displaying posts 51 to 75 of 882

Pages (36): first .. 2 [3] 4 .. last

Author Subject: Goldie the track car
prism7guy

Seasoned Pro

Location: DoncastAAAAARGH

Registered: 13 Jan 2008

Posts: 4,637

Status: Offline

Post #51
Another little update, the weather held out again today for the most part so i got the top coat on in the engine bay, quite happy with the colour Smile
IMG_0853 by Steve Count, on Flickr
It could do with another final coat but that can wait until my top engine mount repair arrives and i've welded that in. My make shift spray booth worked a treat, that was £7.50 well spent last year LOL

I also decided to whip the wishbones out of the subframe and remove the bushes ready for the solid roller bearing ones, thanks to cooper for the hint of a quick way of getting them out, which is to bend over the lip on the normal ones (not the P one), then just work round it with hard hits and a chiesel or something similar to slowly drive that half out. Once one side is out its easy peasy to knock the other side out with a drift.
For the P bush i gave it a quick spray with GT85, then used an adjustable spanner on the metal tab to get the actual metal centre to spin on the wishbone, once its moved its much easier to knock off with a hammer and punch or whatever you choose to use.

With the bushes out i decided to flap wheel them down and give them a lick of paint. Unfortunately it went dark by the time i had painted them so i havent got a picture of the finished item, they are currently hanging on the washing line drying along with a few other brackets which i decided to tart up LOL
IMG_0864 by Steve Count, on Flickr

One other thing i did was to attack the top engine mount bracket with a cutting disc then hacksaw, i basically removed the bit that should hold the PAS pump, and chopped the same way that the S/C boys do it so that if i ever happen to get some spare cash i could whack a 'charger on Ninja
I got a bit anal and went round removing all the sharp edges from the casting, cleaned it up with a wire wheel then painted it.

Thats it for this weekend i think. Smile

________________________________________

Goldie the track car.
Posted 11th Aug 2017 at 14:51
berger

Seasoned Pro

Location: Bathurst

Registered: 26 Oct 2008

Posts: 1,068

Status: Offline

Post #52
Keep going with the spray job.

Can transform that minging Blaze into a much loved Astor!

Looks good so far, want to motivate myself to do the underside of my car, but cba! Smile

________________________________________

Bang'in 7 gram rocks!
I have one gear, GO!
Posted 21st Mar 2011 at 01:27
prism7guy

Seasoned Pro

Location: DoncastAAAAARGH

Registered: 13 Jan 2008

Posts: 4,637

Status: Offline

Post #53
Don't worry, it wont always be blaze Wink
I couldnt spray the bay astor as it would p*ss rob off, so i went for Peugeot steel grey which is actually quite similar, it seems quite metallic but im not sure if it is as muchly so as astor.

I think ill do the underside of mine whilst im at it, but that can wait until its back on its wheels as i darent risk painting above our new drive, my dad would go mental LOL

Its insanely time consuming preparing it for paint but once its on its quite rewarding, i may just clean the crap off the underside and give it a couple of layers of underseal.
The paint gets quite expensive too, it took two and a bit 500ml cans of primer, three 300ml cans of top coat and i imagine two or three 500ml cans of clear lacquer to get the bay done alone, which adds up when its around £6 a can at halfords.

________________________________________

Goldie the track car.
Posted 22nd Mar 2011 at 11:01
prism7guy

Seasoned Pro

Location: DoncastAAAAARGH

Registered: 13 Jan 2008

Posts: 4,637

Status: Offline

Post #54
Time for another little update i think.

Whilst the forum was down i was a busy boy, my PAS relocation brackets were laser cut and look quite nice if i do say so myself LOL
IMG_0884 by Steve Count, on Flickr
IMG_0885 by Steve Count, on Flickr

Next up i decided to make up some little top hat bushes so there was no play in the M10 bar which would hold the brackets to the sump.

IMG_0886 by Steve Count, on Flickr

After a bit of trial and error i decided i needed to knock up another 2 brackets to mount the alternator to in order for me to be able to use it as a tensioner, and once again so theres no play which there would have been if i had used the original top engine mount bracket.
Below is the almost finished setup, i just need to line up the three pullies now so i don't damage the belts.
IMG_0912 by Steve Count, on Flickr

I bought the engine home from work, cleaned it down with degreaser and an assortment of wire wheels. The rear of the block has been painted with some Halfords matt black VHT stuff which i love, the calipers have been done in the same stuff on both my cars.
The front of the block has had its first coat of red oxide primer, it needs another coat tomorrow then i can put some top coat on Big grin
IMG_0929 by Steve Count, on Flickr


I have removed the old abomination of a top engine mount repair, it was actually much harder to get out than i had first thought, i attacked it with walt (the angle grinder) a large pry bar, a hammer, a chiesel, a punch and a dremel. It was a bit of a ball ache but i got there in the end LOL
IMG_0881 by Steve Count, on Flickr


I've run all new brake lines now, whilst i was under the car sorting out the rears i noticed my beam mounts looked foobar'd, so i wasted nearly a whole weekend knocking up a jig so i could weld them up and make them solid. If i had known it would be such a ball ache before i started i wouldnt have bothered, but at least i know not to bother doing it again now. If you attack the rubber with a wire wheel it wears through it nicely but the resulting black rubbery tar stuff is horrible, it managed to get itself everywhere.


I also ordered a group n lower engine mount from BBM several weeks ago, i popped that into the lower mount casting and thats now been fitted to the engine.


I replaced the CV gator on the n/s driveshaft, i got a nice discount as my mum works for unipart, whilst she was buying it for me she got me a steering rack gator too as mine had split. I needed a new gator on the o/s driveshaft too but to get round that i just bought another driveshaft second hand off here.
I also did an owain style repair on the steering ram Ninja

Since i wont be having a head unit in the car i decided that i could occupy that space with my oil pressure gauge and battery kill switch. It still needs a bit of fettling but you can get the idea from this:
IMG_0905 by Steve Count, on Flickr

I also made up some new adjustable droplinks one day after work, i havent fitted them yet as theres no point without the engine in. mmmmm shinyyy LOL
IMG_0902 by Steve Count, on Flickr

More on the brakes, i decided to go with yellow stuff pads, for no real reason other than they were bloody cheap compared to the DS2500's i wanted, and i dont think i will be keeping standard rear calipers for long so its no big issue.
I fitted new brembo discs with the pads, unfortunately GSF messed up and somehow thought that i would settle for bendix discs when i asked them to order in brembo fronts, so i have to call back after work on monday in the hope that some have been delivered Dry

Swampy supplied me with some nice braided hoses for the rear, and two custom ones to fix my wilwood bias valve into my new copper-nickel lines.

I still need to finish off the brakes but there isnt much real work left to do on them now.
I ordered a litre of ATE super blue fluid, its not rated quite as good as the AP racing 600 that i have in my diablo but at half the price i can settle for the 10*c lower wet boiling point, as i mentioned earlier i dont think i will be keeping any of the standard calipers for long so theres no point wasting lots of money on the current setup.

I think thats about it for now, i've got a week off work from the royal wedding onwards so hopefully it will all really start to come together then and be back on the road soon Hyper
The only real thing left to buy to get it up and running is a nice new powervamp 25 battery, the cheapest ive found is £97 delivered so if anyone can trump that feel free to let me know Thumbs up

________________________________________

Goldie the track car.
Posted 11th Aug 2017 at 14:58
phillipm

Seasoned Pro

Location: Rotherham

Registered: 15 Oct 2006

Posts: 20,607

Status: Offline

Post #55
Might be sending some stuff off for anodising next month if you want the links doing.

________________________________________

- Bespoke rollcages/additions/adjustments. Half cages right up to complete custom spaceframes - MSA/FIA spec, CDS, ROPT, T45, etc - PM me
Email me!
Custom-made polybushes available - need an odd size or fitment? - anything from batch work to one-off pieces.
Posted 17th Apr 2011 at 04:36
prism7guy

Seasoned Pro

Location: DoncastAAAAARGH

Registered: 13 Jan 2008

Posts: 4,637

Status: Offline

Post #56
Hmm, any idea on how much it will cost? I may be interested but I've got to start saving up for my 'ring trip soon so money is a bit tight now LOL

________________________________________

Goldie the track car.
Posted 17th Apr 2011 at 13:53
phillipm

Seasoned Pro

Location: Rotherham

Registered: 15 Oct 2006

Posts: 20,607

Status: Offline

Post #57
LOL

Depends how much stuff I end up sending down, I'll get a price anyway and let you know before I send 'em.

________________________________________

- Bespoke rollcages/additions/adjustments. Half cages right up to complete custom spaceframes - MSA/FIA spec, CDS, ROPT, T45, etc - PM me
Email me!
Custom-made polybushes available - need an odd size or fitment? - anything from batch work to one-off pieces.
Posted 17th Apr 2011 at 13:58
prism7guy

Seasoned Pro

Location: DoncastAAAAARGH

Registered: 13 Jan 2008

Posts: 4,637

Status: Offline

Post #58
Thanks Phil Thumbs up

I might as well do a very brief update for todays progress, ill put pics up tomorrow as im in a rush to get to the pub LOL

I got another coat of red oxide on the block, another layer of silver hammerite on the 'box and left them to dry for a bit, then fitted one of rich's 1st batch flywheels, theres barely any markings on the teeth and i have a starter from a turbo diesel so hopefully i wont have any issues in the future. I also fitted the clutch then stuck the 'box on.

Dropped that lot into the car, not really too easy on your own without a balance bar thing but none the less i got it in with only a couple of scratches on the engine bay.
Once i had it in i attached the gearbox mount and lower mount so that i could test fit the top mount with jim's repair plate attached, with that in place i tacked it in, removed the rest of the top mount and proceeded to weld it in.
Once it had cooled i gave it a lick of primer to prevent rust.

Thats about it for today i think, time for a quick shower then plenty of beer to reward myself LOL

________________________________________

Goldie the track car.
Posted 18th Apr 2011 at 02:10
prism7guy

Seasoned Pro

Location: DoncastAAAAARGH

Registered: 13 Jan 2008

Posts: 4,637

Status: Offline

Post #59
One thing i have tried as i got p*ssed off with the normal setup is to have some little spacer sleeves on the hockey stick bolts that hold the bearing in on the o/s driveshaft. The reason behind this is that the nylocs sit slightly in the counterbore on the casting and it really p*ssed me off trying to get the nuts undone whilst under the car as its hard to get a spanner or socket onto them properly. Hopefully if this idea works out the nut will be more easily accessible Smile

This evening after work i got my first layer of top coat on the block and head, its going to take a few coats as its weird stuff, i wont put pics up until its finished and i'm happy with it.
I also ordered my Powervamp battery this morning, and after GSF messed me about once again i sacked them off and opted to order some Zimmermann front discs online. The main reason for opting for zimmermann aside from the low cost is that i have had them on my diablo for the last few thousand miles and have been impressed, i took it round oulton at the end of last year and after about 20 mins of abuse and cooking the brakes the discs didnt warp and there was no pad material stuck on the disc so i'm still using them now, i wrecked my old brembo discs doing a similar thing last year.
The final thing that i ordered today was a cheapo sun strip from ebay, since removing the roof lining and putting the sun visors back up they just flop around and bug me, plus this vinyl will be lighter than them and will block the sun all the way along the windscreen Smile

________________________________________

Goldie the track car.
Posted 11th Aug 2017 at 14:59
prism7guy

Seasoned Pro

Location: DoncastAAAAARGH

Registered: 13 Jan 2008

Posts: 4,637

Status: Offline

Post #60
The engine is now fully mounted in the bay and has been painted.
IMG_0943 by Steve Count, on Flickr

The only thing i'm having an issue with is rotating the inlet on the PAS pump, it just doesnt seem to want to budge. I've tried a blowtorch on the pump casting around it, stilsons, gentle taps with a hammer and nothing seems to be shifting it.

If anyone who has rotated it before could provide any useful info i would apprectiate it Thumbs up

________________________________________

Goldie the track car.
Posted 11th Aug 2017 at 15:00
mrrcarney

Newbie

Location: Saltcoats

Registered: 19 Apr 2011

Posts: 26

Status: Offline

Post #61
prism7guy wrote:
Santa came early this year and brought me a few goodies just in time for my nice long weekend Big grin


The engine is now fully mounted in the bay and has been painted.

This bay looks the dogs so tidy Big grin I want one lol
The only thing i'm having an issue with is rotating the inlet on the PAS pump, it just doesnt seem to want to budge. I've tried a blowtorch on the pump casting around it, stilsons, gentle taps with a hammer and nothing seems to be shifting it.

If anyone who has rotated it before could provide any useful info i would apprectiate it Thumbs up
Posted 24th Apr 2011 at 17:03
berger

Seasoned Pro

Location: Bathurst

Registered: 26 Oct 2008

Posts: 1,068

Status: Offline

Post #62
Two oil coolers are better than one!

Two 13 row coolers running side by side in the front grill?

________________________________________

Bang'in 7 gram rocks!
I have one gear, GO!
Posted 24th Apr 2011 at 19:10
prism7guy

Seasoned Pro

Location: DoncastAAAAARGH

Registered: 13 Jan 2008

Posts: 4,637

Status: Offline

Post #63
Thats the plan Karl.

My diablo has a single 19 row cooler in the centre of the grille but due to the limited height of the air openings its not getting maximum air flow so the oil can still hit 125c or so on track, which i wasnt too happy about.

Hopefully two 13 row ones will have decent enough air flow as they will also be directly infront of the two fans whereas in the middle there was part of the fan cowling which im sure wouldnt have helped air flow through it.

These radiators were cheap enough, about £33 each IIRC, they are from a british company who specialise in cooling solutions, they came with a 1 year warranty and have been tested to 170psi which i believe is the same as mocal's test pressure (but much cheaper than the £60 ea that i found the equivalent mocals for).

________________________________________

Goldie the track car.
Posted 25th Apr 2011 at 13:50
midlife

Seasoned Pro

Location: Colne, Lancashire

Registered: 13 Mar 2006

Posts: 7,544

Status: Offline

Post #64
prism7guy wrote:


The only thing i'm having an issue with is rotating the inlet on the PAS pump, it just doesnt seem to want to budge. I've tried a blowtorch on the pump casting around it, stilsons, gentle taps with a hammer and nothing seems to be shifting it.

If anyone who has rotated it before could provide any useful info i would apprectiate it Thumbs up


I struggled with this too, iirc I held the casting in a vice & heated the casting with an electric heat gun, then I used a piece of tubing about 3 feet long & gradually applied pressure. TBH I thought I was going to break it but all of a sudden it started to rotate.
Have another go with more leverage but be prepared for the bend to collapse on itself, mine bent a little but was ok in the end.
Good luckThumbs up

Cool

________________________________________

Get used to seeing the yellow one !!!MehMehMehMehMeh
Team 330™Cool
Team "no front end or engine"
Team "LIMITED EDITION" I live for the 306 stickerSmug
Team 0-60 in 6.44 & standing qtr in 14.808 @ 94.55mph all with std engineSmug
203bhp Corolla T-Sport daily driver stealthier than Kwai Chang Caine
Posted 25th Apr 2011 at 14:23
prism7guy

Seasoned Pro

Location: DoncastAAAAARGH

Registered: 13 Jan 2008

Posts: 4,637

Status: Offline

Post #65
Mine caved in and cracked in the end Doh

I got it sorted now though, Birk supplied a pump with the inlet pipe already removed so i cleaned it all down, painted it up, applied some loctite retaining compound on the pipe and gently tapped it in at the angle i wanted it at. Hopefully there will be no leaks now LOL

I'm not happy with the high pressure hose on mine though, it says 3/8" ID on it so i bought a 10mm hose tail banjo fitting for the outlet, this is quite loose in the bore of the hose and no jubilee clip has been strong enough to clamp it down (proper jubilee ones not cheapo other brands). I think i may have to try an exhaust style T clamp but the one i bought is slightly too large (20-22mm, so i want to try a 17-19mm one).

If that fails i may just get a custom section made up to take it to the pressure sensor, or even leave that out and get a custom hose made up to take it back to the ram.

________________________________________

Goldie the track car.
Posted 25th Apr 2011 at 14:30
phillipm

Seasoned Pro

Location: Rotherham

Registered: 15 Oct 2006

Posts: 20,607

Status: Offline

Post #66
prism7guy wrote:
Thats the plan Karl.

My diablo has a single 19 row cooler in the centre of the grille but due to the limited height of the air openings its not getting maximum air flow so the oil can still hit 125c or so on track, which i wasnt too happy about.

Hopefully two 13 row ones will have decent enough air flow as they will also be directly infront of the two fans whereas in the middle there was part of the fan cowling which im sure wouldnt have helped air flow through it.

These radiators were cheap enough, about £33 each IIRC, they are from a british company who specialise in cooling solutions, they came with a 1 year warranty and have been tested to 170psi which i believe is the same as mocal's test pressure (but much cheaper than the £60 ea that i found the equivalent mocals for).


Last two mocal/setrab coolers we bought were rated for 250psi, good job really 'cause the rotary runs at 170 LOL

________________________________________

- Bespoke rollcages/additions/adjustments. Half cages right up to complete custom spaceframes - MSA/FIA spec, CDS, ROPT, T45, etc - PM me
Email me!
Custom-made polybushes available - need an odd size or fitment? - anything from batch work to one-off pieces.
Posted 25th Apr 2011 at 18:15
berger

Seasoned Pro

Location: Bathurst

Registered: 26 Oct 2008

Posts: 1,068

Status: Offline

Post #67
phillipm wrote:
prism7guy wrote:
Thats the plan Karl.

My diablo has a single 19 row cooler in the centre of the grille but due to the limited height of the air openings its not getting maximum air flow so the oil can still hit 125c or so on track, which i wasnt too happy about.

Hopefully two 13 row ones will have decent enough air flow as they will also be directly infront of the two fans whereas in the middle there was part of the fan cowling which im sure wouldnt have helped air flow through it.

These radiators were cheap enough, about £33 each IIRC, they are from a british company who specialise in cooling solutions, they came with a 1 year warranty and have been tested to 170psi which i believe is the same as mocal's test pressure (but much cheaper than the £60 ea that i found the equivalent mocals for).


Last two mocal/setrab coolers we bought were rated for 250psi, good job really 'cause the rotarty runs at 170 LOL


Mocal do heavy duty as well as standard pressure rated coolers.

Dunno what my Setrab is rated to, its not blown all the oil out yet though! LOL

________________________________________

Bang'in 7 gram rocks!
I have one gear, GO!
Posted 25th Apr 2011 at 18:13
phillipm

Seasoned Pro

Location: Rotherham

Registered: 15 Oct 2006

Posts: 20,607

Status: Offline

Post #68
Thinking about it they were the HD versions, larger fins to allow shite to pass through.

________________________________________

- Bespoke rollcages/additions/adjustments. Half cages right up to complete custom spaceframes - MSA/FIA spec, CDS, ROPT, T45, etc - PM me
Email me!
Custom-made polybushes available - need an odd size or fitment? - anything from batch work to one-off pieces.
Posted 25th Apr 2011 at 18:16
prism7guy

Seasoned Pro

Location: DoncastAAAAARGH

Registered: 13 Jan 2008

Posts: 4,637

Status: Offline

Post #69
Well i have cracked on a bit more today but got utterly p*ssed off right at the end of the day.

I was about to bleed the brakes and decided to myself to double check that all the bleed nipples were still ok and werent going to snap on me (I had cracked them all off a few weeks ago to make sure they werent seized when it first went onto axle stands, they were all free). Anyway, i managed to snap both the bloody rears, before i tried to undo them i went round them with a wire brush, gave them a quick spray with GT85, gave each one a nice love tap with a hammer square on then went on with my 3/8" ratchet, holding it right above the socket to make sure it was being held on square. Each one simply snapped so i'm not sure whether i allowed a small amount of moisture in when i cracked them off previously and they corroded together or what.

After i had broken them off i decided to take the calipers off so i could take them into work tomorrow and drill the remaining bits of the nipple out, and whilst undoing the n/s one the bloody brake line decided to snag on the union and twist itself around, despite the plentiful GT85 being applied. I decided not to try and grip the brake line with pliers or mole grips or anything so i couldnt crush it but it just kept on rotating with the union and eventually snapped so it looks like im either going to have to buy a new section pre-made or buy myself another roll of brake line, some more unions and see if i can borrow a flaring kit again to make up my own Sad

Another fail in a way is trying to seal the 3/8" ID high pressure PAS hose to the 10mm hose tail on the banjo fitting that i am now using on the outlet of my PAS pump, the hose itself is slack on the hose tail so i bought an exhaust style T clamp to clamp it down but i ordered one a little too large, and since they only close up a little bit its not enough to crush it on Doh
I tried a jubilee clip but that simply destroys the threading before it clamps the hose enough (proper jubilee branded too, not cheapo s**te).
So its looking like i need to find somewhere local tomorrow that stock the T clamps and get the next size down which i believe is 17-19mm.
I may also wrap the hose tail with a lot of PTFE tape to help bulk it up a bit before clamping the hose.

I have also somehow lost the small left handed countersunk bolts which hold the fan blades onto the motors and the top radiator hose clip which holds it into the plastic elbow, so i need to source new ones of them Doh


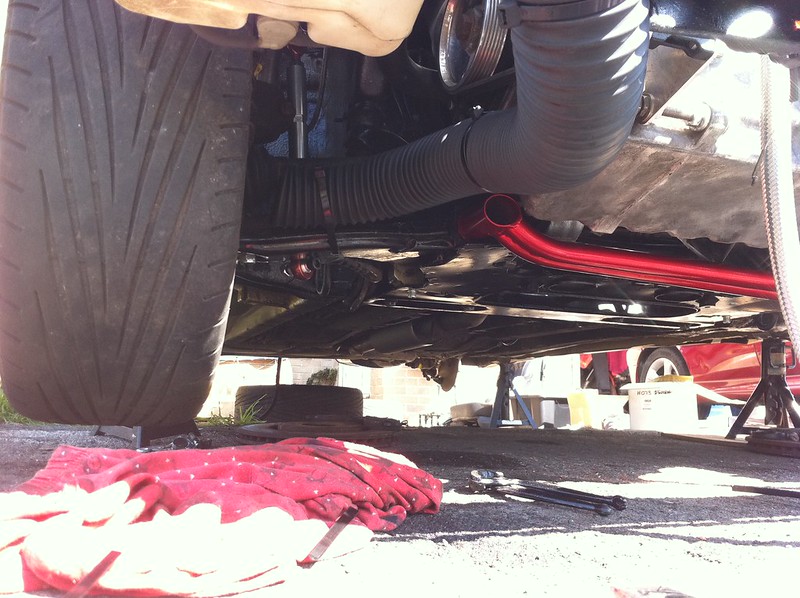
Progress wise i have now put my standard exhaust back on diablo and put the magnex on goldie, but the centre box has cracked (not magnex, i believe it was made by proflow) so i could do with getting it welded up once its up and running, it cracked on the actual face of the box about 15mm away from where the pipe leaves for the backbox, a bit displeased about that as i paid a lot for the centre section to be made up and its cracked after about 18 months, although i did like to make the car backfire a lot so i must have put it under some stress though its time Ninja
Fitting the exhaust to goldie was a pain in the ass as it had all been welded together, so was long and awkward, and because i had goldies back end on the driveway and the front end over the pavement on axle stands the angles basically meant that my nose would touch the subframe if i looked straight up, so trying to manouver my arms to get the fiddly nut onto the bolt from the new manifold to cat fitting kit was a nightmare, filled with lots of foul language as the spring kept pinging the nut and cup plate straight at my face LOL

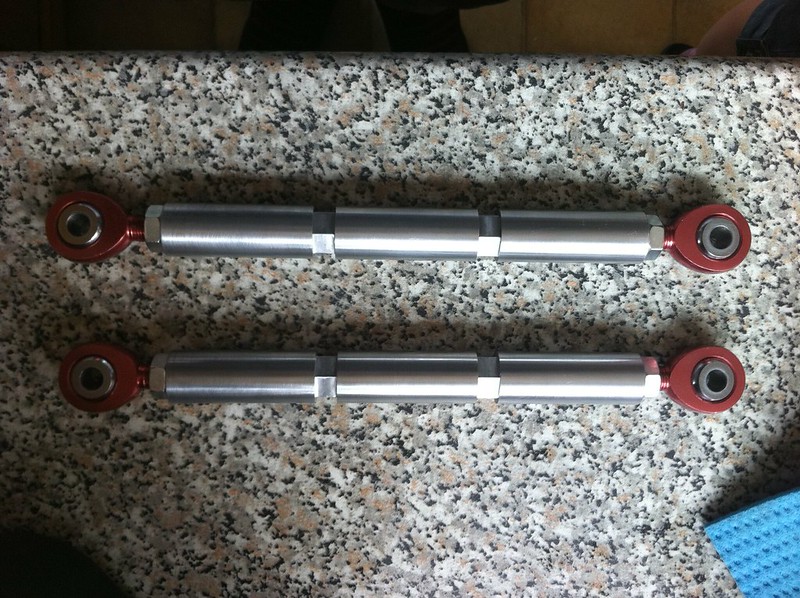
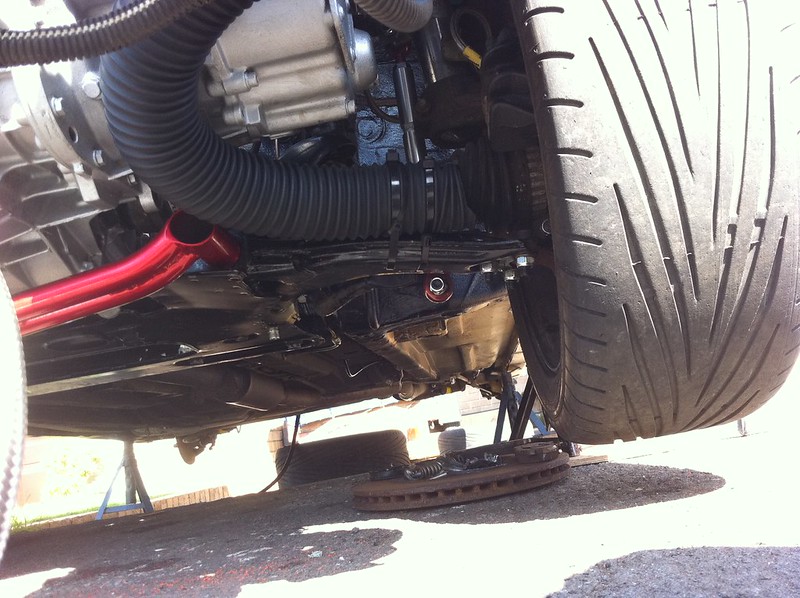
I fitted nice 'n shiny lower strut brace, it was a bit of a pain trying to get the bolt through the washer after rich's solid roller bearings but i got there after a bit of fiddling around.

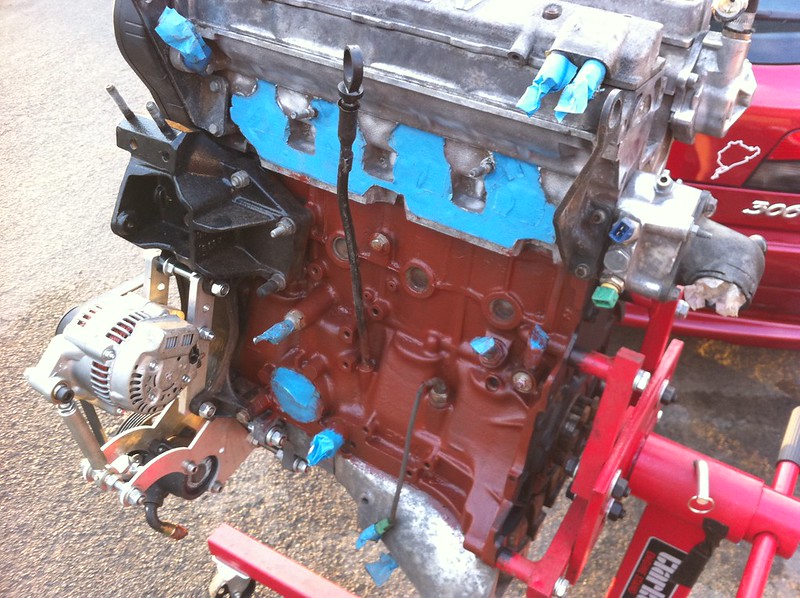
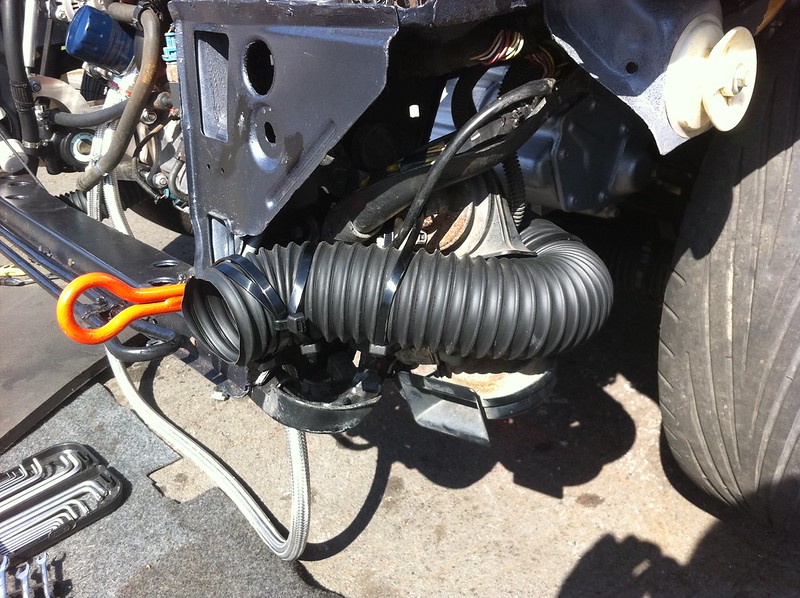
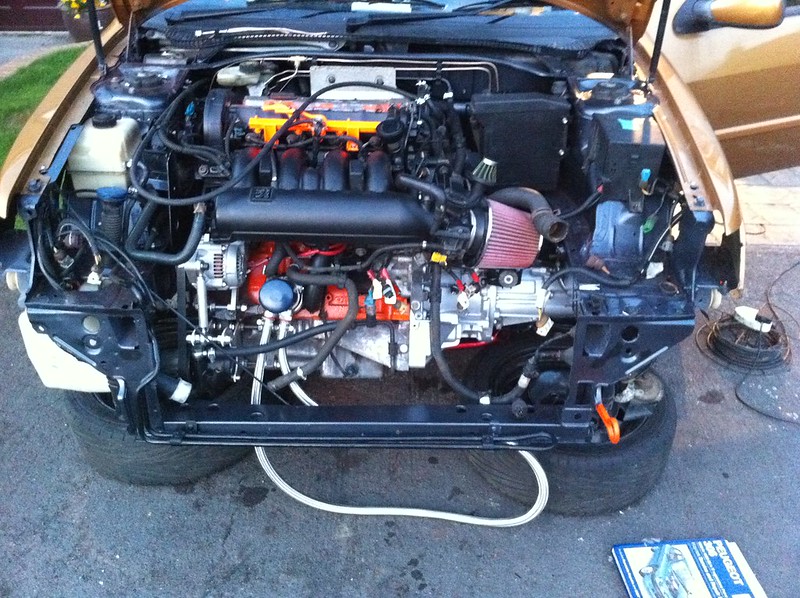
I have cut the old battery section off the ecu housing and made some aluminium brackets to hold it in position, im not sure if i will need to make another to hold it to the bulkhead or something as there is a small amount of flex in these brackets and i dont want it to vibrate and fatigue the wires, maybe i'm just being anal about that Dunno
IMG_0960 by Steve Count, on Flickr

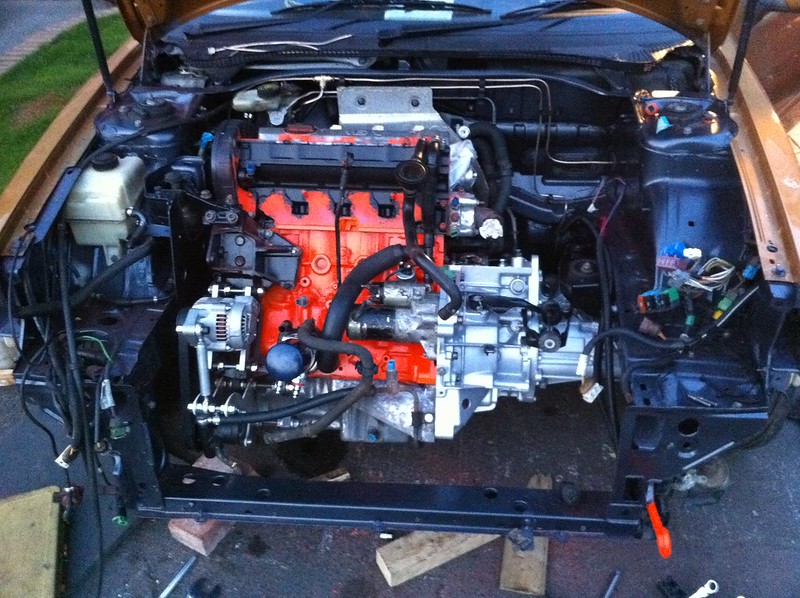
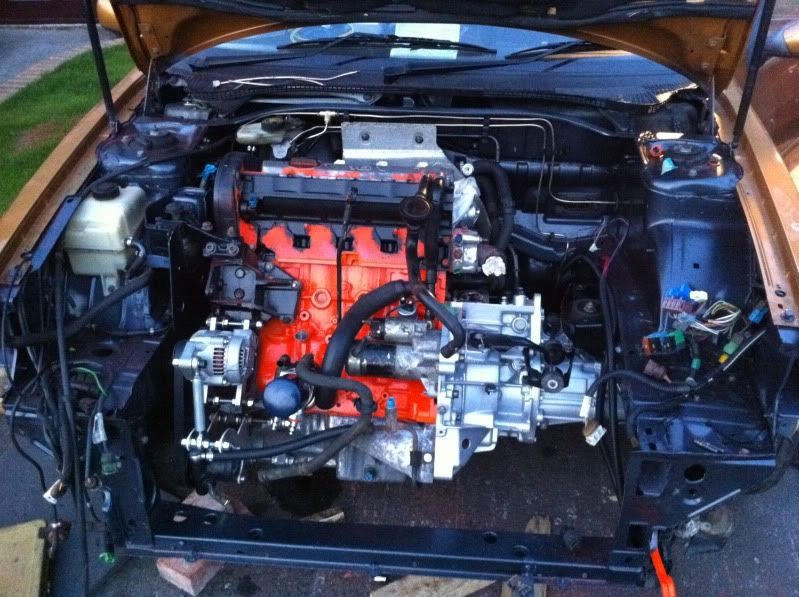
Inlet manifold and fuel rail are now back on with fresh o-rings, they are 14.5mm ones from Mr Injector, and came with new fuel filter cup things, i think they cost about £13 or so delivered but arrived nice and quick and well wrapped so a big Thumbs up to him from me.

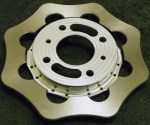
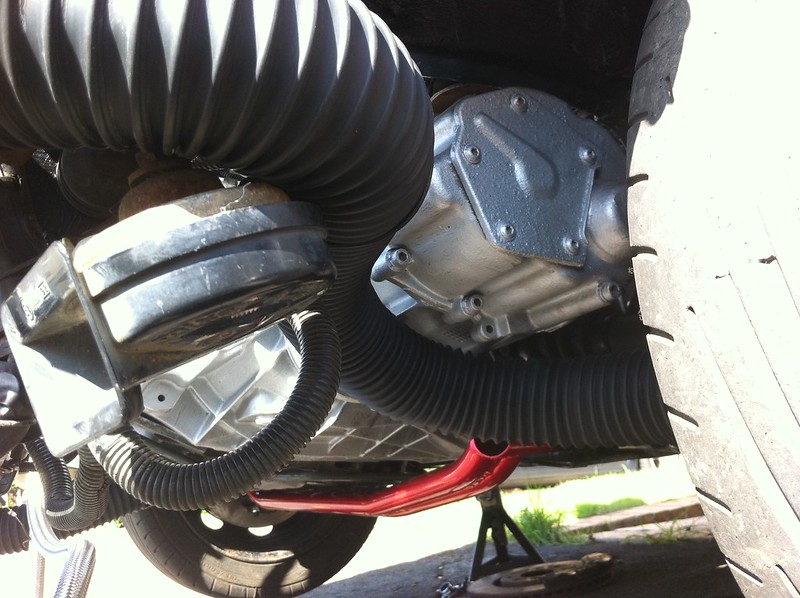
My idea that i had of using little spacers on the driveshaft hockey sticks worked out quite well, much easier to tighten as they dont go into the slight counterbore and there isnt loads of thread sticking out so can use a regular 11mm socket.

I also gave the new discs a quick blast with brake cleaner and painted the centres black with the VHT stuff i have, should help a little with corrosion resistance and look nicer for longer as i hate looking through the spokes at rusty discs LOL

I have a nice long shopping list now for stuff i want to pick up tomorrow ready to put it all back together. In a way i dont want to get it ready tomrorrow as it will kill me waiting for may so i can tax it, as being a tight yorkshire man i wont start my tax this month for it to only last a few days LOL

If any of you local people (phil, cooper, birk etc) know of somewhere that will sell a 17-19mm T clamp locally and have it in stock i would appreciate you letting me know, i dont want to have to wait round ages for one to be delivered from ebay Smile

________________________________________

Goldie the track car.
Posted 11th Aug 2017 at 15:04
rallyeash

Seasoned Pro

Location: Devizes

Registered: 11 Dec 2006

Posts: 4,424

Status: Offline

Post #70
really like that alternator setup Thumbs up

________________________________________

230 hp 2.1 16v XU 205 rallye on jenveysHyper Project thread here
309 3dr K20 Type R
Posted 26th Apr 2011 at 03:27
prism7guy

Seasoned Pro

Location: DoncastAAAAARGH

Registered: 13 Jan 2008

Posts: 4,637

Status: Offline

Post #71
Cheers, i got the inspiration from yours, thanks for the advice Thumbs up

________________________________________

Goldie the track car.
Posted 26th Apr 2011 at 03:28
cooper666

Senior User

Location: doncaster

Registered: 27 Nov 2009

Posts: 778

Status: Offline

Post #72
geuess you want to borrow the flareing kit againWhistle

________________________________________

clio r27
ps3 id:cooperkloe


Posted 26th Apr 2011 at 22:05
prism7guy

Seasoned Pro

Location: DoncastAAAAARGH

Registered: 13 Jan 2008

Posts: 4,637

Status: Offline

Post #73
I think i've got it covered Matt, bullseye said they will knock me one up in the morning if i take my old line there for them to copy from, sounded quite reasonably priced too.

I managed to drill out the old bleed nipples today, was a bloody pain in the arse though and took about 2 hours of faffing round to do the first one, by then i had learned the knack of doing it so did the other one in about 30 mins.
I got a nice new set of M7x1 taps and ran each one down to clean up the thread and have put new nipples in them. The calipers are now back on the car ready for the new brake line which i'll get made tomorrow.

I didnt get anything else done on the car today really, just spent the day pottering about picking up bits and bobs that i needed, i now have the metal clip that holds the top radiator hose into the plastic elbow, many thanks to Birk Thumbs up
Also bought some air ducting for cooling the brakes, i think its about 60 or 62mm bore, 2 metres was enough to do both sides, i havent completed the setup yet but its getting there, i will put pictures up tomorrow if i get chance as i need to fabricate some brackets for it, and eventually could do with getting some trumpets to fit where the fogs were and attach the hose to them.
I got some stainless braided fuel line to go between the fuel rail and the plastic connectors down at the side of the cambelt cover, i don't like the idea of having a fuel leak with all the normal connectors etc.
For some reason i also bought a load of jubilee clips to replace the clips peugeot use to secure the various hoses (the type which i use nail pincers to do up and undo). I didnt like the mis match of all the various types of fasteners that previous owners have used so tomorrow i will simply go round changing them all to these mikalor branded jubilee style clips LOL

I also sourced a mikalor T clamp thing which has secured the high pressure PAS pipe to the banjo hose tail, no more movement down there Smile
And finally i got some 5/8" ID hose for the supply to the PAS pump.

I got the hose and clips etc from Hose Depot Direct Ltd which is just down the road, they really knew their stuff and had everything in stock, i would really recommend them Yes

All being well i can crack on tomorrow once i have the new brake pipe and get most of the front end back together Hyper

________________________________________

Goldie the track car.
Posted 27th Apr 2011 at 02:47
prism7guy

Seasoned Pro

Location: DoncastAAAAARGH

Registered: 13 Jan 2008

Posts: 4,637

Status: Offline

Post #74
Today didnt go as smoothly as i had hoped but i got a bit more done.

I got the new brake line section made up at a local motor factors, it came to less than £7 with a big bag of tie wraps included so i was happy.
Thats all fitted and the brakes are now ready to be bled again Smile

I fitted the new braided fuel lines, no issues here but i was finding it a bugger to cut neatly before i discovered i could go round the braiding with a dremel cutting disc then use a stanley knife to do the inner, this stopped the dust etc getting into the tube. I put a bit of heatshrink round the braiding at the ends before securing it in place with jubilee clips.

Next i moved onto the air ducting for the brakes, i think its 60mm ID, approx 70mm OD, i bought two metres and didnt have much spare after.
Pictures of how i've run them, i may need to do a couple of tweeks before i would say they are a finished item, i wouldnt mind getting some trumpets to sit where the fog lights used to be to direct air into them, and i may need to do something more on the wishbone to hold them in place.
IMG_0968 by Steve Count, on Flickr
IMG_0969 by Steve Count, on Flickr
IMG_0970 by Steve Count, on Flickr
IMG_0965 by Steve Count, on Flickr
IMG_0967 by Steve Count, on Flickr

Hopefully the above setup will provide enough cooling on trackdays so i dont need to keep replacing the discs and allow the wheel bearings and ball joints to have a slightly longer life.

Eventually i had to move onto the job i hadnt been looking forward to so much, fitting the radiator and shrouding. I suspected that the arms which i used to support the tensioner for the alternator may snag on the outlet for the oil heat exchanger and i wasnt wrong Doh
I couldnt have put them in a worse position LOL

After a lot of mock fitting, measuring and thinking i decided to drill the holes for the tensoiner securing bar closer to the engine block, and mount the tensioner from there, this gave me an extra inch or so once i had trimmed the alloy arm, a bit of filing to remove all burrs and ensure there would be clearance for when the engine rocks back and forth and it was sorted.
The inlet pipe for the PAS pump is very close to the plastic part of the radiator but there isnt a whole lot i can do for that at the moment, i may eventually get some slimline spal fans and move the radiator forward a little to help resolve this.

Thats about as far as i managed to get today as i have to go out in a bit.
I should be able to get the oil coolers mounted and the rest of the front end put back on tomorrow, and bleed the brakes.
Then its just a case of filling up the fluids, finishing some wiring in the dash and finally mounting the battery and it's ready for a test start Hyper
(Touch wood its not a tapper LOL)

________________________________________

Goldie the track car.
Posted 11th Aug 2017 at 15:07
rallyeash

Seasoned Pro

Location: Devizes

Registered: 11 Dec 2006

Posts: 4,424

Status: Offline

Post #75
how about getting rid of the cowling and running a slimline fan clipped onto the radiator?

________________________________________

230 hp 2.1 16v XU 205 rallye on jenveysHyper Project thread here
309 3dr K20 Type R
Posted 28th Apr 2011 at 02:40

Pages (36): first .. 2 [3] 4 .. last

All times are GMT. The time is now 02:25

The Peugeot GTi-6 & Rallye Owners Club - ©2024 all rights reserved.

Please Note: The views and opinions found herein are those of individuals, and not of The Peugeot 306 GTi-6 & Rallye Owners Club or any individuals involved.
No responsibility is taken or assumed for any comments or statements made on, or in relation to, this website. Please see our updated privacy policy.