displaying posts 26 to 50 of 882

Pages (36): 1 [2] 3 .. last

Author Subject: Goldie the track car
prism7guy

Seasoned Pro

Location: DoncastAAAAARGH

Registered: 13 Jan 2008

Posts: 4,637

Status: Offline

Post #26
Erm, i'm in work in the morning cramming in some overtime LOL
My way home will be via machine mart to get an engine stand and a few other bits for the rebuild, my boss said i can take the engine in to work and rebuild it there after hours which was good of him Big grin

I think im going to borrow works engine crane and drain the engine oil and whip the gearbox off tomorrow afternoon if it isnt raining, and may start removing all the other stuff from the engine bay so i can get it prepared for painting.

I'll come through to yours if you want to save yourself the hassle of coming to mine, though your welcome to come down if you want to, i should be back by 2pm tomorrow and in all day sunday.

________________________________________

Goldie the track car.
Posted 5th Feb 2011 at 01:03
prism7guy

Seasoned Pro

Location: DoncastAAAAARGH

Registered: 13 Jan 2008

Posts: 4,637

Status: Offline

Post #27
The exhaust manifold heat shield has started to come away at the offside of the car, i'll get a picture tomorrow but i was thinking of using some of this to do a 'repair' clicky

I've also started to wrap the manifold with heat wrap stuff to keep some of the heat in, although im sure i read somewhere that it will probably shorten the life of the manifold.
I'm nearly out of wrap after doing one length but i used most when wrapping my de-cat pipe which is currently on the diablo.

I wet the wrap this time as i did it dry last time, my arms still managed to get filled with little bits of fibre though Doh LOL

I also removed the rear wiper motor today to save a bit more weight.

________________________________________

Goldie the track car.
Posted 5th Feb 2011 at 01:21
prism7guy

Seasoned Pro

Location: DoncastAAAAARGH

Registered: 13 Jan 2008

Posts: 4,637

Status: Offline

Post #28
Today i didnt get a great deal done on the car as the weather was crap, but i did nip into town and now own my own engine stand, angular torque gauge, parts cleaner fluid and a decent set of feeler gauges, preparing for the engine rebuild Big grin

I set up camp in the engine bay and removed the remains of the air-con pipes:
IMG_0523 by Steve Count, on Flickr
Whilst i was in there i took off the heater matrix pipes which were a doddle to do since there was so much room to move around, and the coolant system has been under so much pressure with the head gasket going LOL

Once i had had enough in the engine bay i got the paint stripper gun out and the scraper i bought specifically for removing the sound deadening tar almost a year ago, i didnt get any photos but all the tar has been removed from the drivers side, it probably took an hour or two to get it all up.

Tomorrows progress really depends on the weather as i dont have anywhere indoors to work on the car or engine, i want to get the gearbox off and most ancillaries then give the engine a good clean before i take it into work.
Failing that i might strip the engine bay a bit more and try cleaning the engine bay up a bit with some TFR which cooper666 kindly gave me Thumbs up

If the weathers really crap then i think i'll just strip the tar from the passenger side then try and sort out all the crap which i dont want/need that i have stripped from the car and take it to the tip.

________________________________________

Goldie the track car.
Posted 11th Aug 2017 at 14:31
cooper666

Senior User

Location: doncaster

Registered: 27 Nov 2009

Posts: 778

Status: Offline

Post #29
got some battery cables for you palNinja you will just have to buy some ends in. ill get the crimper from work,will you be running batt plugs to isolate the battery if needed.

________________________________________

clio r27
ps3 id:cooperkloe


Posted 8th Feb 2011 at 00:32
prism7guy

Seasoned Pro

Location: DoncastAAAAARGH

Registered: 13 Jan 2008

Posts: 4,637

Status: Offline

Post #30
Sweet, thanks Matt.
Do you know what size cable it is so i can get the right size ends in?
I think i'm going to get one of those FIA kill switches that kill the ignition rather than just the battery.

________________________________________

Goldie the track car.
Posted 8th Feb 2011 at 01:44
cooper666

Senior User

Location: doncaster

Registered: 27 Nov 2009

Posts: 778

Status: Offline

Post #31
ill fetch it through sat afternoon maybe so you can have a look. measure up and see if the length ive got is large enough for what your planning.

________________________________________

clio r27
ps3 id:cooperkloe


Posted 8th Feb 2011 at 02:08
prism7guy

Seasoned Pro

Location: DoncastAAAAARGH

Registered: 13 Jan 2008

Posts: 4,637

Status: Offline

Post #32
I'm not sure what time i'll be back from work sat afternoon, could be 3pm onwards.
I could try and find my way to yours if you wanted, those roads near your house are like a maze LOL

________________________________________

Goldie the track car.
Posted 8th Feb 2011 at 02:28
cooper666

Senior User

Location: doncaster

Registered: 27 Nov 2009

Posts: 778

Status: Offline

Post #33
sunday? dont bother trying to find my house lol. ill need to road test the car anyway/bed brakes in etc just got some new b fluid cheep rbf600 of the bay.be doing some work on my brakes over the weekend.

________________________________________

clio r27
ps3 id:cooperkloe


Posted 8th Feb 2011 at 02:37
prism7guy

Seasoned Pro

Location: DoncastAAAAARGH

Registered: 13 Jan 2008

Posts: 4,637

Status: Offline

Post #34
On sunday i got a bit more done to the car, it was quite windy but the rain held off for the most part, so i started stripping the engine.
It started as a full engine with gearbox attached and all ancillaries.
After a short while it looked a bit like this:
IMG_0612 by Steve Count, on Flickr
Then this:
IMG_0621 by Steve Count, on Flickr

By the time i had everything off the engine it was dark, so i packed up my tools, shifted all the crap from the passenger side into the drivers side and cracked on with the tar on the floor.

The 1500W heat gun soon warmed me and the car up, along with some furious scraping LOL

Thats the majority of the tar up now, just need to go over it with some white spirit or something to get rid of the remains.

I'm just going to skip everything in the back that hasn't sold by the weekend and that i don't need for the rebuilding process.

I haven't decided on the radiator yet, i have the ordonez steel one which came on the car and had no signs of leaking, but i wouldn't mind getting a nissens one as its lighter and much better at cooling.

I'm also unsure on what i'm doing with regards to the aux belt when i rebuild it all, i'm thinking of relocating the PAS pump to where the A/C used to be, then getting one of these and fabricating something so that i use the alternator as the belt tensioner. This should cut out about 4 pullies by my reckoning, which should help reduce some rotational inertia and also save some more weight.
I weighed my alternator earlier and it came in at 5.34kg, i'm just not sure if 55A would be enough to cover the cars electrical needs and charge the battery back up. If anyone knows the answer to this and would like to chip in it would be appreciated. Smile

I've been a bit of a busy bunny with my ordering too, got some parts from pugplus to replace my nasty old corroded through coolant pipes.
I have a seam welded subframe which will soon be on its way to me, and i also have a nice shiny new alloy crank pulley on its way to me courtesy of Rich_W Thumbs up

I think thats about it for this week.
Next weekend i aim to get the head off and maybe crank out, I'll be using one of Rich's uprated headgaskets and his uprated bearings too.

________________________________________

Goldie the track car.
Posted 11th Aug 2017 at 14:34
cooper666

Senior User

Location: doncaster

Registered: 27 Nov 2009

Posts: 778

Status: Offline

Post #35
prism7guy wrote:
I think i'm going to get one of those FIA kill switches that kill the ignition rather than just the battery.


see post 474 on project pug,more for fully isolating batery when parked up between trackdays or as chris says easier to jump of. you could fit the anderson plug into the bulkhead.

________________________________________

clio r27
ps3 id:cooperkloe


Posted 8th Feb 2011 at 02:52
prism7guy

Seasoned Pro

Location: DoncastAAAAARGH

Registered: 13 Jan 2008

Posts: 4,637

Status: Offline

Post #36
Ahh, yeah i had been planning on using one of them connectors, i was going to run them off the battery as seperate wires to the kill switch though.
I was going to use a nice battery like daveyboy has and mount that under the boot floor where the spare used to go, then have the anderson connector held somewhere near the rear tow eye so i could charge/jumpstart from that, and have the main live feed go off to the dash where my FIA kill switch will be before it gets to the various places it needs to be.

I hope my explanation above makes some sense Laugh

________________________________________

Goldie the track car.
Posted 8th Feb 2011 at 03:04
prism7guy

Seasoned Pro

Location: DoncastAAAAARGH

Registered: 13 Jan 2008

Posts: 4,637

Status: Offline

Post #37
Forgot to say above, i should be back sunday afternoon, i'll probably nip into work in the morning to clear space for my engine.

________________________________________

Goldie the track car.
Posted 8th Feb 2011 at 11:27
prism7guy

Seasoned Pro

Location: DoncastAAAAARGH

Registered: 13 Jan 2008

Posts: 4,637

Status: Offline

Post #38
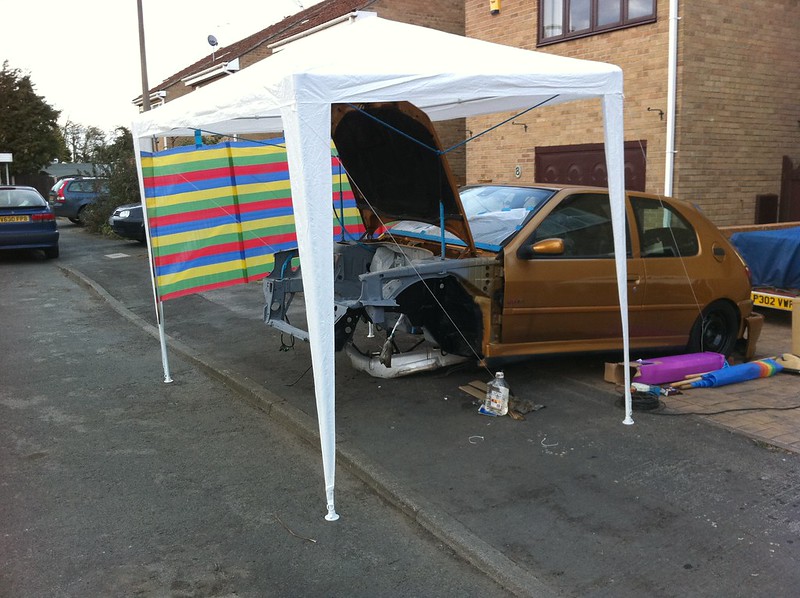
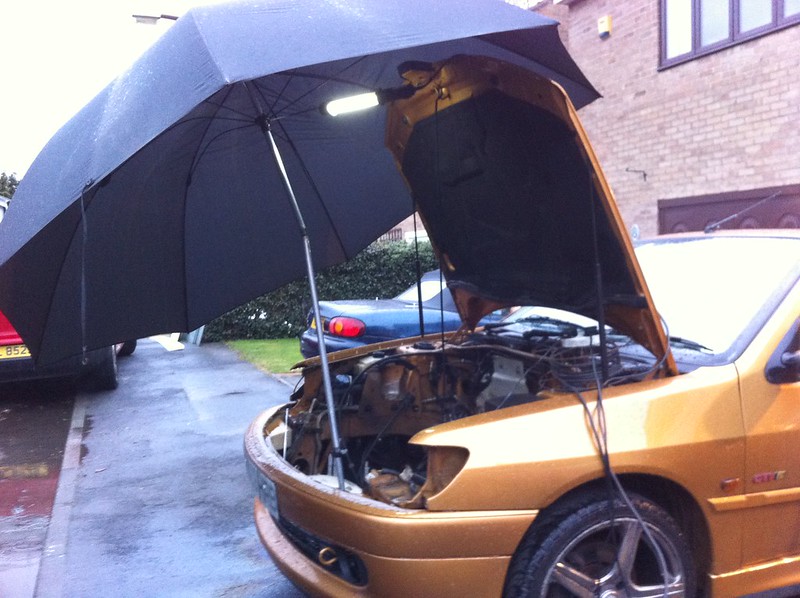
I've not updated this for a while as i havent actually been doing a great deal to the car, weathers been crap and i've been very busy with other stuff, but plenty of enquiring and ordering has been going on.

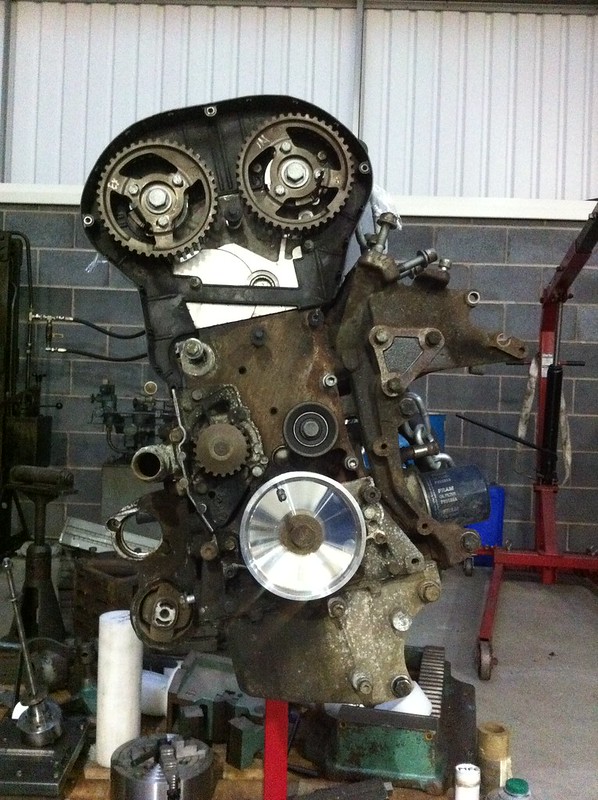
I've got the engine setup on the stand at work so i can now spend an hour or so a day stripping it down, i have 9 days leave left so i may use some and get a decent amount of time on it.

It was pretty simple to make, a bit of 20x3mm flat, one cut to approx 100mm long with a hole each end, another approx 280mm long with a hole at one end, and another hole approx 80mm in.
I just used an M6 bolt to hold the two together, all holes were drilled 6.8mm dia as it was the first stub drill i found lying around LOL
I different M6 bolts to the ones already on the pulley as they originals werent really long enough and i didnt want to put un-necessary strain on them bolts or the pulley hub.
This tool worked nicely to help just loosen the pulley securing bolt.

I went a bit ebay mad last night and ordered loads of stainless cap screws for the cam covers, coil packs, coil pack cover etc.
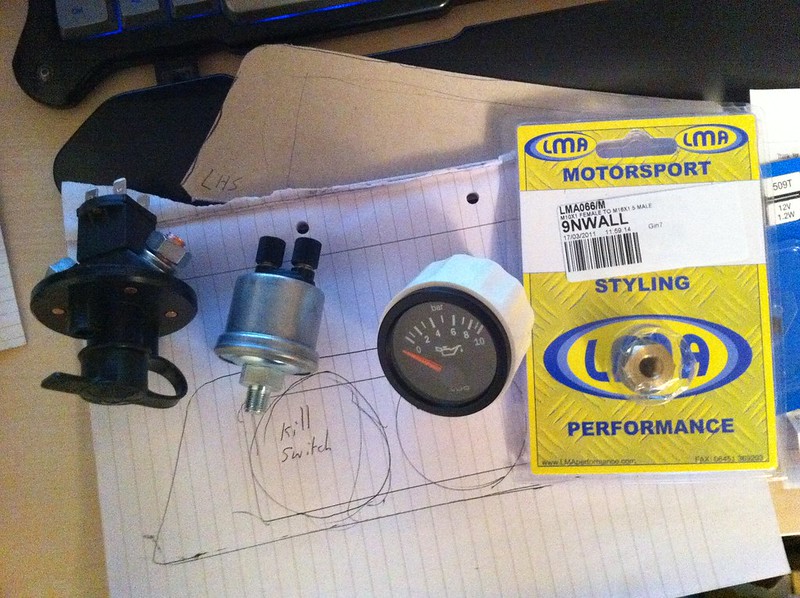
Also got an FIA killswitch with resistor etc for the billy bargain price of £15.15 delivered from ebay Cool

I ordered some heat reflective mat which i am going to attach to the original exhaust manifold heatshield, the original has started to fall apart, i'm also bidding on some heat wrap which will hopefully go cheap, i can then heat wrap the rest of the exhaust manifold.

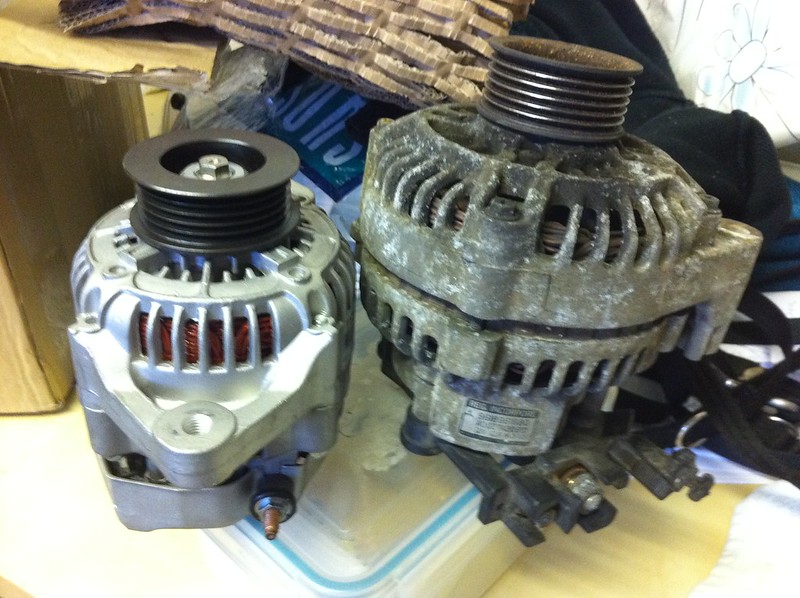
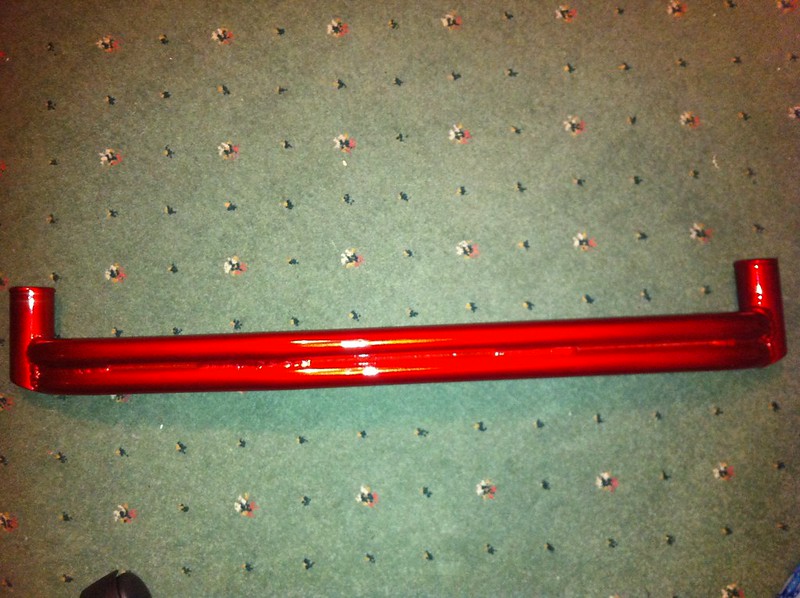
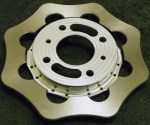
I've fitted my new alloy crank pulley to help with the timing, i didnt want to risk the old rubber pulley. Thanks to Rich for this Thumbs up

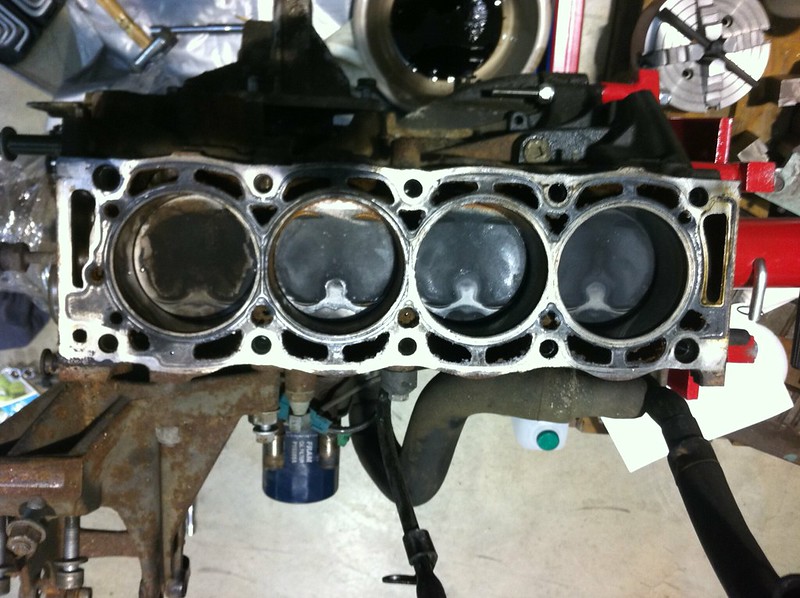
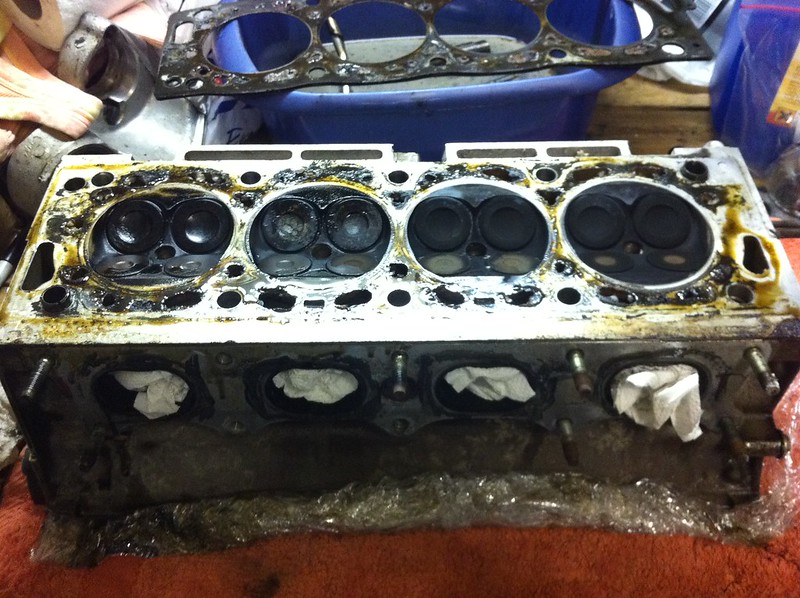
I've also got an uprated headgasket and head bolts, engine gasket kit, and a few other bits on order from Rich, they should be with me some time next week all being well.

Once i have the head off i have been quoted ~£210 to have the head skimmed, valves re seated, pressure tested and all cleaned etc, the company has been recommended to me by many people, all in-the-know so i'm going to go with that, all i've heard is good reports about them.


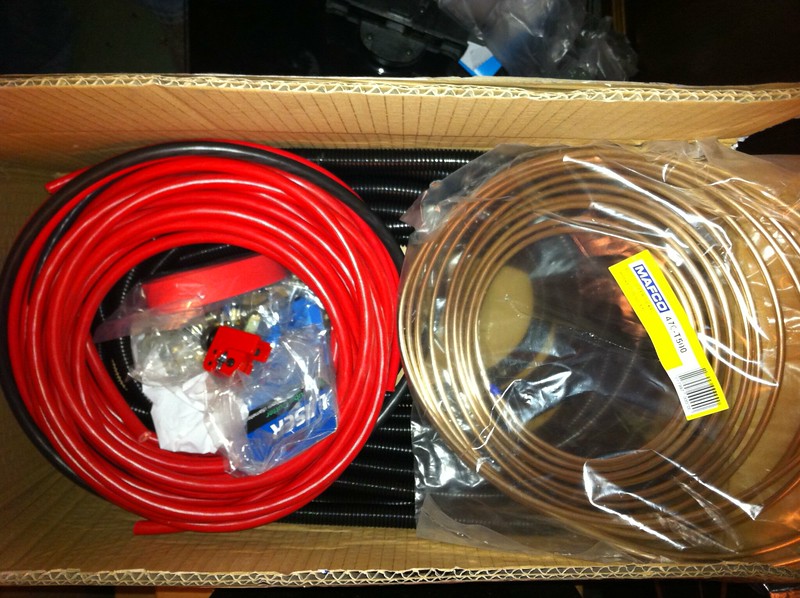
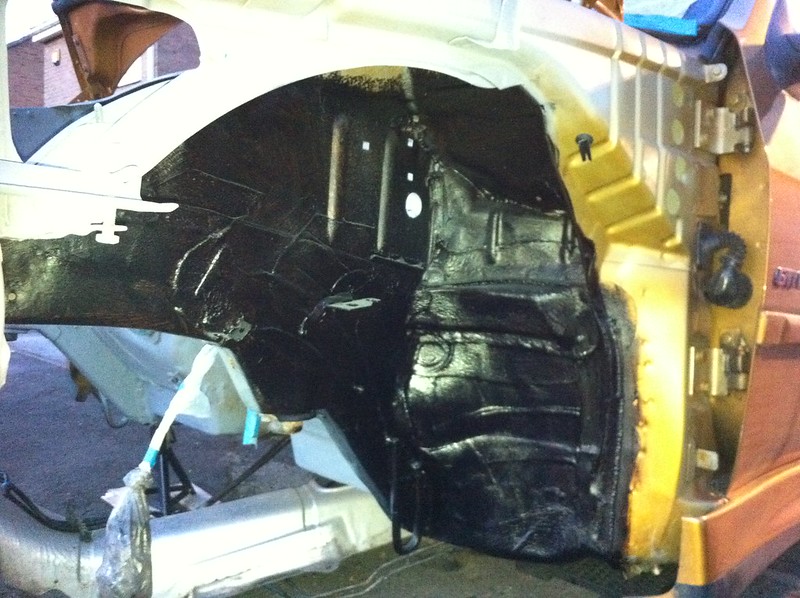
I'm wanting to get rid of the ABS to save weight and tidy up the engine bay a bit, after a couple of PM's to Rikky who has been very helpful i now have a simple schematic of how i intend to run my brake lines.

As far as i know the master cylinder and brake callipers are 10x1mm thread. The wilwood brake bias valve is 1/8" NPT.
I will be running the solid lines under the car, then come up through the floor with the braided lines to the bias valve then back down underneath with braided lines connecting to the solid lines to the rear callipers.

Thanks Rikky for your help Thumbs up


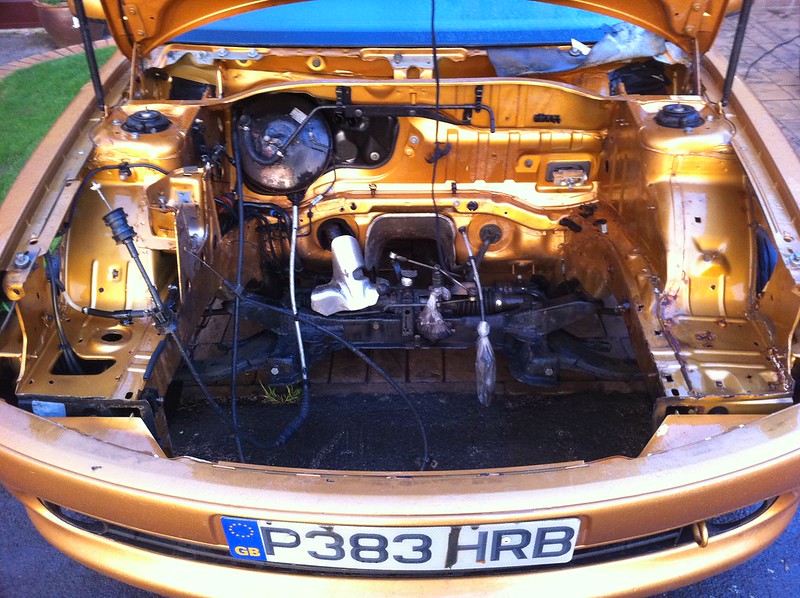
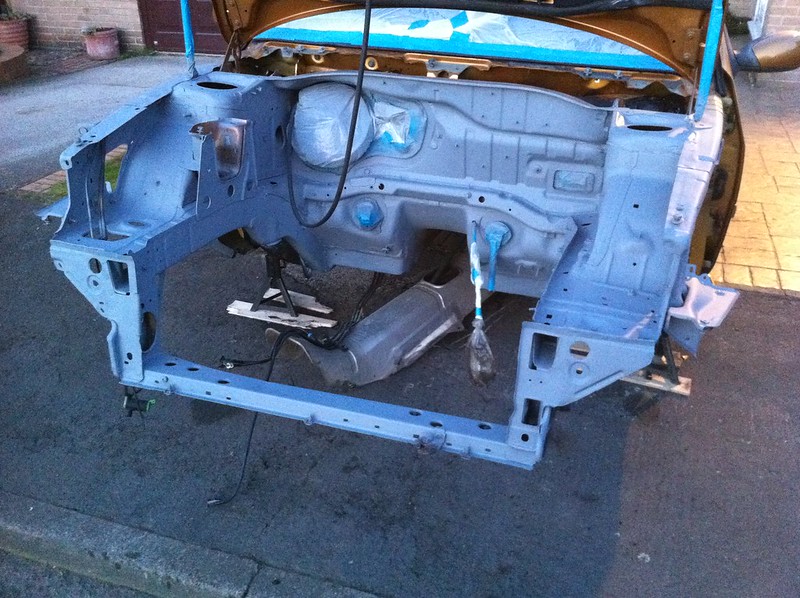
Last weekend i made a start on removing the dash, just to get rid of all un-necessary wiring and anything else that can be removed really.
I'm going to keep the heater matrix for now, i'm on a bit of a budget financially and time wise as i want the car back on the road for FCS, and hopefully my annual trip to the 'ring a couple of weeks after FCS Cool

Matt (Cooper666) has been very helpful with my progress so far so a big Thumbs up from me, cheers mate.

________________________________________

Goldie the track car.
Posted 11th Aug 2017 at 14:38
prism7guy

Seasoned Pro

Location: DoncastAAAAARGH

Registered: 13 Jan 2008

Posts: 4,637

Status: Offline

Post #39
Another brief update.

I completely stripped the engine down and discovered the head was missing some bits and had some nasty corrosion. The camshafts and the seats in the head and cam carriers were also scored so it was basically a written off head, the only good thing is the cam covers seals are in good condition and they have cleaned up nicely.

The block is also written off for my budget, cylinder 4 had some pitting, i didnt want to risk spending so much on the engine rebuild only to have that let me down, and having it re bored out would add the cost of oversize pistons etc, taking it out of my budget.

I have decided to just call it a day with this engine for the time being. The crankshaft is in ok condition, very light scoring on a couple of journals so i'm going to keep this and the block, eventually once the car is up and running to the sort of spec i want it to be i'm going to get the block bored out to 86.5mm and the crank ground 0.3mm, ideal for some forged low compression pistons and rich's uprated bearings Ninja
(Just need to buy a charger and fitting kit in the mean time Laugh)

I have sourced my new engine and have paid a deposit. I'll be picking it up in a couple of weeks, so that gives me a bit of time to clean up the engine bay and give it a lick of paint.

Some pics of the engine bits:
IMG_0668 by Steve Count, on Flickr
IMG_0671 by Steve Count, on Flickr

In the mean time more shiny parts have been arriving, my seam welded subframe came, so that will be fitted over the weekend if its not throwing it down with rain.

I have the engine bay loom laid out in the conservatory, the abs wiring has all been removed, the fog lights and anything else deemed un-necessary will be removed and the loom put back after the bay has been painted.

I have also been thinking a bit on how to mount the PAS and alternator. I'm going to get a small lightweight denso 55A alternator to save a couple of kg and create more space. I just need to get my new engine so i can check that the dimensions are about right, and maybe make a few tweaks.

I just need to think of how i'm going to do the associated pipework then.
Once i have a design and i'm confident it will work ok i'll send the drawing off to some laser cutters and have it cut out of either aluminium or steel, undecided at the moment as i can weld steel but aluminium is lighter Hmm

________________________________________

Goldie the track car.
Posted 11th Aug 2017 at 14:42
prism7guy

Seasoned Pro

Location: DoncastAAAAARGH

Registered: 13 Jan 2008

Posts: 4,637

Status: Offline

Post #40
Weekend update time.

This weekend i cleaned up the engine bay a bit, i attacked it with jizer and some traffic film remover that cooper gave me, its come up pretty clean now as i'm intending on respraying it before the new engine goes in.
A trip to halfords after work on saturday meant i'm a fair few quid lighter but a few cans of spray better off, I cant remember the colour i chose for the bay but its something along the lines of Peugeot steel silver. I wanted something dark but clean looking rather than bright or matte.

I also cleaned up the sump from the old engine, just so storing it isnt such an issue really as it wont get grease and muck everywhere, also cleaned the gearbox too as i want to paint it silver, but its a ball ache getting into all the corners on the casting webbs Laugh.

I managed to get all the sound deadening foam out from behind the dash too, which is a fair chunk of weight saved (it was soaking wet from a leaking arial so even heavier than normal). The arial has now been removed and replaced by a grommet and some duct tape LOL
I need to find a more attractive solution to the removal, but until then this will do.

The final thing i did was to fit my seam welded subframe. This was much quicker and easier than i had imagined, so i will remove it again when i'm spraying the engine bay.

I have also ordered a VDO oil pressure sender (0-5 bar, hopefully this will be ok, i wasnt sure on the max pressure as i read somewhere that its something like 4 bar at 3k rpm) and i'm going to order one of daveyboy's top engine repair plates.
Just need to knock up a thread adaptor for the pressure sender, i think the sender is m10x1.0 thread and the block is m16x1.5. Should be easy enough to do out of some brass hex Cool

Beer o clock now though Smile

________________________________________

Goldie the track car.
Posted 11th Aug 2017 at 14:43
welshpug!

Capt Pedantic

Location: Bigend, Wales.

Registered: 27 Mar 2007

Posts: 25,817

Status: Offline

Post #41
Max oil pressure on these is 6 bar...

Doh LOL

________________________________________

need a part number? get on here - http://public.servicebox.peugeot.com

Bring on the Trumpets.

Posted 28th Feb 2011 at 02:14
prism7guy

Seasoned Pro

Location: DoncastAAAAARGH

Registered: 13 Jan 2008

Posts: 4,637

Status: Offline

Post #42
Doh

I think i'll still use it though, i only really wanted one to see if the pressure was too low at any point, and i guess it will be ok if its maxxed out on a 0-5 bar gauge. Unless you spot any major flaws in my plan?

________________________________________

Goldie the track car.
Posted 28th Feb 2011 at 11:47
daveyboy

aka Jim Davey

Location: Southampton

Registered: 01 Oct 2007

Posts: 8,648

Status: Offline

Post #43
prism7guy wrote:
Ahh, yeah i had been planning on using one of them connectors, i was going to run them off the battery as seperate wires to the kill switch though.
I was going to use a nice battery like daveyboy has and mount that under the boot floor where the spare used to go, then have the anderson connector held somewhere near the rear tow eye so i could charge/jumpstart from that, and have the main live feed go off to the dash where my FIA kill switch will be before it gets to the various places it needs to be.

I hope my explanation above makes some sense Laugh


Don't buy a housing for the battery yet I have a spare for a Powervamp 25 as the race car came with a carbon battery box.

________________________________________

R H Davey Welding Supplies. I sell new and used welding equipment in the Hampshire area. I take on welding jobs in the evenings, ally casting repairs are one of my specialities but I can weld pretty much anything. PM me with your requirements.

Some of my services: (See my for sale threads)
Engine mount/chassis repair
Solid Beam Mounts BACK IN PRODUCTION
Harness bars
Posted 28th Feb 2011 at 14:21
prism7guy

Seasoned Pro

Location: DoncastAAAAARGH

Registered: 13 Jan 2008

Posts: 4,637

Status: Offline

Post #44
daveyboy wrote:
prism7guy wrote:
Ahh, yeah i had been planning on using one of them connectors, i was going to run them off the battery as seperate wires to the kill switch though.
I was going to use a nice battery like daveyboy has and mount that under the boot floor where the spare used to go, then have the anderson connector held somewhere near the rear tow eye so i could charge/jumpstart from that, and have the main live feed go off to the dash where my FIA kill switch will be before it gets to the various places it needs to be.

I hope my explanation above makes some sense Laugh


Don't buy a housing for the battery yet I have a spare for a Powervamp 25 as the race car came with a carbon battery box.


Hmm
I'm down in southampton in a couple of weeks, i'll PM you Wink

________________________________________

Goldie the track car.
Posted 1st Mar 2011 at 00:01
prism7guy

Seasoned Pro

Location: DoncastAAAAARGH

Registered: 13 Jan 2008

Posts: 4,637

Status: Offline

Post #45
Not much done on the car this week, mainly due to the weather being crap yesterday and spending today at cadwell park.

On a brighter note my oil pressure sender arrived and its 0-10 bar not the 0-5 bar that it was advertised at Hyper

I have ordered a few shiny new bits which should turn up over the next week or so, including an m16x1.5 to m10x1 adapter for the oil pressure sender, i was going to make one but it turned out much cheaper to just buy one pre made than to buy in a short length of brass then have the ball ache of turning one etc.
Also went a bit crazy and bought myself 5 oil filters and a couple of litres of gearbox oil from aep direct (i feel i have to order lots from them in one go to justify the steep postage).
I could have done with new ball joints but i couldnt tell which ones were 16mm ones so i'll probably end up getting these from pug eventually.

On saturday i decided i would make a start on the engine bay de-rusting, here are a couple of before shots:
IMG_0708 by Steve Count, on Flickr
(Yes, as you can see the whole car has become some sort of vile rust colour)

Anyway, after a bit of time with the stupidly expensive de rust disc in walt i had most of the surface rust away, so applied some bilt hamber deox gel, left it overnight then jet washed it off the next day.

To protect the bare steel i applied some bilt hamber hydrate 80.

Some areas need more attention but i plan on sorting these next weekend as i have monday off work too to get more done.

Oh yeah, i also worked quite late into the night on friday removing all the excess wires from the engine bay loom, it will no longer be able to have abs, brake pad wear sensors, fog lights or air-con. A few grams saved here for several hours of tedious wire snipping Laugh

________________________________________

Goldie the track car.
Posted 11th Aug 2017 at 14:45
scoobyai

Newbie

Location: shildon

Registered: 08 Feb 2010

Posts: 25

Status: Offline

Post #46
nice thread u should take look at ( disco_stu ) thread on track car u mite get few ideas Big grin
Posted 7th Mar 2011 at 03:34
prism7guy

Seasoned Pro

Location: DoncastAAAAARGH

Registered: 13 Jan 2008

Posts: 4,637

Status: Offline

Post #47
A bit of an update, I have been and collected my new engine last weekend, its currently sat on the stand at work so i can make my PAS relocation bracket fit right.
I knocked up a design in CAD, printed it off to be about the right scale and held the cut out in place and noticed a school boy error so went back to the drawing board and remodelled it.
As far as i can tell it should do the job nicely, so the drawing has been sent off to the local laser profiling company that we use at work, hopefully it wont be too expensive and i should get the brackets back in the next couple of weeks.

My new alternator arrived to help with the making of the bracket above, its quite a bit smaller than the standard one so saves a bit of weight, maybe a couple of kg but i dont think it was quite that much.
IMG_0837 by Steve Count, on Flickr

Other recent purchases include the following:
IMG_0850 by Steve Count, on Flickr
IMG_0842 by Steve Count, on Flickr
IMG_0848 by Steve Count, on Flickr
IMG_0847 by Steve Count, on Flickr


It's safe to say that my bank account is now empty LOL
On the bright side i have plenty to be doing in the rare bits of spare time i get Smile

Also on their way to me are one of Daveyboy's top engine mount repairs and a battery tray for a Powervamp 25 battery.

The last couple of weeks i have been sorting out the engine bay, its no longer rust coloured with bits of rust, its currently a nice grey primer colour:
IMG_0839 by Steve Count, on Flickr
With nice undersealed wheel arches:
IMG_0840 by Steve Count, on Flickr

And my temporary spray booth to help stop getting overspray on everyones cars close by:
IMG_0846 by Steve Count, on Flickr

Hopefully i'll get the top coat on tomorrow if its not crap weather, maybe lacquered too if theres time.
Then the front end can start to be rebuilt Hyper

________________________________________

Goldie the track car.
Posted 11th Aug 2017 at 14:49
phillipm

Seasoned Pro

Location: Rotherham

Registered: 15 Oct 2006

Posts: 20,607

Status: Offline

Post #48
Plenty of bits and nothing to bolt them to LOL

________________________________________

- Bespoke rollcages/additions/adjustments. Half cages right up to complete custom spaceframes - MSA/FIA spec, CDS, ROPT, T45, etc - PM me
Email me!
Custom-made polybushes available - need an odd size or fitment? - anything from batch work to one-off pieces.
Posted 20th Mar 2011 at 04:07
birk

Seasoned Pro

Location: Doncaster

Registered: 24 Oct 2005

Posts: 7,032

Status: Offline

Post #49
Just need some nice solid mounts off me now steve hehe

________________________________________

Dimma + Gt35 turbo = Ninja
Solid rear beam mounts £130
07889376885
Dan
Posted 20th Mar 2011 at 18:43
prism7guy

Seasoned Pro

Location: DoncastAAAAARGH

Registered: 13 Jan 2008

Posts: 4,637

Status: Offline

Post #50
Once funds allow it birk, little bit overdrawn at the moment Doh
I'm concentrating on bits that i need to get it back on the road now, once its up and running i can afford to buy more shiny bits LOL

________________________________________

Goldie the track car.
Posted 21st Mar 2011 at 00:46

Pages (36): 1 [2] 3 .. last

All times are GMT. The time is now 00:19

The Peugeot GTi-6 & Rallye Owners Club - ©2024 all rights reserved.

Please Note: The views and opinions found herein are those of individuals, and not of The Peugeot 306 GTi-6 & Rallye Owners Club or any individuals involved.
No responsibility is taken or assumed for any comments or statements made on, or in relation to, this website. Please see our updated privacy policy.