Post #201
Looking great Iain 
I dam well know the feeling of put on / take off Etc


|
| Author | Subject: 306 Maxi project |
|
Seasoned Pro  Location: Bristol Registered: 20 Apr 2013 Posts: 5,209 Status: Offline |
Post #201
Looking great Iain I dam well know the feeling of put on / take off Etc |
|
|
|
 Location: Leeds Registered: 20 Aug 2005 Posts: 8,878 Status: Offline |
Post #202
quote: [quote RallyeRed]When Dave's sorted the front wings, Hopefully not too long now! ________________________________________ Proud Member of the ASTOR Owners Club |
|
|
|
|
Regular Location: Northwich Registered: 03 May 2016 Posts: 353 Status: Offline |
Post #203
Did a bit of the putting on - taking off thing today between the raindrops.Earlier in the week I got my PAS fitting tigged up with a -6 male boss. 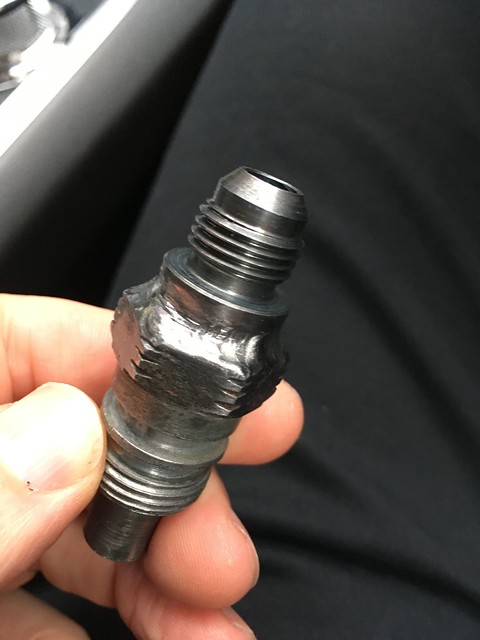 Today I re-did both coilovers with the stronger poundage ones I had made; 8" 220-320lb dual rate, and also raised the collars a fraction as it was too low last week. Happy with how it sits now. 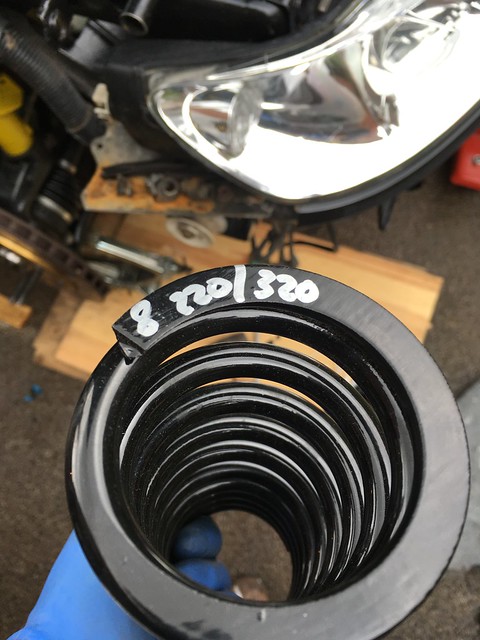 At least at times like this you appreciate a car that's easy to work on. I didn't get much more done outside as the weather was awful today. Was a bit of a downer when you have a long list of things to do. Moved inside and did a few hose ends; Got a straight -6 with PTFE hoses to go on the pas pump outlet, and a 45deg -6 for regular hose as the low pressure feed from the pas fluid tank. Will each respective end with the hose and work out the length I need and complete the job. 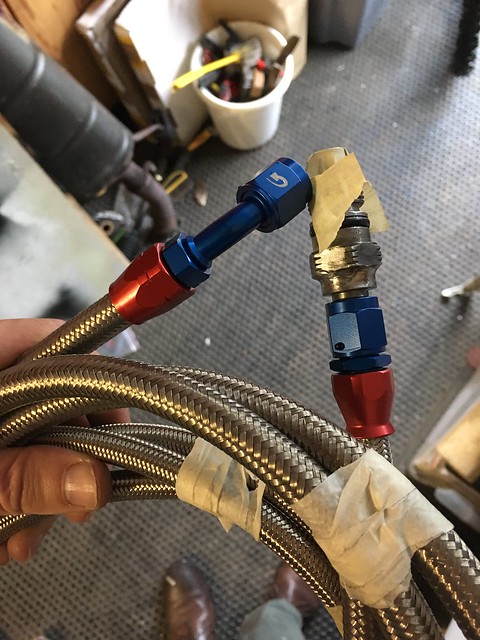 Got a question for you folks on that - which fitting on the rack is the high pressure feed - is it the upper most one? Have got one other head scratcher - perhaps someone can help me. As I look at the sandwich plate below, which side feeds the oil cooler, and which side is the return? It's not a mocal plate, so there's no arrows on it. My thoughts are the outlet on the R of the plate as we look at it is the exit that feeds the oil cooler..? 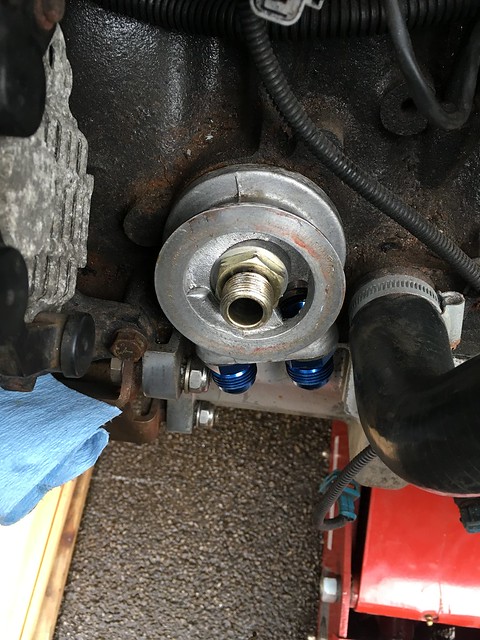 Cheers Iain |
|
|
|
|
Regular Location: Northwich Registered: 03 May 2016 Posts: 353 Status: Offline |
Post #204
Think I’ve figured out now the outlet on the left of the plate is the side that flows to the cooler.If someone could confirm that’d be great. |
|
|
|
|
Seasoned Pro  Location: DoncastAAAAARGH Registered: 13 Jan 2008 Posts: 4,637 Status: Offline |
Post #205
I'm not 100% sure but i think you're right. The filters have a perforated metal tube runs down the middle, i've always assumed this holds the filter material in place so it doesnt try and collapse in to the return which would be the centre hole. I hope that makes sense.Nice work on the project so far by the way ________________________________________ Goldie the track car. |
|
|
|
|
Regular Location: Northwich Registered: 03 May 2016 Posts: 353 Status: Offline |
Post #206
Thanks Stephen, much appreciated. This is what I've rolled with.If my oil cooler was horizontal, it wouldn't make much difference, but with running it vertical, I wanted the flow from top to bottom so getting it right was important. Today I finished the oil cooler lines. Really happy with the Speedflow stuff. I made one hose too short at the beginning, and discovered how tenacious the hose grips on the fittings actually is when trying to remove it. Had to resort to a hacksaw and a stanley knife! 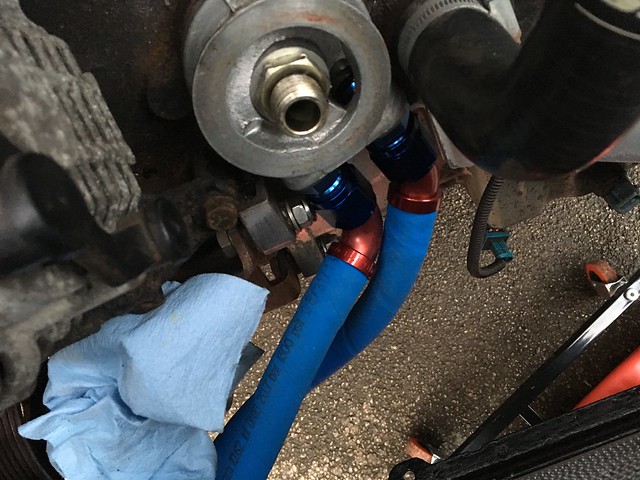 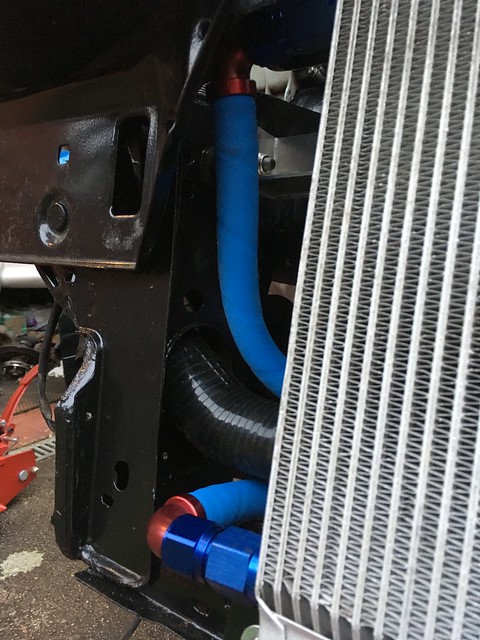 Also had a chance today to start sizing up my hp PAS line. Fitted the pump end and ran the hose underneath the engine mount and down to the rack. 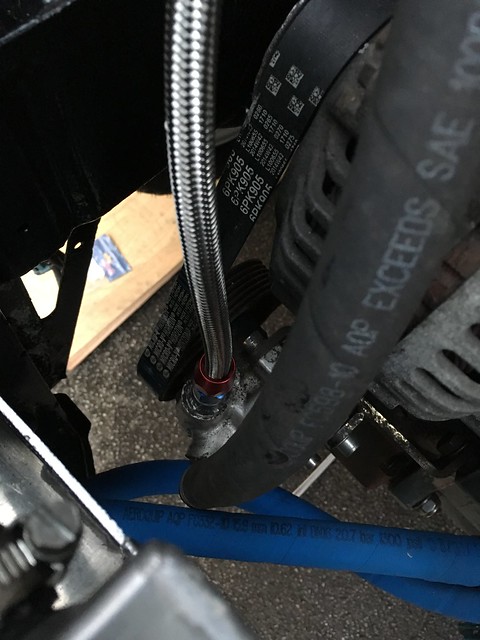 Happy with the route and I have the right fittings. Will finish to the rack with a 135deg job. Still need to confirm which is the high pressure inlet on the rack though; anyone? Cheers Iain |
|
|
|
|
Senior User  Location: Saxtead Registered: 16 Dec 2008 Posts: 810 Status: Offline |
Post #207
I can look tomorrow or Tuesday night unless anyone let's you know beforehand. I have mine done in braided hose to a 106 pump so must have worked it out when I did that!Out if curiosity, was there a reason you had the adapter tigged up rather than use an off the shelf adapter? |
|
|
|
|
Regular Location: Northwich Registered: 03 May 2016 Posts: 353 Status: Offline |
Post #208
Not really Martin; I didn't know the female thread of the widget that goes in the pump, and because the steel bosses are peanuts and I knew I could get it tigged on for nowt, it was just a cost effective way to do it. (And I guess one less join to seal)If you could let me know the score on the high pressure inlet on the rack, when you get to your car that would be much appreciated. All of my 'before' photos don't quite answer my question! Cheers Iain |
|
|
|
|
Senior User Location: Saxtead Registered: 16 Dec 2008 Posts: 810 Status: Offline |
Post #209
Finally managed to have a look at the car. I have the at high pressure inlet at the top and the return as the lower hole on the rack. Must be right as mines been working for a while! Haha |
|
|
|
|
Seasoned Pro  Location: Londinium Registered: 29 Nov 2010 Posts: 2,665 Status: Offline |
Post #210
Iain, how difficult was it to make your own PAS and oil lines? I'm not sure on the process involved to fit the AN fittings?________________________________________ Rallye Race Car |
|
|
|
|
Location: Leeds Registered: 20 Aug 2005 Posts: 8,878 Status: Offline |
Post #211
this might help Dan Making AN Fittings Youtube Vid ________________________________________ Proud Member of the ASTOR Owners Club |
|
|
|
|
Senior User Location: Saxtead Registered: 16 Dec 2008 Posts: 810 Status: Offline |
Post #212
quote: [quote="demondriverdan"]Iain, how difficult was it to make your own PAS and oil lines? I'm not sure on the process involved to fit the AN fittings? there are plenty of guides about like linked above Dan. I made my fuel lines and PAS lines and id never done it before. I bought the bits from Torques and a step by step guide was included with the fittings. |
|
|
|
|
Seasoned Pro Location: Londinium Registered: 29 Nov 2010 Posts: 2,665 Status: Offline |
Post #213
Cheers guys  ________________________________________ Rallye Race Car |
|
|
|
|
Regular Location: Northwich Registered: 03 May 2016 Posts: 353 Status: Offline |
Post #214
quote: [quote="devere"]Finally managed to have a look at the car. I have the at high pressure inlet at the top and the return as the lower hole on the rack. Must be right as mines been working for a while! Haha Thanks for that Martin - I guessed lucky then! (Relief...)  PAS PAS |
|
|
|
|
Regular Location: Northwich Registered: 03 May 2016 Posts: 353 Status: Offline |
Post #215
Dan, the method varies depending on the hose.PTFE lined stuff for higher pressure applications like brake, clutch etc (and also fuel lines) which I used for the PAS work by inserting the PTFE part of the hose in an olive, and the female fitting (red part on Goodridge) clamps over the braided covering and tightens down on to the male male of the fitting. You just have to be careful the hose doesn't get wound out of the fitting as you tighten it up. For oil lines Goodridge use a cutter style male fitting which bites into the hose lining as the female fitting is tightened up, and doesn't use an olive. It's critical the right types of fitting correspond with the intended hose and function. I've attempted to use Torques stuff in the past along with similar Ebay fittings and been left disappointed but their quality and function. It's personal choice, but despite the significant cost savings, it's not for me. I'll stick to Goodridge and Speedflow. The Speedflow stuff I used on the oil cooler is push on style. It's the first time I've used it, so the proof will be in the pudding, but it was childs play to fit, and I was impressed with the quality. Generally I used Goodridge type of self assembly (and re-useable) hose and fittings because I'm exploring different fit, and routes or there's some form of custom requirements. It's very expensive, but along the way I've been able to dive into my parts boxes from other builds to make up what I need, as well as buying some new stuff too. Making up the hoses just offers me the flexibility of sizing or routing things differently and making up the hose on the spot to fit. It only takes moments once you know the lengths etc. Many suppliers offer their own hose making service, but you'll need to be sure about the right ends, and exact lengths etc. Making up the hoses often comes at little extra cost - all the cost comes in the parts. |
|
|
|
|
Seasoned Pro Location: Londinium Registered: 29 Nov 2010 Posts: 2,665 Status: Offline |
Post #216
Cheers Iain, appreciate the write up!________________________________________ Rallye Race Car |
|
|
|
|
Seasoned Pro  Location: Bucks Registered: 25 Feb 2007 Posts: 2,437 Status: Offline |
Post #217
Have you got any more pictures of your lower rad hose set up? After mocking up rads I've decided to go 205 as I have all from my 205 - apart from the bottom hose |
|
|
|
|
Regular Location: Northwich Registered: 03 May 2016 Posts: 353 Status: Offline |
Post #218
All in post 182 mate - Spoox 306 hose to 135deg hose with a 32mm joiner |
|
|
|
|
Newbie  Location: pamplona Registered: 01 Jul 2017 Posts: 21 Status: Offline |
Post #219
Hola tienes fotos de como vas a ensanchar ejes?mover copelas trapecios o brazos y mangueta o pivote? |
|
|
|
|
Newbie Location: pamplona Registered: 01 Jul 2017 Posts: 21 Status: Offline |
Post #220
El mio pide ensanchar 11cm por cada lado en la parte delantera |
|
|
|
|
Seasoned Pro Location: Bucks Registered: 25 Feb 2007 Posts: 2,437 Status: Offline |
Post #221
quote: [quote="RallyeRed"]All in post 182 mate - Spoox 306 hose to 135deg hose with a 32mm joiner |
|
|
|
|
Capt Pedantic  Location: Bigend, Wales. Registered: 27 Mar 2007 Posts: 25,817 Status: Offline |
Post #222
quote: [quote="blandy"]Have you got any more pictures of your lower rad hose set up? After mocking up rads I've decided to go 205 as I have all from my 205 - apart from the bottom hose pull the metal bit off the end of a 306 hose, I think that will go straight on a 205 rad with a hose clamp, mine goes onto a small manifold thing to tee off to the header tank and the heat exchanger. ________________________________________ need a part number? get on here - http://public.servicebox.peugeot.comBring on the Trumpets. |
|
|
|
|
Regular Location: Northwich Registered: 03 May 2016 Posts: 353 Status: Offline |
Post #223
Got some time on the car this week.Fitted the other PAS line (the low pressure one), but couldn't connect to the tank because the -6 won't quite squeeze over the outlet which is PITA, going to need an adaptor of some sort. Anyone else done this? 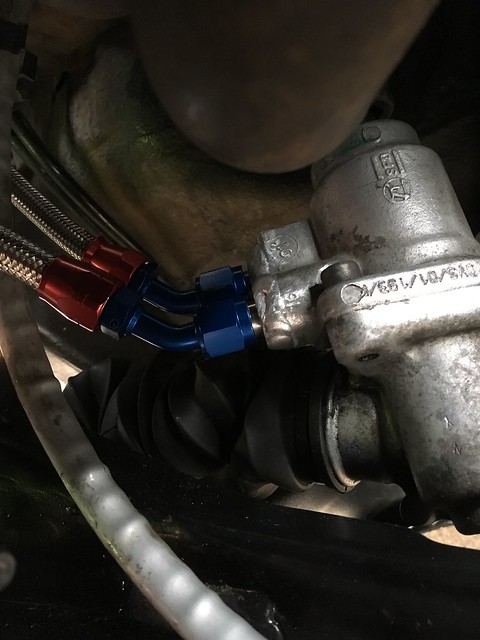 These are 45 deg fittings - 90's will take you a bit close to the manifold. Also re-did my fuel hoses - do you reckon these look alright? An 8mm inlet and a 10mm return. They were not quite as tight as I would have liked, so I used a little ptfe on the plastic joiners and proper fuel clips to get a tight fit. 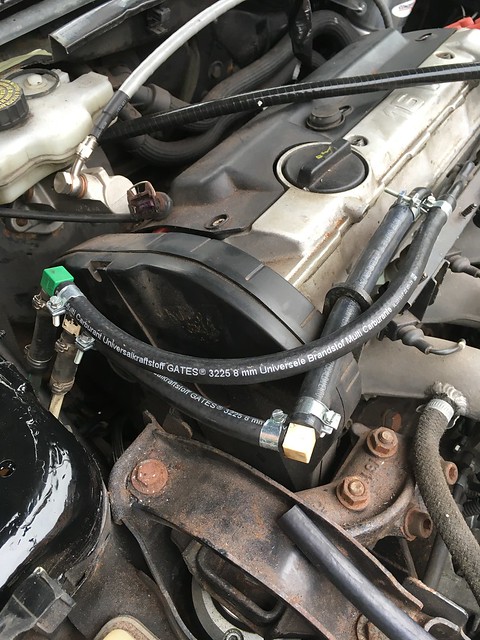 Had a look at my front bumper fitment this week. There's some threaded chock sections in the corners of the bumper, but when I offered the bumper up it's clear they weren't going to fit on to the the lower part of the slam panel under the headlights (like I thought they would). 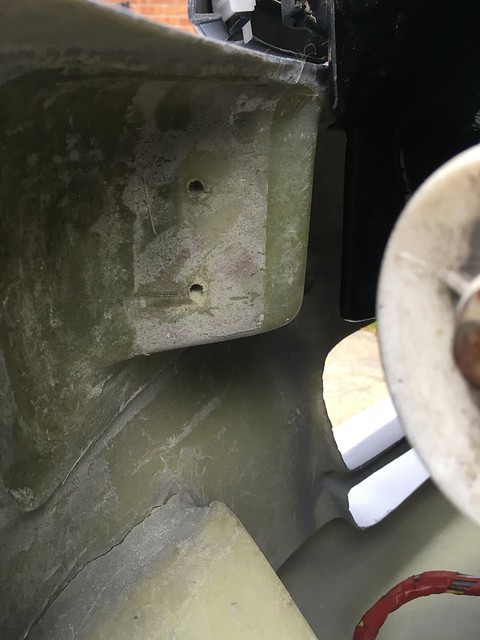 So as I had one lying about I placed an OEM bumper plastic mount inside the bumper and lo and behold with a few inches chopped off each end it slotted in really nicely.  Popped a self tapper in each end just to hold it, and offered it up. Fitted a treat and was surprisingly solid. At this point I noticed I have a flatter front to the bumper than the grill, but not arsed. Guessing a mix or ph1/ph2.5 etc. (It's an evo 2 bumper tho..) Still hoping to sort kevlar version long term, but wanted to get a handle on how to fit it. 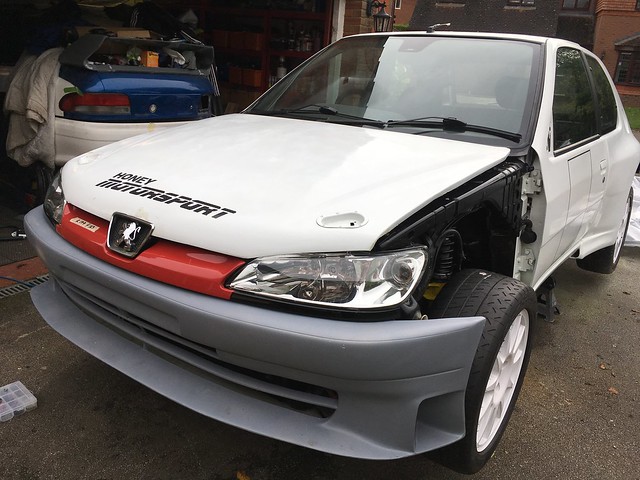 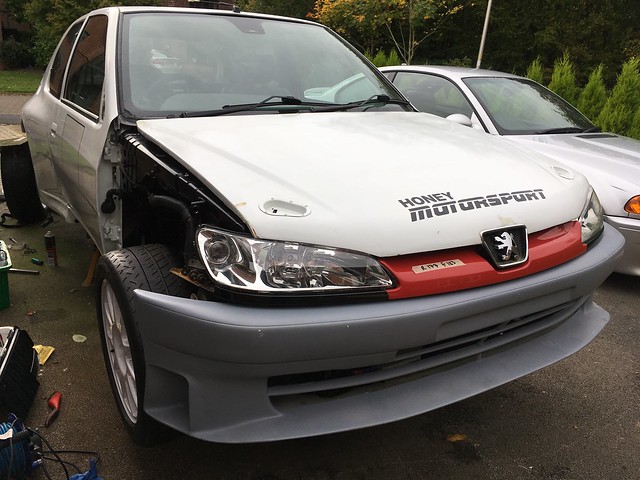 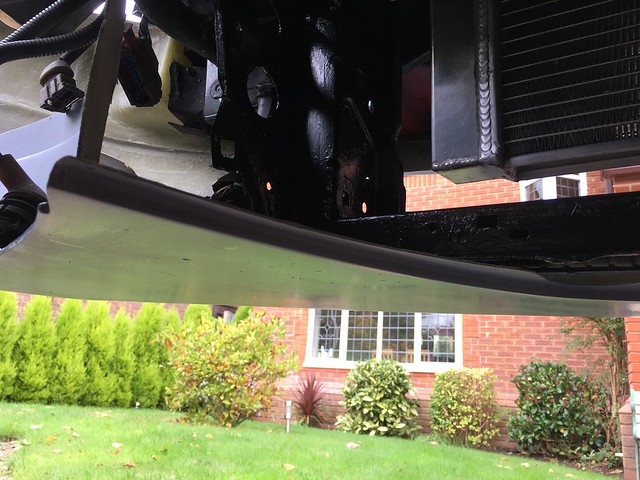 Did a little kevlar carbon rear stone guard from one of the flat panels I made a while back. 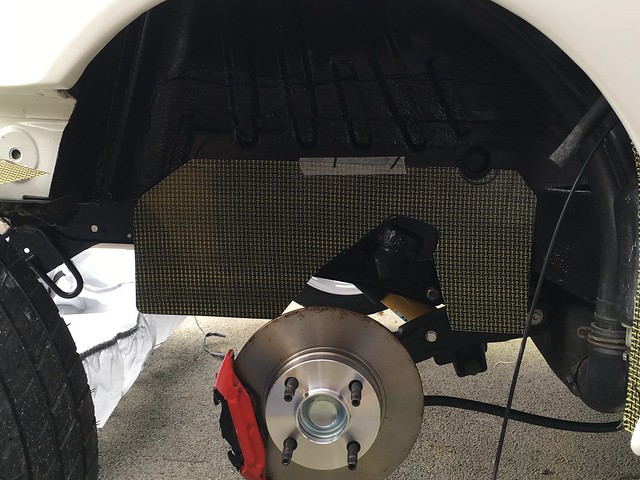 I laid up 2-3 layers of kevlar to make a rear arch liner. I used some polycarbonate plastic held in tension by some gaffa tape. It needed minimum prep - just some E-Z release agent wiped on, and I could lay up straight away. The kevlar I was using was fairly lightweight though, so near the end I decided to add some carbon-kevlar on top to add a bit more strength in and a sneaky bit of extra width in case I'd calculated wrong.. 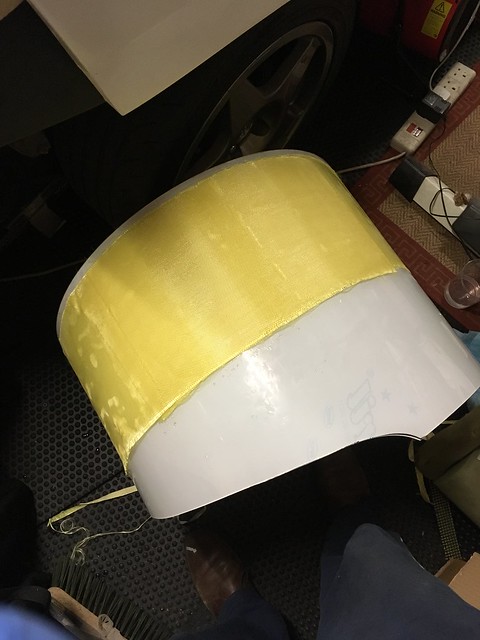 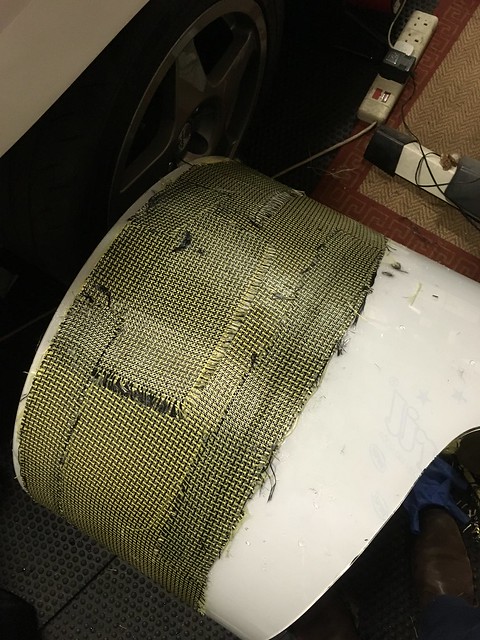 A couple of nights later.. and this morning I popped it off. Came away very easily, and had a great finish inside. 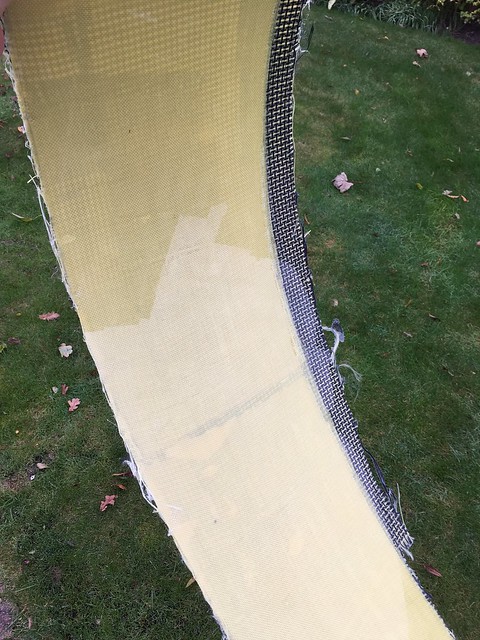 And so to the trimming. After some basic cutting, I then went to the flap wheel on the angle grinder. This stuff is tough. I went through about 5 80grit flap wheels today getting this fit of this liner right! Unfortunately it's not a simple rectangle shape as you have to account for the way the arches bulge, and at the same time the inner wing isn't flat either. I lost count of the amount of times this thing went on and off - at least 30 with trimming in between - knowing full well if I overdid it any moment I couldn't put material back in.. I then made up some stainless brackets, which I riveted on and bonded/sealed with some sikaflex for good measure. 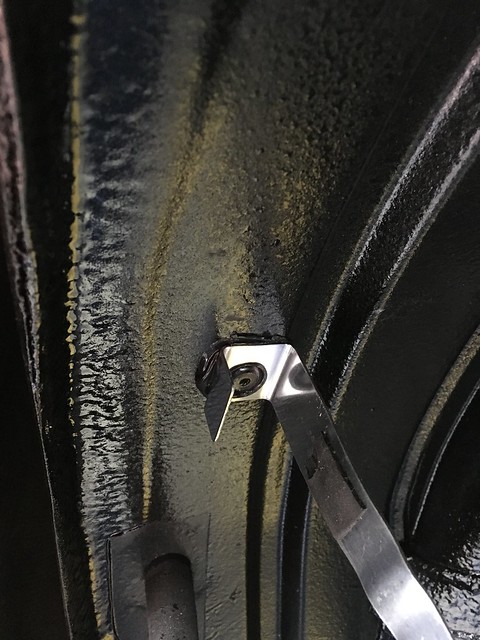 The idea was to tuck the liner up quite high - above the edge of the arch so these little brackets dotted about were important to support the liner. Some hours later it fitted well, and I was pleased to finally finish the bloomin' thing! 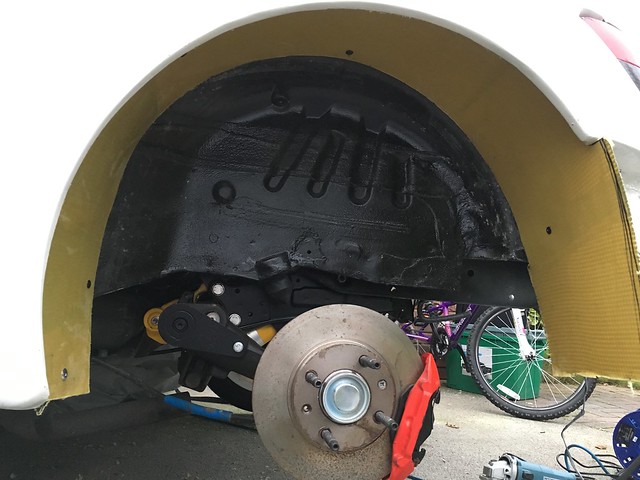 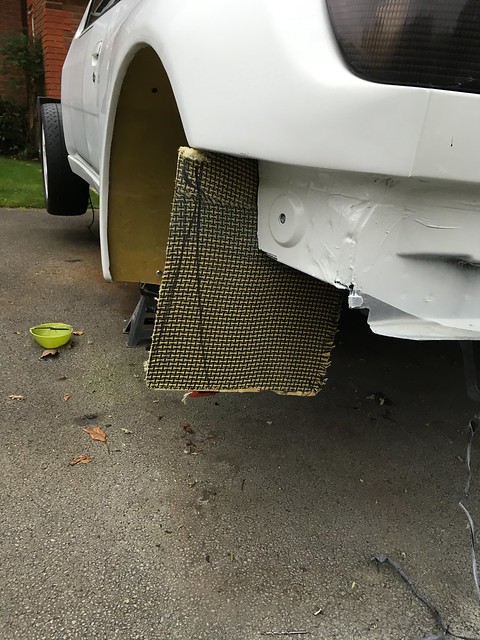 I left plenty poking out to cover the rear bumper section as well. (I've ordered a spoiler and rear bumper from AC sport and it's due for delivery on Monday) Finally today a quick win with putting my mirrors on. A bit of double-sided sealing tape, and some stainless fixings and they look great. 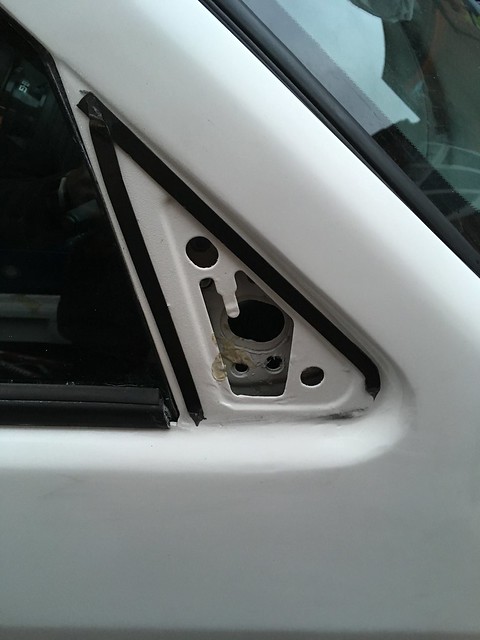 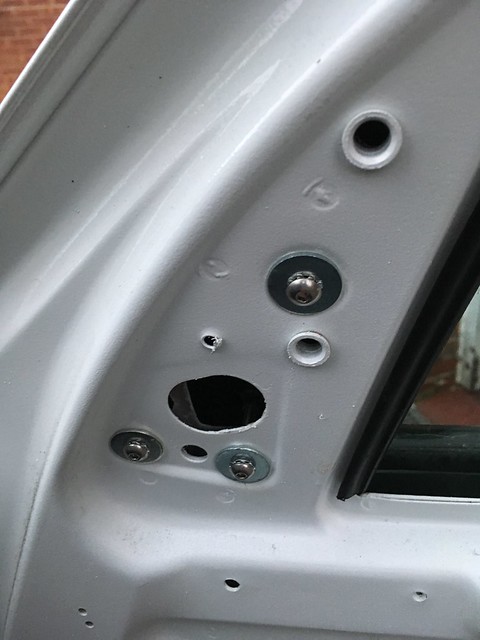 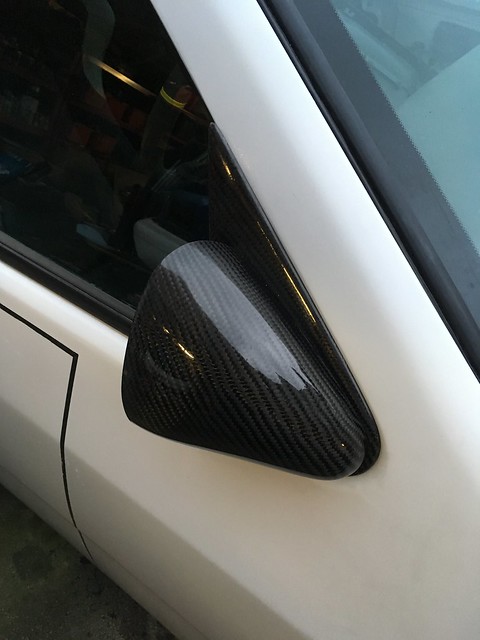 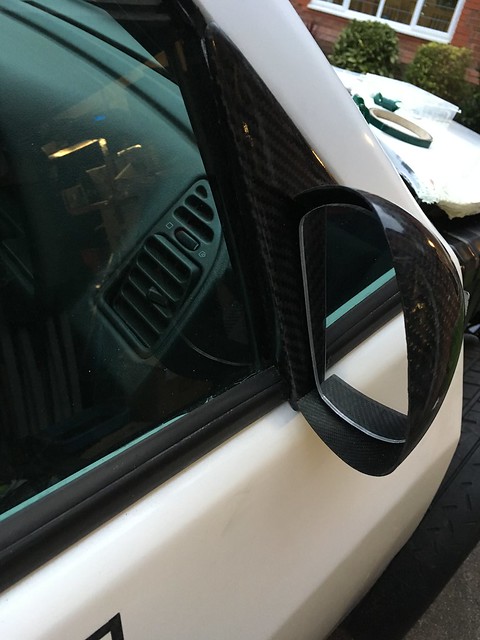 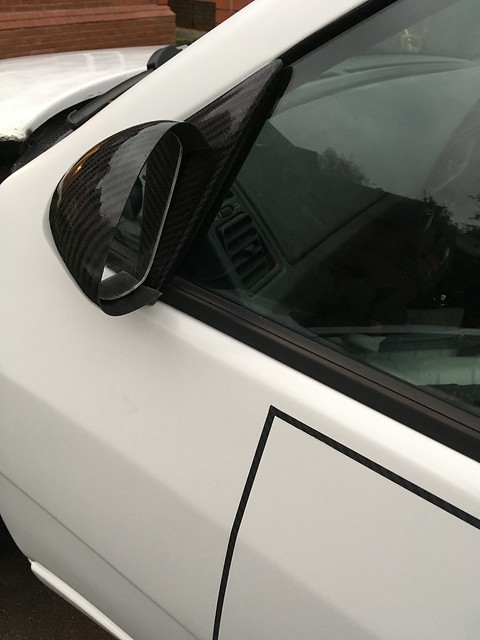 Last one from me - what have a got here - ABS sensor on the left, and 2 plugs - which is indicator, and what is the other one? Can I just cut the abs loom right back (abs long gone)?? 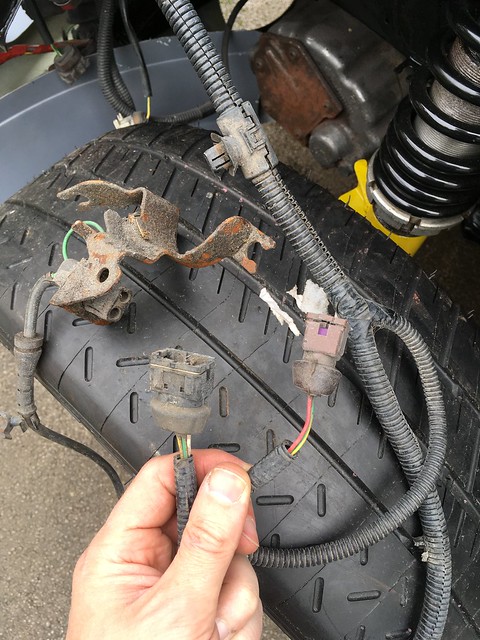 Cheers Iain |
|
|
|
|
Capt Pedantic Location: Bigend, Wales. Registered: 27 Mar 2007 Posts: 25,817 Status: Offline |
Post #224
no need to cut the abs loom, its all self contained and you just need to remove it.________________________________________ need a part number? get on here - http://public.servicebox.peugeot.comBring on the Trumpets. |
|
|
|
|
Newbie Location: pamplona Registered: 01 Jul 2017 Posts: 21 Status: Offline |
Post #225
Hola felicidades por el maxi. Me podrías ayudar con lo de la suspensión pivot etc? Las copelas las has movido? Tienes separadores? |
|
|
|
The Peugeot GTi-6 & Rallye Owners Club - ©2024 all rights reserved.

Please Note: The views and opinions found herein are those of individuals, and not of The Peugeot 306 GTi-6 & Rallye Owners Club or any individuals involved.
No responsibility is taken or assumed for any comments or statements made on, or in relation to, this website. Please see our updated privacy policy.