displaying posts 176 to 200 of 254

Pages (11): first .. 7 [8] 9 .. last

Author Subject: 306 Maxi project
RallyeRed

Regular

Location: Northwich

Registered: 03 May 2016

Posts: 353

Status: Offline

Post #176
Good Knowledge Martin thanks for sharing. Always wondered how you T'd into your system from the header tank.

Did you ever use your gp A front ARB btw the way? Would be interested in that if you wanted to sell - looking like I will ARB-less to begin with.
Posted 11th Sep 2017 at 12:30
Day666

Seasoned Pro

Location: Bristol

Registered: 20 Apr 2013

Posts: 5,209

Status: Offline

Post #177
Iain I've found a way to run a ARB on our type of suspension/cars ...it involves a bit of modification /buying non 306 bits but Simon on here
Has a fantastic fix
Hoping to get some pics
Posted 11th Sep 2017 at 13:22
demondriverdan

Seasoned Pro

Location: Londinium

Registered: 29 Nov 2010

Posts: 2,665

Status: Offline

Post #178
quote:
[quote="Day666"]Iain I've found a way to run a ARB on our type of suspension/cars ...it involves a bit of modification /buying non 306 bits but Simon on here
Has a fantastic fix
Hoping to get some pics


Would be interested as well Smile

________________________________________

Rallye Race Car
Posted 11th Sep 2017 at 13:26
devere

Senior User

Location: Saxtead

Registered: 16 Dec 2008

Posts: 810

Status: Offline

Post #179
quote:
[quote="demondriverdan"]Devere, what did you use for a header tank? I'm looking at getting a smaller rad for mine so I can run an airbox but wasn't sure what to do about a header tank on a 205 rad. Was thinking about getting a Nissan one like Day666 runs as I think it has the tank built in


I just used a header tank from a 205 Gti. Has the small return pipe on it to go to the top of the rad. And then the single outlet on the bottom which feeds the system. The whole lot then just loops together at the back of the thermostat housing where the metal pipe runs across the back of the engine.

The only other thing was blocking off a second small pipe on top of the tank as only one is used for return. That's just a pipe a bolt and jubilee clip tho.

Bleeds easily and very quickly. Never any problems.
Posted 11th Sep 2017 at 13:33
welshpug!

Capt Pedantic

Location: Bigend, Wales.

Registered: 27 Mar 2007

Posts: 25,817

Status: Offline

Post #180
I have a 205 header tank too, not quite finished the install yet, its just slung in there lol, you'll see the two adapters I used on my thread.

________________________________________

need a part number? get on here - http://public.servicebox.peugeot.com

Bring on the Trumpets.

Posted 11th Sep 2017 at 13:41
RallyeRed

Regular

Location: Northwich

Registered: 03 May 2016

Posts: 353

Status: Offline

Post #181
quote:
[quote="demondriverdan"]
quote:
[quote="Day666"]Iain I've found a way to run a ARB on our type of suspension/cars ...it involves a bit of modification /buying non 306 bits but Simon on here
Has a fantastic fix
Hoping to get some pics


Would be interested as well Smile


Yes v interested in this!
Cheers Smile
Posted 11th Sep 2017 at 13:43
RallyeRed

Regular

Location: Northwich

Registered: 03 May 2016

Posts: 353

Status: Offline

Post #182
OK update time; pressed pause for a week or so as I was away with work, but have got a day on it since and I certainly kept the postman busy whilst I was away.

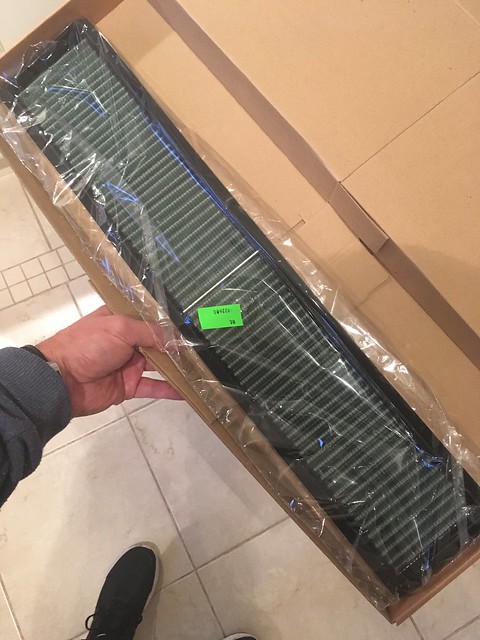
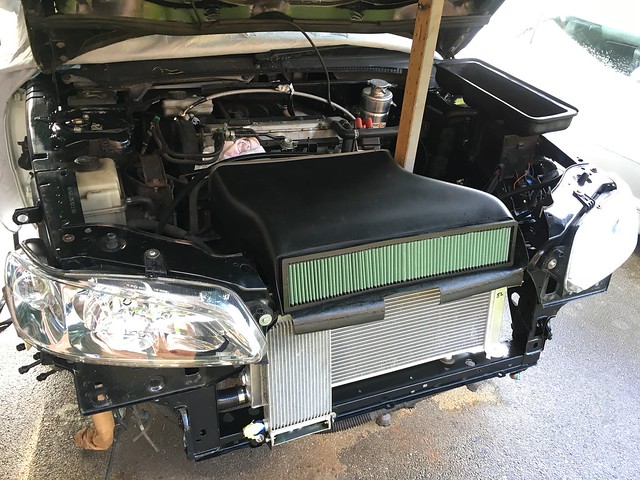
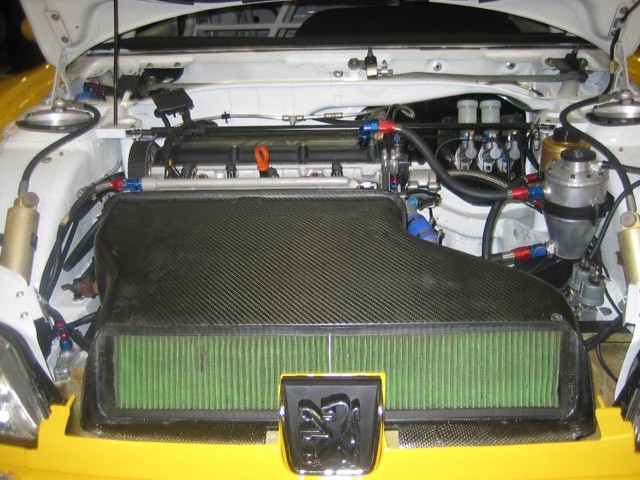
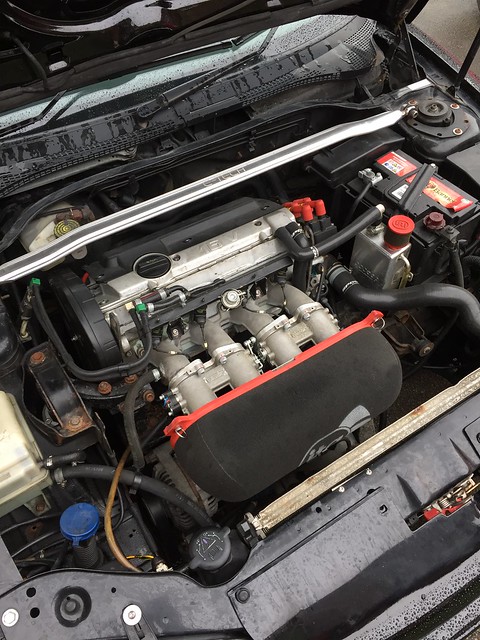
So the shorter 205 rads seem to be a topic of conversation recently. Here's how I did mine. Remember the aim is to fit a maxi evo air box over the top, and I also wanted to fit a 19 row Mocal oil cooler.

My last update shows how I was measuring up for hoses and so on. I ended up doing a bit of U turn with the hoses vs fabrication on the radiator to keep costs down.

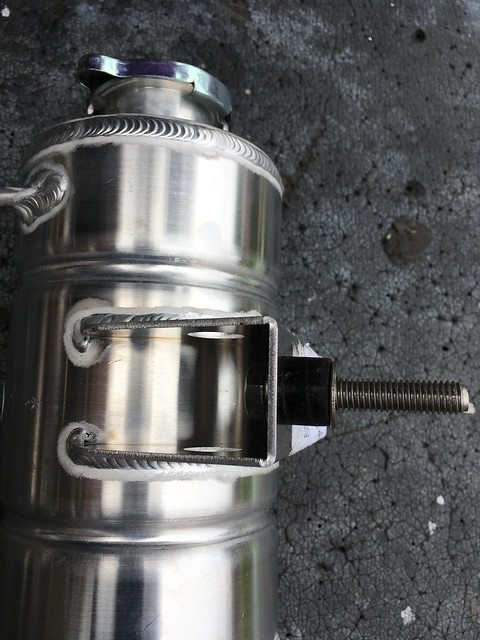
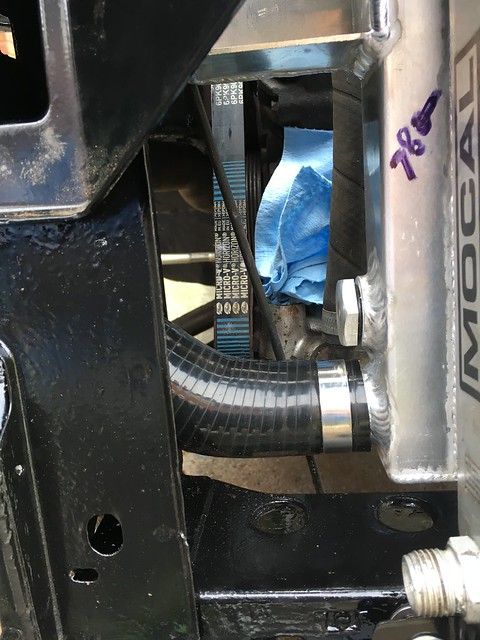
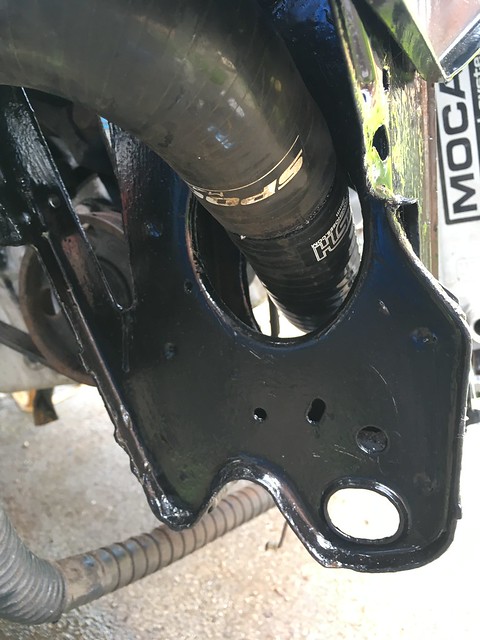
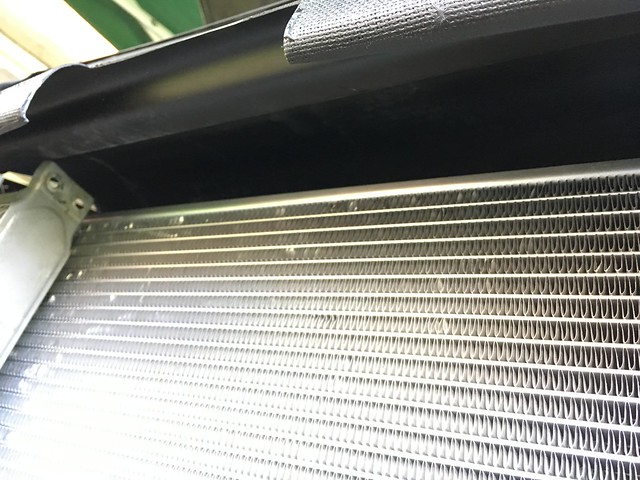
First up I took the rad to my alloy welding guy to have some brackets welded on. One per side, plus a little arm for the oil cooler mount.


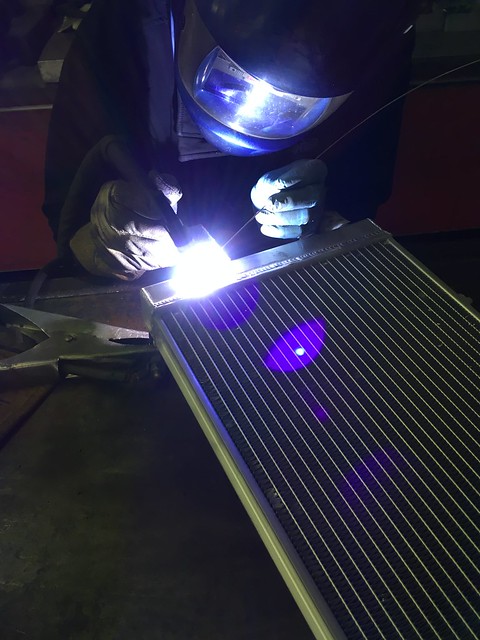
He knows what he's doing! Was good to watch.


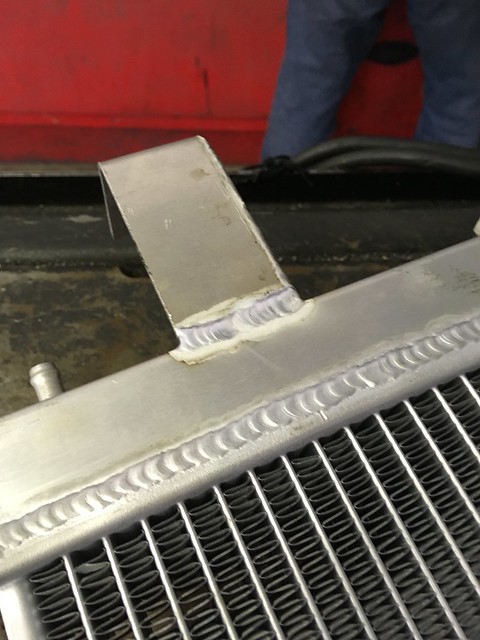
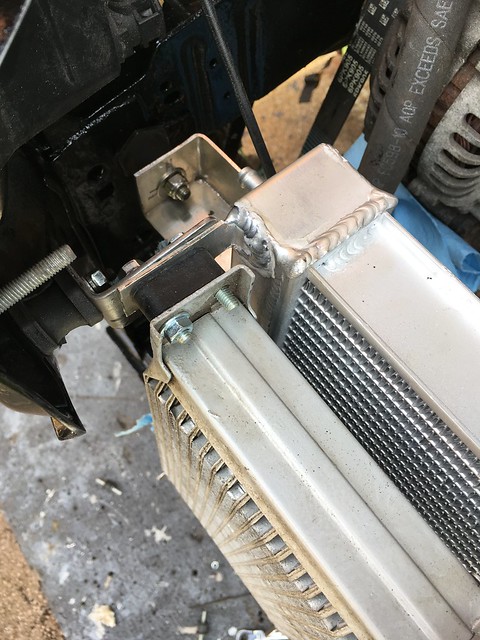
Not the best pic, but the side brackets were done as a little box shape, and fitted to the crossmember pillar with a rubber bobbin. The oil cooler was mounted with a two way bracket, using a Mocal bobbin - one bracket from the rad, and one from the back of the headlight panel.


Header tank courtesy of Merlin Motorsport (I think) - plenty similar about though.


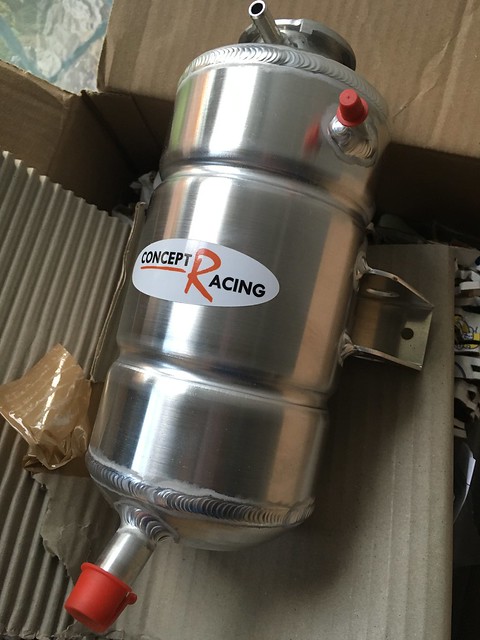
I wanted to mount this somewhere on the bulkhead, ideally on the scuttle panel part with a nut and bolt, or if push came to shove on the bulkhead itself using a rivnut fitting. I was worried about drilling through the bulkhead with having an interior on the other side still intact, but as luck would have it I could just squeak it on the scuttle panel, and still have clearance under the bonnet.


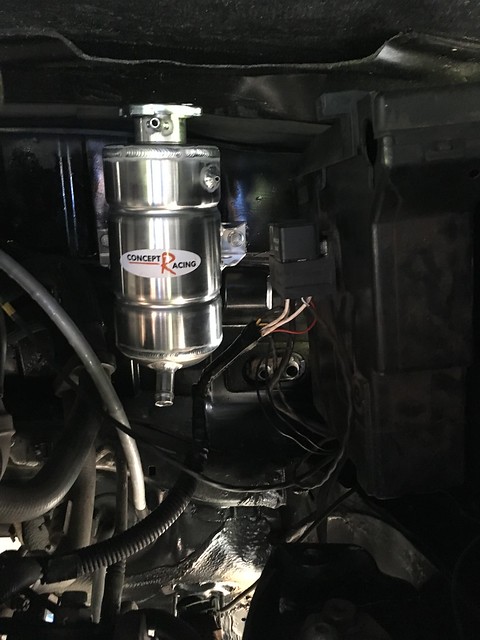
All the way though mounting these things I was careful to use either a purpose made bobbin or make my own with hose material so there's some isolation from the bumps and vibration.


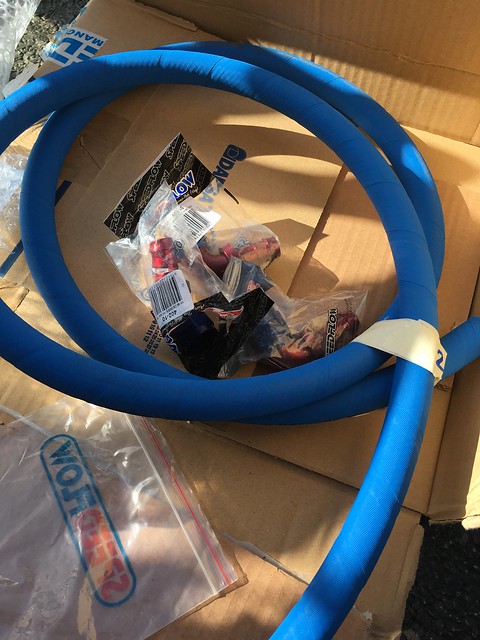
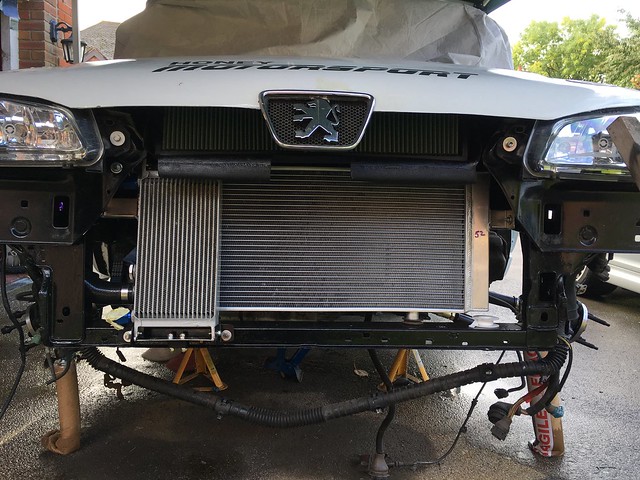
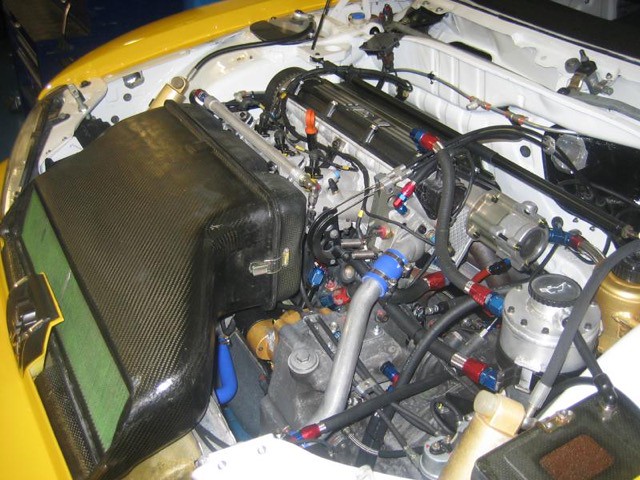
On to the hoses. Both the main hoses were 38 to 32mm reducers. A 90deg for the top, and a 45deg for the bottom.


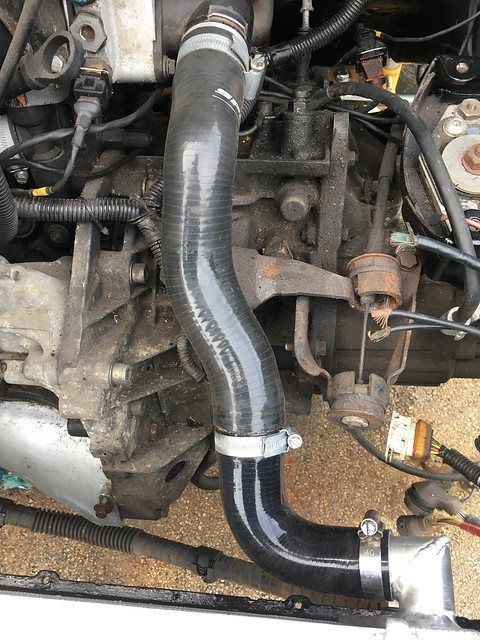
As you can see I already had Spoox hoses fitted, so I made the most of those and just trimmed everything to fit, and with a few alloy hose joiners and some stainless jubilee clips I was sorted.

I tee'd the header tank into the heater matrix feed using a nylon y pipe, and rather flukily a left over Cossie Roose motorsport hose with just the right sequence of bends and diameter changes.


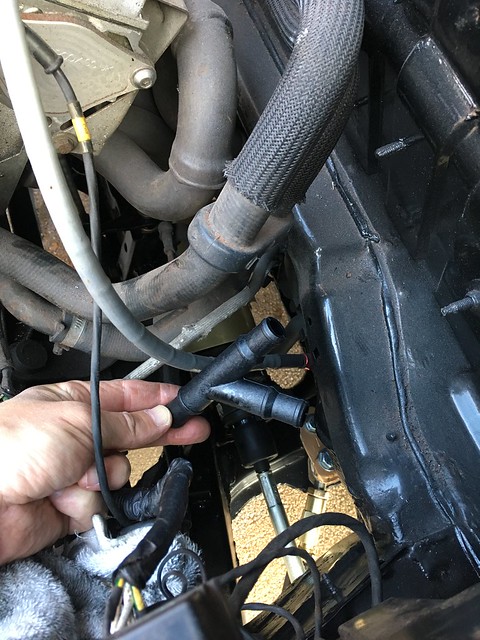
Here I have cut the rear-most matrix hose. I replaced the last bit of hose which mates with the steel pipe, with part of the Roose hose but only because the condition of the original wasn't great - got lucky with the diameter change to mate with the Y pipe. And the Roose hose also donated a perfect bend to the header feed.

I just need to plumb the overflow return to the rad to finish. So all in all, a few bits and bobs and a bit of fab needed to adapt the 205 rads, and inevitably the costs rise accordingly. Still cheaper than custom rad options and a bit of fun along the way.

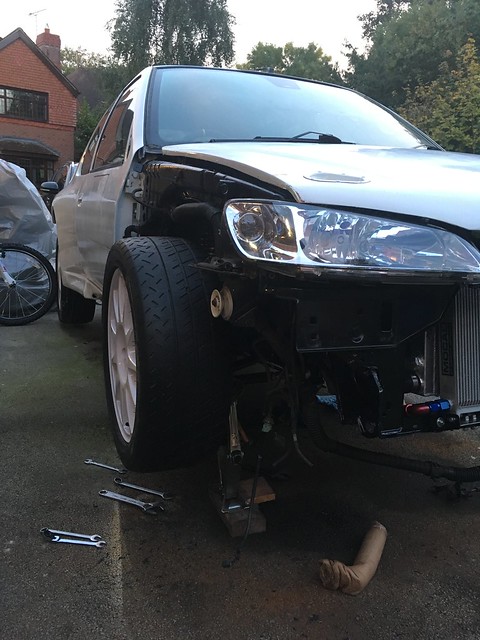
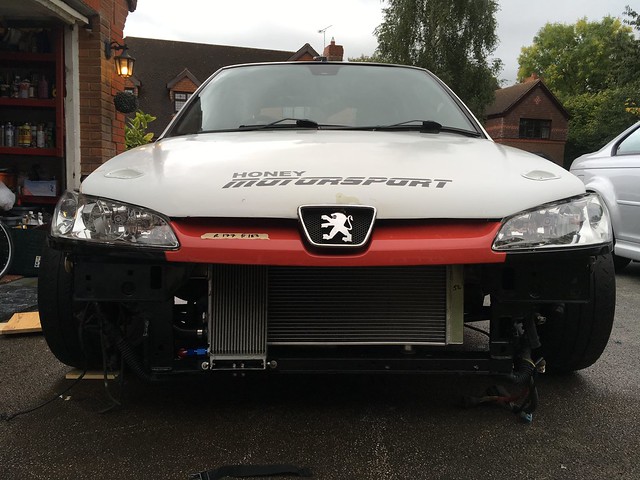
As you will have seen I did the whole rust-proofing business on the front crossmember, then painted the top coats, so that's all good. I've also put the whole front subframe assembly on the other week.

It was half built up, so pretty weighty. I wasn't about to lie on the ground and lift it up. The jack came in handy and it all went surprisingly smoothly.


Finally got to use my lovely brand new subframe mounts!


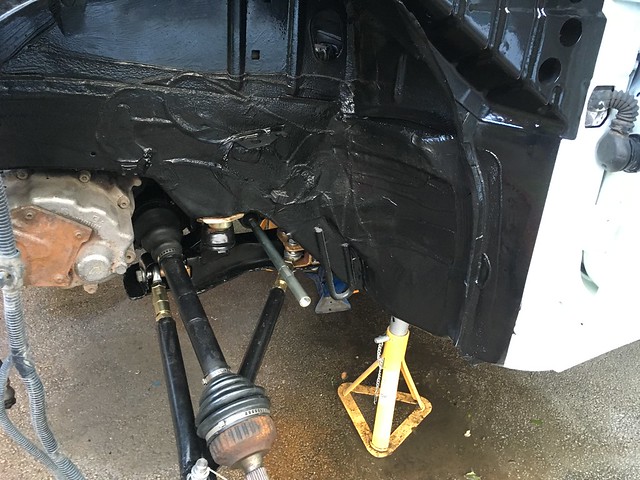
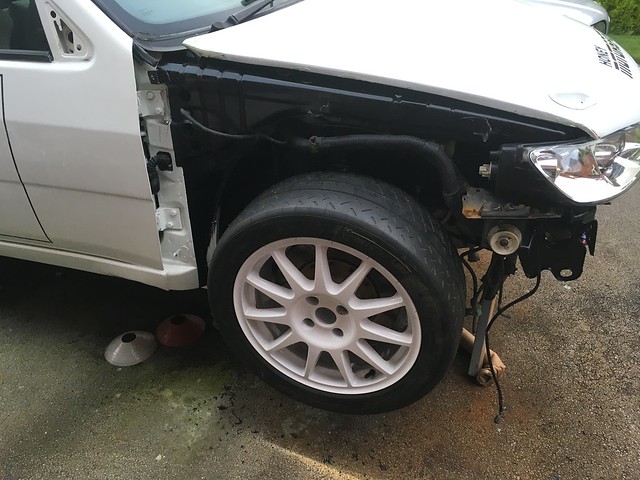
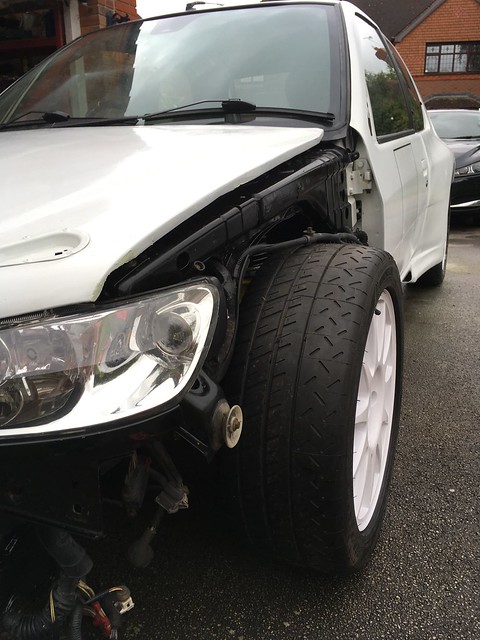
Fully home. Driveshafts in, just need to centre the rack and the steering wheel and connect the steering column coupling. Tidied up the arch paintwork etc also.


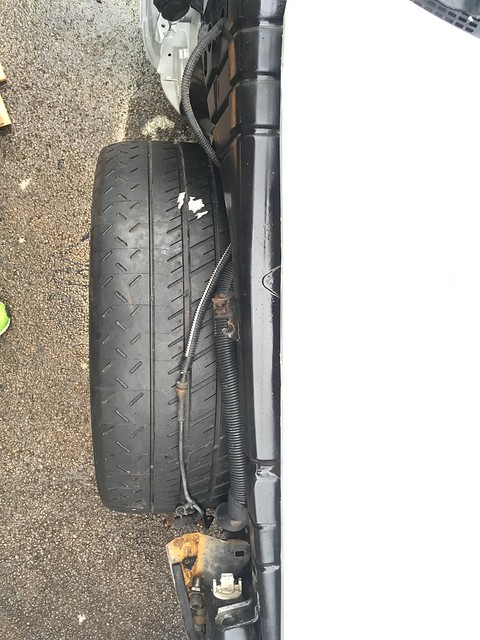
Here you can see the driveshaft extensions spliced in. If I've got my maths right (correct length) I'll follow up with some proper custom shafts, as I don't think extensions like this are a long term solution.

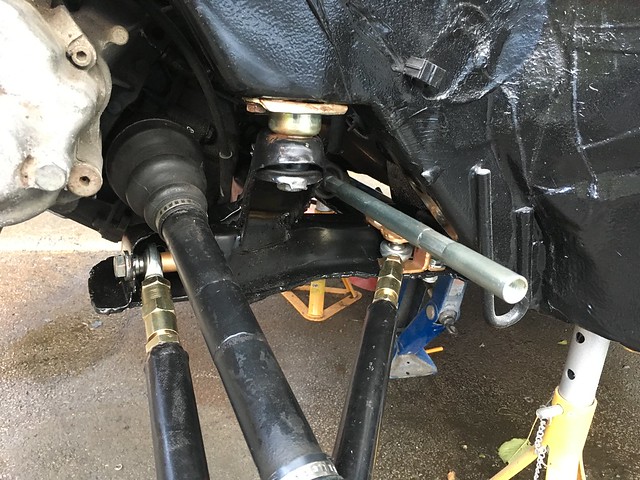
Uprights loosely bolted in place with steering rack extensions. Using OEM TRE's, and don't forget these are GTI6 track rod arms instead of the shorter VTS ones.

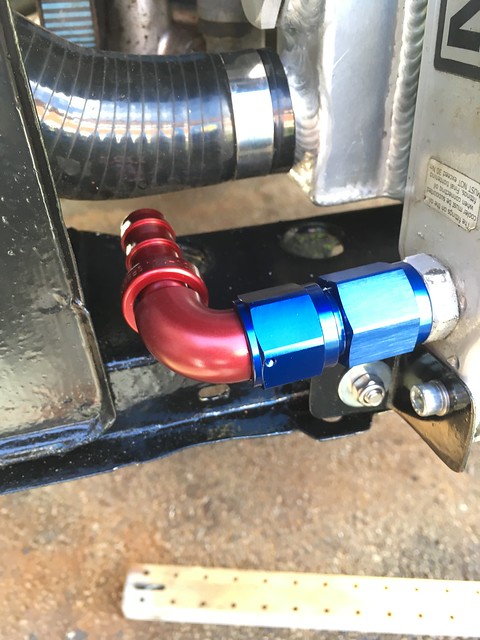
If I get the chance in the coming days I'll build up my front coilovers and fit them, and build up my front brake bells and rotors. Also I'm hoping my new oil cooler hoses and fittings will arrive so I can finish my cooler. Hoses and fittings for the PAS lines are also on their way, and if I can track down some bits I've put "somewhere safe" I have half a chance of doing those too. (Proving elusive tho!)

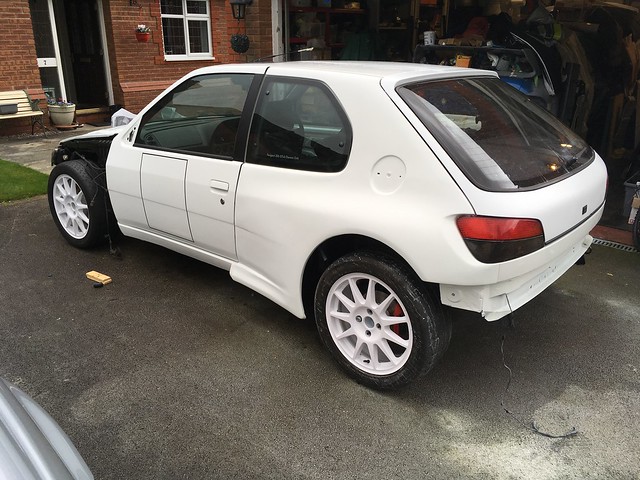
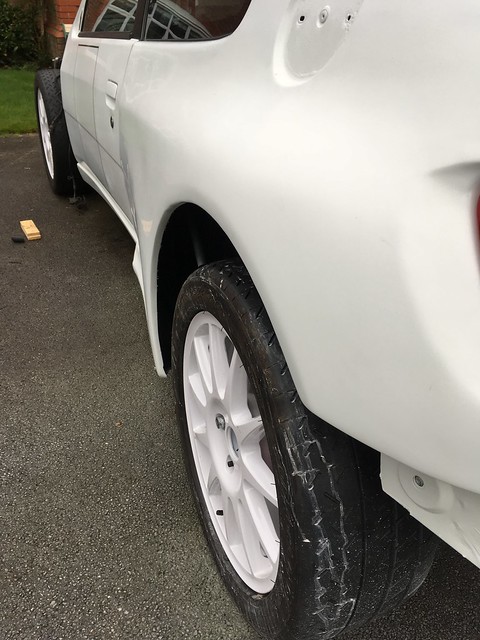
It's getting there, and for sure the temptation will be to stick some wheels on and lower it down, but I've still to finish brake lines, front bodywork, so I'll leave it in hover mode for now.

Cheers
Iain
Posted 28th Sep 2017 at 22:34
RallyeRed

Regular

Location: Northwich

Registered: 03 May 2016

Posts: 353

Status: Offline

Post #183
oh, and my Green cotton panel filter has just landed;

Posted 28th Sep 2017 at 22:34
Day666

Seasoned Pro

Location: Bristol

Registered: 20 Apr 2013

Posts: 5,209

Status: Offline

Post #184
I’m not sure if everyone’s aware or maybe they are Iain ?....Carl uses the same fully Alloy 6 (Ebay) Rad as me with Longman inlet which has a expansion tank built in plus is only a little lower than the 6 one Thumbs up

You don’t need a superlow 205 Rad to fit a Maxi Airbox ....you need to cut out the slam panel plus ....Use the correct length
Jenvey or Omex with the correct length inlet with correct curve

I had to sell my Maxi Airbox to Carl only because my one off Satchel inlet is almost straight / no way of fitting it Crazy

PS ...It’s looking Amazing Iain Thumbs up
Posted 28th Sep 2017 at 23:26
RallyeRed

Regular

Location: Northwich

Registered: 03 May 2016

Posts: 353

Status: Offline

Post #185
Cheers Damo - only time will tell how the airbox offers up, but I'm pretty sure it'll only take a bit of composites fun to get it fitting right if it needs adjusting! With the slam panel already cut, and everything done rad-wise there's no way back now Shock
Posted 29th Sep 2017 at 09:16
birk

Seasoned Pro

Location: Doncaster

Registered: 24 Oct 2005

Posts: 7,032

Status: Offline

Post #186
quote:
quote:
[quote="RallyeRed"][quote="birk"]What wheels you going for ?


Whats the score with your Dimma these days? Is it up and running and being used or are you working on the turbo conversion still?

Cheers
Iain


Iain,

Forgive my late reply, I don't look on here as much as I used to.

But the Dimma is waiting on a lot of custom items for the engine, mainly the inlet manifold and to modify the exhaust manifold because I wasn't happy with how the turbo and wastegste sat, then after that I've got to figure out how my clutch will work, get an intercooler, rad and pipes made up, fit and map the ecu, strip and rebuild the car again haha

I just wish it was sat in my garage so I could work on it, it's all out of my hands at the moment 😞

________________________________________

Dimma + Gt35 turbo = Ninja
Solid rear beam mounts £130
07889376885
Dan
Posted 29th Sep 2017 at 09:47
RallyeRed

Regular

Location: Northwich

Registered: 03 May 2016

Posts: 353

Status: Offline

Post #187
That's rough mate. Whenever my last project car went away for some work it became very easy to lose the love when it's out of sight. Keep the faith mate!
Posted 29th Sep 2017 at 13:10
Day666

Seasoned Pro

Location: Bristol

Registered: 20 Apr 2013

Posts: 5,209

Status: Offline

Post #188
quote:
[quote="RallyeRed"]That's rough mate. Whenever my last project car went away for some work it became very easy to lose the love when it's out of sight. Keep the faith mate!


100% agree plus same here ....but my Loves back again ....but skint Thumbs down
Posted 29th Sep 2017 at 13:42
birk

Seasoned Pro

Location: Doncaster

Registered: 24 Oct 2005

Posts: 7,032

Status: Offline

Post #189
Whole heartedly agree, it's so frustrating having to wait on other people. The cage guy took 6weeks and now it's stuck with the exhaust fabricator 😞

I hope I get the love back when the car returns.

I'll need to decide on the respray colour also, because it needs a full strip down ha

________________________________________

Dimma + Gt35 turbo = Ninja
Solid rear beam mounts £130
07889376885
Dan
Posted 29th Sep 2017 at 17:52
RallyeRed

Regular

Location: Northwich

Registered: 03 May 2016

Posts: 353

Status: Offline

Post #190
ooh respray colour... that's a tough one to wrestle with.
I wanted to go white for the rally influence, but was a big fan of the french blue you see on Fiat Pandas, and also a mid-grey colour.
Then again, that'll be even more weeks away out of sight - but at least it'll be worth looking at when it returns Smile

Had a bit of time on the car today. My Speedflow stuff arrived. Looks good - checked out a few fittings and I think I've got all the right ones.


Finally tracked down my PAS fitting. My weld on boss looks like it will fit all right, so will get that tigged on rather than mig it myself.


Thought I'd take a look and see how the air filter might fit. The filter isn't far out - need to trim the recess in the air box a fraction to make it fit properly.


Offered up the air box in roughly the right position, and I wouldn't want my rad to be much bigger I think!


Might even need to trim the edge of my oil cooler a bit!


I had the time to build up my coilovers today as well, then suddenly this happened..


Very loosely fitted right now as I don't have any reference points on the front end to know whether I've got this in the ball park yet. Seems 'girthy' enough right now though! Got the other side on as well, but it's a cheap win really. Still need to bolt together my rotors properly and callipers, brake hoses etc.

Best not think about it as the list is getting longer each day. Cross one off, add two. You know how it goes..

Cheers
Iain
Posted 29th Sep 2017 at 22:11
demondriverdan

Seasoned Pro

Location: Londinium

Registered: 29 Nov 2010

Posts: 2,665

Status: Offline

Post #191
See when I look at that air box I can't see how it'd fit with a 306 rad, even the slightly smaller one that Damien and Carl run.

Iain, did you get the air box from Maxi Motorsport? I'm thinking about getting one of their GRP ones.

________________________________________

Rallye Race Car
Posted 29th Sep 2017 at 22:49
RallyeRed

Regular

Location: Northwich

Registered: 03 May 2016

Posts: 353

Status: Offline

Post #192
That's what that air box is Dan.
Not the most accurately built thing though, but fit for purpose.
I do see that the exact dimensions/angles of the inlets & TB's will certainly influence what clearance looks like though.
There's no way it's compatible with a 306 rad tho. The rad definitely needs to be lower to some extent.
Posted 30th Sep 2017 at 07:36
blandy

Seasoned Pro

Location: Bucks

Registered: 25 Feb 2007

Posts: 2,437

Status: Offline

Post #193
what inlet do you have on your bodies out of interest?
Posted 30th Sep 2017 at 09:23
Day666

Seasoned Pro

Location: Bristol

Registered: 20 Apr 2013

Posts: 5,209

Status: Offline

Post #194
quote:
[quote="demondriverdan"]See when I look at that air box I can't see how it'd fit with a 306 rad, even the slightly smaller one that Damien and Carl run.

Iain, did you get the air box from Maxi Motorsport? I'm thinking about getting one of their GRP ones.


My Rad sits lower plus is 3inches lower than a stnd 6 rad ...The front of the curved lip of the Airbox is designed to sit plus nearly touch the Rad ...if it’s out to far the airbox is at its thickest so that’s why people are using 205 type rads ...you need short Jenveys like Mei / me Have plus a correct length Inlet with correct curve ...from looking at Iain’s Picture if temp fitting it ...it’s designed to go back towards the engine by 3inches ...I don’t think Iain can because his TBs are to long ?

Basically the slightly narrowest part of the Airbox is by the filter underneath / that should be back more / not sticking out so far ..your TBs will probably restrict this as they are standard length Whistle


PS ...beware Maxi Air Boxes increase Induction noise substantially / some tracks you won’t get away with it on drive bus ...speak to Carl about this two people I know had issues
Posted 30th Sep 2017 at 22:46
blandy

Seasoned Pro

Location: Bucks

Registered: 25 Feb 2007

Posts: 2,437

Status: Offline

Post #195
mmm was hoping if anything it would be quieter being more enclosed but if thats the case be no good as i want quieter
Posted 30th Sep 2017 at 11:02
RallyeRed

Regular

Location: Northwich

Registered: 03 May 2016

Posts: 353

Status: Offline

Post #196
oh yes, definitely not a quieter option - we have a carbon CSL air box on my wife's M3 and that was done deliberately to liberate some induction noise (among other things).

Until I get the back panel of air box on, I won't know for sure how far it'll all stick out or fit. Until I fit this I won't know with the back of the rear part of the box sitting on the inlet how far the front will go. My pic is based on a rough measurement I took just to have a look.

If you look at some of the below, I would say mine won't be further than these;


Posted 30th Sep 2017 at 12:51
RetroPug

Seasoned Pro

Location: Leicestershire

Registered: 15 Jan 2013

Posts: 2,473

Status: Offline

Post #197
Absolutely love this project!

________________________________________

61k miles Ph.1 Diablo '6 Project Thread
Posted 30th Sep 2017 at 13:06
RallyeRed

Regular

Location: Northwich

Registered: 03 May 2016

Posts: 353

Status: Offline

Post #198
Cheers mate Smile

Mean't to add yesterday, when I fitted everything up on the wishbones, uprights etc, I have good tire to coilover clearance, and good clearance from brake disc to ball joint (or bearing in my case). It is odd that Oli for example had a right trauma with coilover clearance with his, but i have no issues. I'm sure there still a few speed bumps ahead tho, these things seldom come together straight away.
Posted 30th Sep 2017 at 13:35
RallyeRed

Regular

Location: Northwich

Registered: 03 May 2016

Posts: 353

Status: Offline

Post #199
quote:
[quote="blandy"]what inlet do you have on your bodies out of interest?


Sorry mate missed this one earlier; mine are a Satchell-esque OEM manifold cut and shut. Not sure of the original origin.
The rest of my set up are OEM fuel rail and Jenvey 50's.

This is how it looked originally - maybe this will give some point of reference in front of the Nissens rad for how far it projects?

Untitled

Your rad and cooler set up looked great - why do you want to change it back?

Iain
Posted 30th Sep 2017 at 13:44
RallyeRed

Regular

Location: Northwich

Registered: 03 May 2016

Posts: 353

Status: Offline

Post #200
Touchdown!

Not a lot to report other than I did a bit more this afternoon, then thought what the hell, I'll put it back down on the floor for s**ts and giggles..


Unfortunately though, whilst this will be no stanced show queen, the back end is a little high still - and this is with a spare gearbox in the boot as well:


[url=https://flic.kr/p/BW2RDb]
[/url]

What you can also see is a 50-60mm difference in track width at the moment also. The front being a fair bit wider. I know I'll need a spacer of some sort to bring the back out a bit, but I don't know precisely by how much at this point.

Obviously I can wind the front width in and out to my hearts content with the adjustable wishbones, but at the moment I am lacking any reference points to put the wheels in the right place. I've centred the rack for now.

I also realised straight away I've set the front too low, which will also have a bearing on how the back will sit when it's sorted, although I guess the rear will still need lowering. My wishbones are below parallel right now.

I used the 185-285 dual rate springs, but the first section is fairly compressed already. I also had some 220-320lb springs made up, so I will swap to them straight away, and wind the collars up the damper tube a bit to lift the front up something like 10-15mm.

I get the feeling I'll be regularly pulling all these bits apart and putting them back together again for some time. It'll be back on the chassis stands in no time!

Overall, still loads to do. Putting it down on it's wheels felt like a cheap win, but actually it's turned into a fairly useful exercise. When Dave's sorted the front wings, I'll immediately have a visual reference for ride height, track width, camber and castor. I'm also going to refer back to the gpA build sheets for the set up info and see how I compare.

Cheers for now
Iain
Posted 1st Oct 2017 at 20:36

Pages (11): first .. 7 [8] 9 .. last

All times are GMT. The time is now 11:07

The Peugeot GTi-6 & Rallye Owners Club - ©2024 all rights reserved.

Please Note: The views and opinions found herein are those of individuals, and not of The Peugeot 306 GTi-6 & Rallye Owners Club or any individuals involved.
No responsibility is taken or assumed for any comments or statements made on, or in relation to, this website. Please see our updated privacy policy.