Post #226
quote:
[quote="jonbb"]Hola felicidades por el maxi. Me podrías ayudar con lo de la suspensión pivot etc? Las copelas las has movido? Tienes separadores?
estás publicando en español


|
| Author | Subject: 306 Maxi project |
|
Seasoned Pro  Location: Bristol Registered: 20 Apr 2013 Posts: 5,206 Status: Offline |
Post #226
quote: [quote="jonbb"]Hola felicidades por el maxi. Me podrías ayudar con lo de la suspensión pivot etc? Las copelas las has movido? Tienes separadores? estás publicando en español |
|
|
|
|
Newbie  Location: pamplona Registered: 01 Jul 2017 Posts: 21 Status: Offline |
Post #227
Perdón es que no se inglés. Perdoname |
|
|
|
|
Regular Location: Northwich Registered: 03 May 2016 Posts: 353 Status: Offline |
Post #228
quote: [quote="welshpug!"]no need to cut the abs loom, its all self contained and you just need to remove it. Thanks Mei. Any ideas what the other plugs are? Cheers Iain |
|
|
|
|
Newbie Location: pamplona Registered: 01 Jul 2017 Posts: 21 Status: Offline |
Post #229
excuse me I do not know English and the previous times that I translated do not understand me. That's why I thought to write in Spanish and to have if you met with the translator translated it well and you understood me. |
|
|
|
|
Regular Location: Northwich Registered: 03 May 2016 Posts: 353 Status: Offline |
Post #230
Loads of stuff has arrived so far this week.First up, maxi rear bumper from AC Sport in grp. Quickly offered up this afternoon; 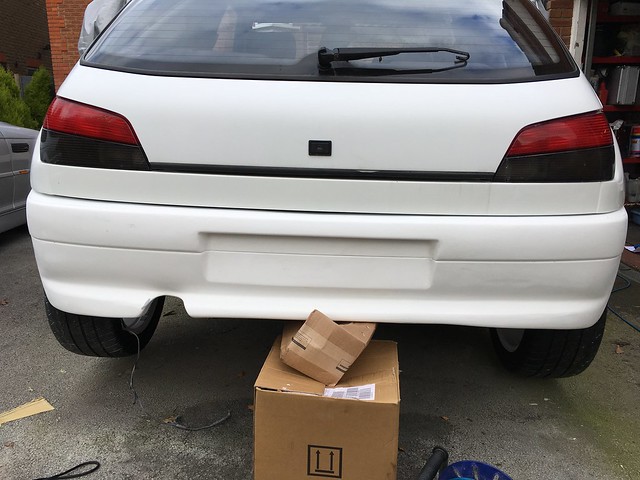 Some brackets in the making; 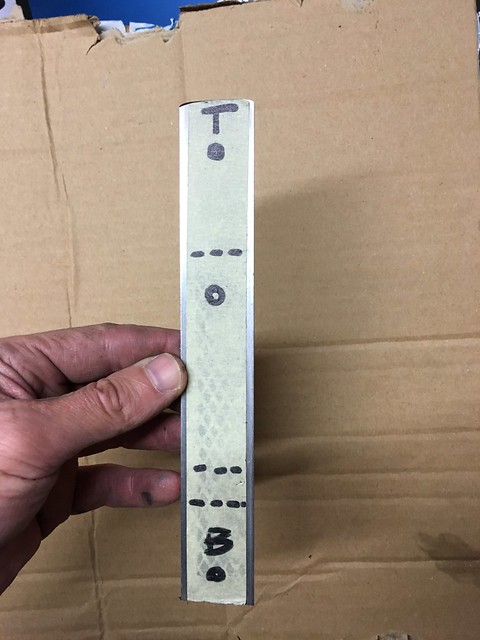 [url=https://flic.kr/p/212UPKY] 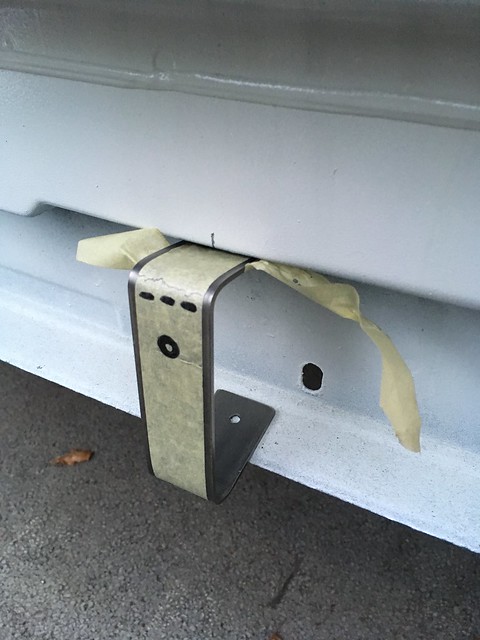 [/url] [/url]They have a captive nut welded on the back. Once I painted them and riveted them in place, I could fit the bumper just using these little a/k bolts. 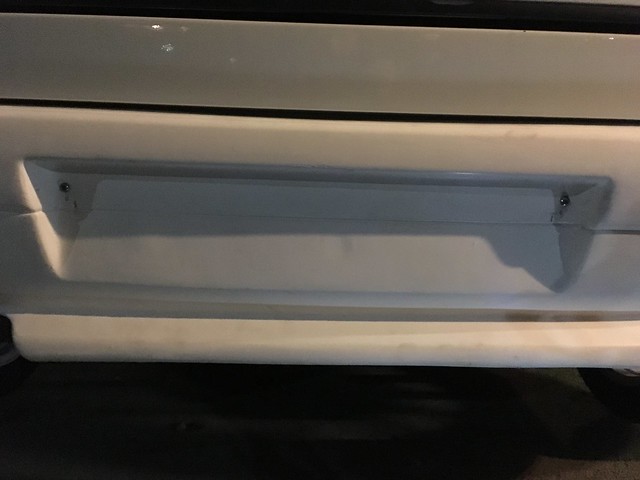 Happy: 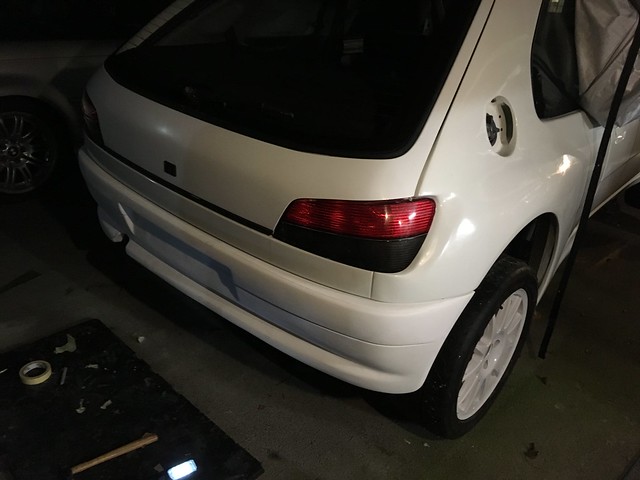 I'll use the holes in the side panel behind the arch where the OEM bumper attaches, to make up some sort of side fitting. I'll use these counter sunk a/k bolts to attach the bumper here.  The aim is to be able to take the front and rear bumpers off with 4-6 easy to reach a/k bolts. I'm happy to have external bolts on a build like this. More to follow in a mo. Iain |
|
|
|
|
Seasoned Pro Location: Bristol Registered: 20 Apr 2013 Posts: 5,206 Status: Offline |
Post #231
Looking great Iain ...keep the updates coming m8 .... |
|
|
|
|
Regular Location: Northwich Registered: 03 May 2016 Posts: 353 Status: Offline |
Post #232
Also scored myself a radiator diffuser. Not sure how I'll fit this yet. Could make a small frame across the rad to hold it (and maybe the fan?) or might see how it interacts with the front bumper and see whether it can be retained within that. Either way I was keen after scaling down the dimensions of the rad to use a diffuser to maximise it's effectiveness.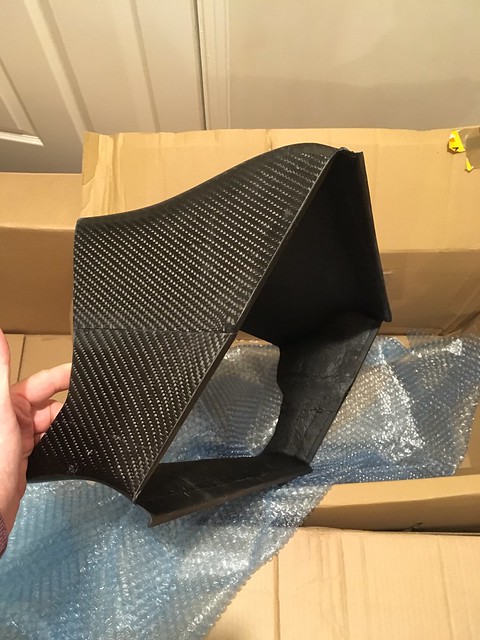 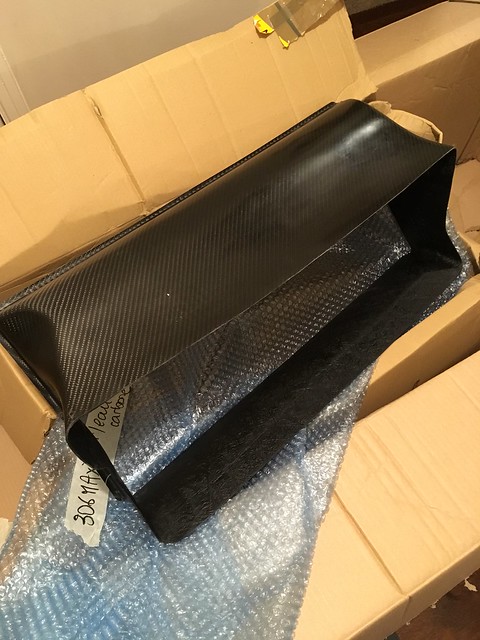 And a rear spoiler; 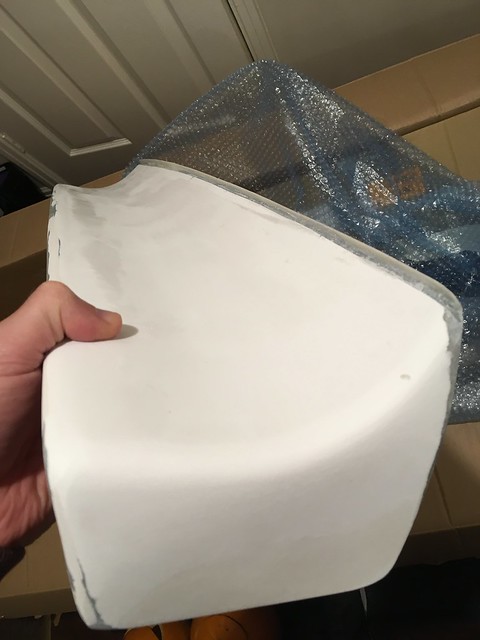 I bought the GRP one, but was pleasantly surprised to see thick carbon blades for the spoiler supports. 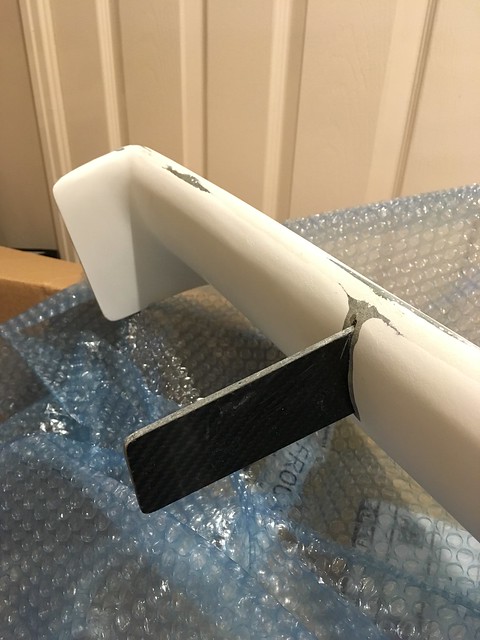 It also has really thin lip on the trailing edge. 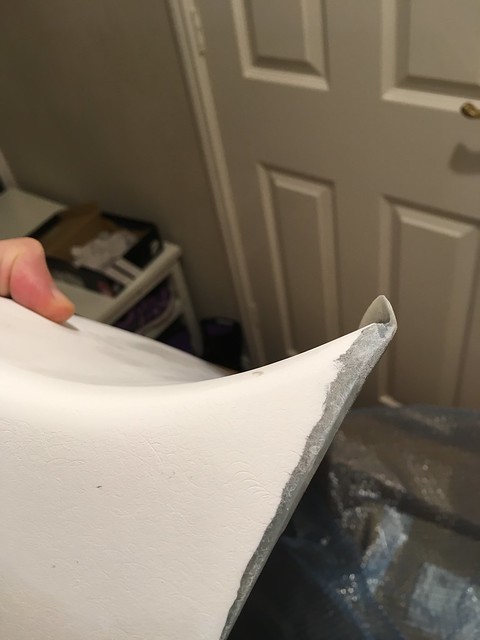 All of this was from AC Sport. I don't have the same products from MC Racing, but would say they're broadly comparable with the other stuff I've had from MC Racing. The main difference is the last order from MC Racing took about 4 months, and this one from ACS took just under half that. |
|
|
|
|
Senior User  Location: Saxtead Registered: 16 Dec 2008 Posts: 810 Status: Offline |
Post #233
I always fpunf Flo very helpful with orders from AC sport. She was always nice to talk to on the phone to sort stuff out.Does the rad diffuser offer up much to the 205 sized rad? It was on my shopping list to get one myself as soon as I relocate my oil cooler. |
|
|
|
|
Regular Location: Northwich Registered: 03 May 2016 Posts: 353 Status: Offline |
Post #234
I'll need to check that Martin - I've still got the front bumper slaved on!Outside chance I might get to it to have a look on Monday.. |
|
|
|
|
Regular Location: Northwich Registered: 03 May 2016 Posts: 353 Status: Offline |
Post #235
Still haven't got to looking at the rad diffuser yet, sorry Martin. For my own benefit I still need to check fitment, and next steps. You'll have seen where my oil cooler fits, so I think I'll be lucky if I can use this diffuser exactly as intended without having to trim it to go around the cooler. If I end up going in that direction, I'm tempted to mould it, and incorporate a little extra width down that side so I can fully envelope the oil cooler as well, then sell this one on. I'll see in due course, but time is pretty precious on the car at the moment due to weather, light, and massive working hours etc. (the usual!) Cheers Iain |
|
|
|
|
Regular Location: Northwich Registered: 03 May 2016 Posts: 353 Status: Offline |
Post #236
Well I'm still alive and have just about managed to keep moving on despite a busy time at work.I decided to mold the bumper. I wanted to do this to a) get a proper return in the edge of the wheel arch in order to be able to mount a mudflap, and  to make a kevlar one rather than GRP. to make a kevlar one rather than GRP.Inevitably the moment I had some time to do this it started raining, so the good ol easy up came out again. 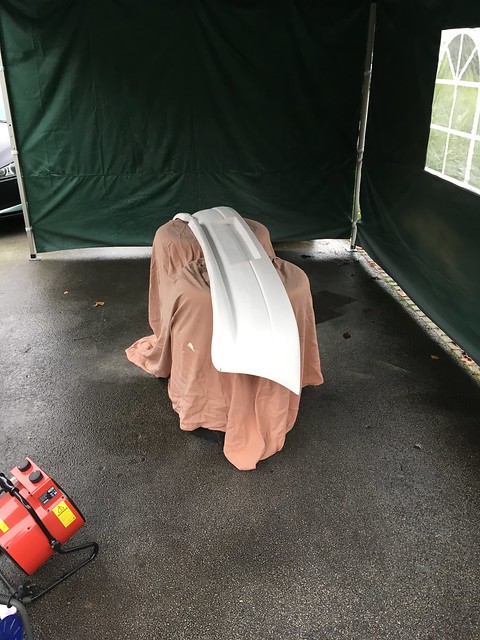 Did loads of sanding and surface prep, but pretty much ended up taking the whole day. Then a million coats of mold release wax. I think that was it for the day.. 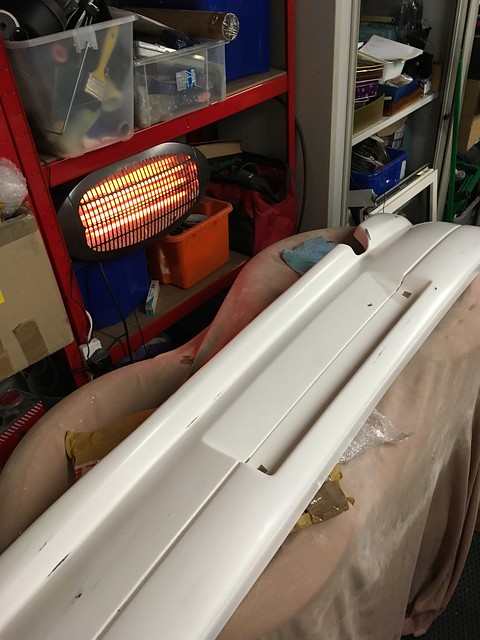 I then made some wheel arch returns for the mudflaps using plastic board and foil tape etc. 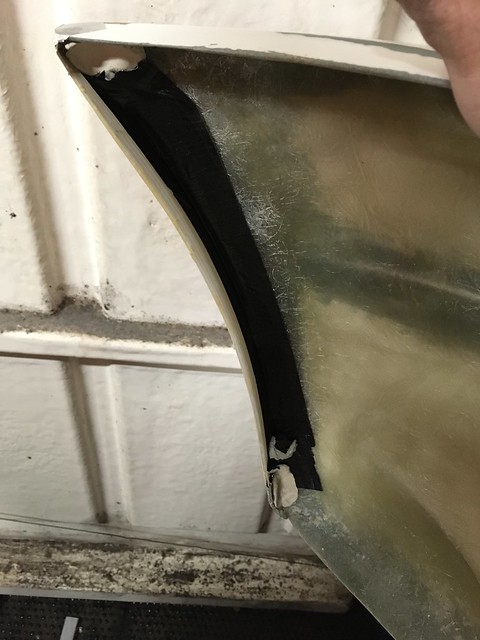 Then I made the flanges for the mold. The mould will be in three pieces due to the arch returns preventing one piece being pulled from the mold when a bumper is laid up. 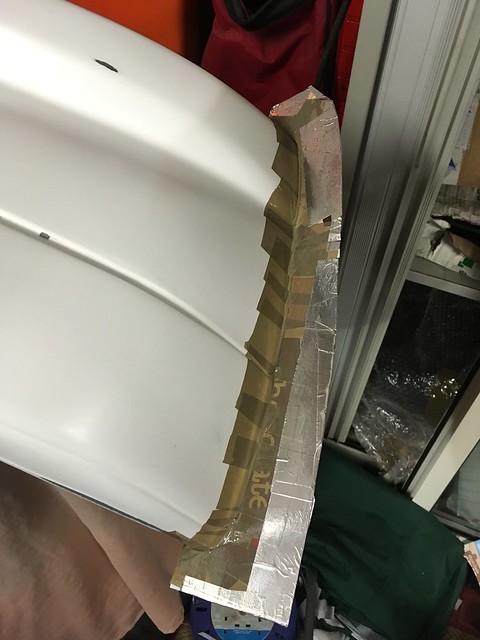 Gel coat on - this is white with red pigment in it, so I could see where I was going on the white bumper, and then will benefit in reverse when I lay one up in white using this mold.  Partway through layering up the chopped strand matting. Used 300gsm first then 600gsm. It was a total s**t fight of cutting, layering, weighing out resin, rolling etc etc. Ended up taking hours and hours. Until you've done it, you have no idea what a PITA in the arse it is doing this. Took me hours and hours. 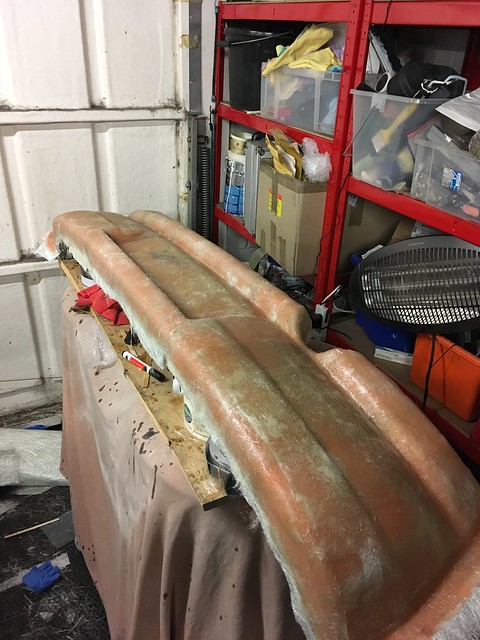 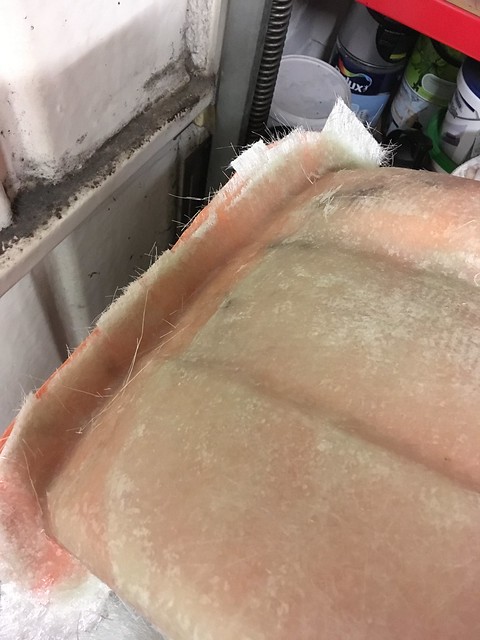 I've then left this for a week, and come back to do a bit more today. I did one of the arch return sections, and also added some more strengthening to the main part in case it needed it, by glassing in some lightweight steel tubes I had lying around. 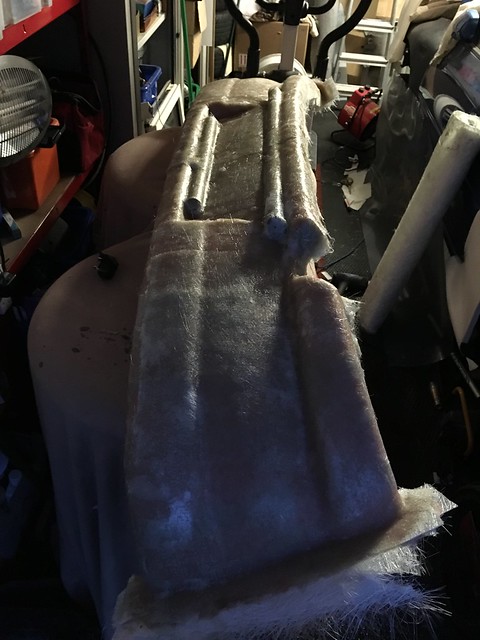 Hopefully tomorrow I can do the other arch return section, then once the smell of the resin has died down (couple of days) bring the whole thing in the house, where I can leave it for a week to really go off. Having inspected it, I already know the mold won't be perfect, as I can see the odd lift here and there (about the size of a 5p piece) near some of the edges, which hopefully I can rectify with a bit of work after I've popped it off. (Fingers crossed) New diff also came today. Purchased little used. Is a Bacci Romano plate diff, the same make as my 5.2 CWP, so will go in my new box. Got it for a third of the price of a new one, so happy with that. 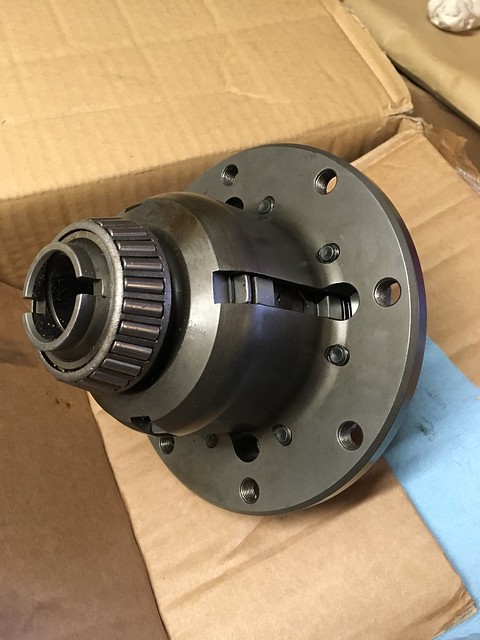 That's all from me for now. I'll report back when I've popped the mold! Although if you don't hear from me, you know it's all gone badly wrong  cheers Iain |
|
|
|
|
Seasoned Pro  Location: DoncastAAAAARGH Registered: 13 Jan 2008 Posts: 4,637 Status: Offline |
Post #237
Nice update. Really interesting watching this progress and how you go about making molds etc. ________________________________________ Goldie the track car. |
|
|
|
|
Regular Location: Northwich Registered: 03 May 2016 Posts: 353 Status: Offline |
Post #238
Thanks Steve. The mold making is far from a how to though - it's more of a 'how I did' which depending on how they come out, may be two completely different things! I think I came out of the garage with as much fibreglass on me as the mold  |
|
|
|
 Location: Leeds Registered: 20 Aug 2005 Posts: 8,878 Status: Offline |
Post #239
Haha its a bit like being tared and feathered  Good work iain ________________________________________ Proud Member of the ASTOR Owners Club |
|
|
|
|
Regular Location: Northwich Registered: 03 May 2016 Posts: 353 Status: Offline |
Post #240
Ha- it's like I said to you last week Dave; I came out looking like a yeti! Had to bin the top I was wearing as I wouldn't have dared put it in the washing machine |
|
|
|
|
Senior User  Location: heswall Registered: 27 Jun 2014 Posts: 623 Status: Offline |
Post #241
nice bit of progress iain ,keep it up mate________________________________________ wayne mcardle |
|
|
|
|
Regular Location: Northwich Registered: 03 May 2016 Posts: 353 Status: Offline |
Post #242
Update time. Popped the mold on the weekend.It was a fighter and didn't give it up easily, but got there in the end. First thing I did was drill holes in the flanges for the different sections. 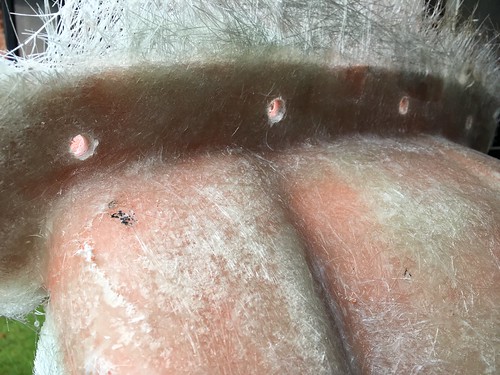 I then gradually started flexing the sides and the joins, and getting some satisfying clicks and cracks as the adhesion between the gel coat and the plug bumper released. Eventually I got one the end sections off, and from there it was plane sailing. 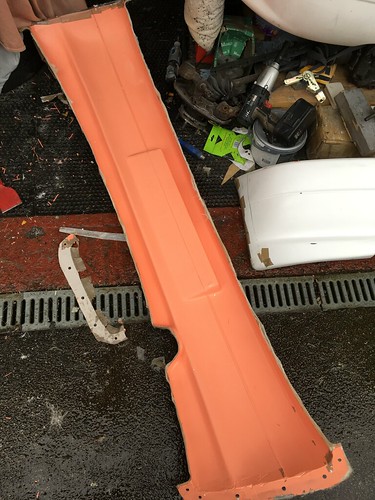 Checking the fit of everything after it was all released from the plug. Looked pretty good. 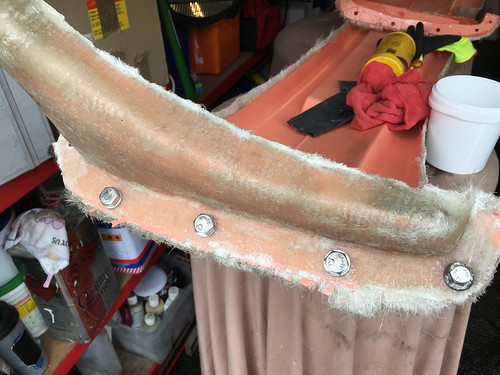 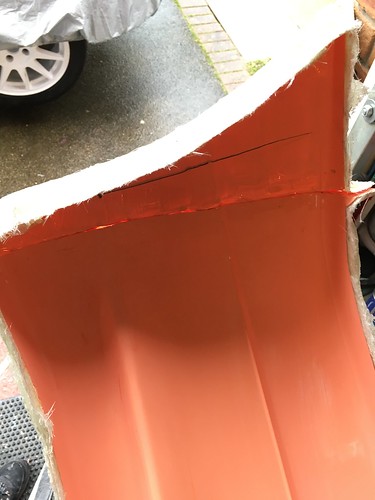 Pleased to say the returns on the arch lip that I built into the mold have survived and turned out pretty well. These will provide a sturdy edge for mounting a mudflap that didn't exist on the original. The mold's not perfect, so I've touched up a few little bits with gel coat, and once that's gone off, will wet sand and polish in much the same the way you would for a top coat of a fresh coat of paint on the car. Hopefully over Christmas I can break the mold in, and maybe even get a bumper done. My aim is to do a bumper before Dave does his wings, heh heh! Cheers Iain PS This isn't a how to - follow at your peril (maybe) - it's just a how I did it |
|
|
|
|
Seasoned Pro  Location: Londinium Registered: 29 Nov 2010 Posts: 2,665 Status: Offline |
Post #243
Looks great! Where do you get your Bacci parts from? A 5.2 CWP would be nice  ________________________________________ Rallye Race Car |
|
|
|
|
Regular Location: Northwich Registered: 03 May 2016 Posts: 353 Status: Offline |
Post #244
I just got lucky Dan. Perhaps a bit of Wayne's luck rubbing off on me. In fact I think the CWP was on eBay and it was Wayne that tipped me off, and the diff was on a rally parts for sale Facebook group. The diff is 1500E new, was advertised at £600 and I got it for £500, so pretty happy with that. The CWP was pretty expensive new, but I got it for another very good price.I have a spare, newly rebuilt gearbox, so both will go into that, which will see me with a very nice box for not a lot of money My aim is to get the box re-built soonish, then once I get the car rolling on it's wheels I'll run it up to my mates place for an MOT and get them to whack the box in for me and check the clutch over. I don't really want to run the car far with the existing box in. Not because there's anything wrong with the box, just that with 645 dia tires I really want the 5.2 and the diff. I think it will make a massive difference, and I know it won't be close to the finished article without. |
|
|
|
|
Regular Location: Northwich Registered: 03 May 2016 Posts: 353 Status: Offline |
Post #245
Not an update as such, but after the photo bucket disaster that befell every thread on any forum ever, I've just gone through all the earlier stuff in this thread and re-done the pics with Flickr links. Hopefully all present and correct now.Cheers Iain |
|
|
|
|
Seasoned Pro  Location: guildford Registered: 15 Aug 2009 Posts: 2,376 Status: Offline |
Post #246
Well done Ian, I had to restore my project thread . Well done on the progress mate.________________________________________ Super high boost Completed, destroyer of gearboxes and 160mph club |
|
|
|
|
Regular Location: Leeds Registered: 12 Feb 2011 Posts: 276 Status: Offline |
Post #247
How much gelcoat did you use on the bumper? I'm about to start moulding a citroen ax bonnet and I'm wondering how much I need to mix up. Just need to filleting wax the flanges then I'm good to go.________________________________________ Ph1 Cossack 6' |
|
|
|
|
Regular Location: Northwich Registered: 03 May 2016 Posts: 353 Status: Offline |
Post #248
Mm good question! I can't remember to be honest. I certainly remember throwing some away that I mixed and didn't need, but I did two of the sections, before doing the third (one of the returns) on a different day, so I probably wasted some on both occasions. It's not loads - it's basically going on like a coat of household gloss paint. Dave or Wayne might be able to tell you how much you need for a bonnet - they've both done them. Cheers Iain |
|
|
|
|
Regular Location: Northwich Registered: 03 May 2016 Posts: 353 Status: Offline |
Post #249
Quick update from me today; first time since last Tuesday I've been well enough to entertain doing any work on the car - had a bug all Christmas  Thought I'd start steady and replace the springs on the coilovers to the newer spec ones I think I've mentioned before. I've now gone to these; 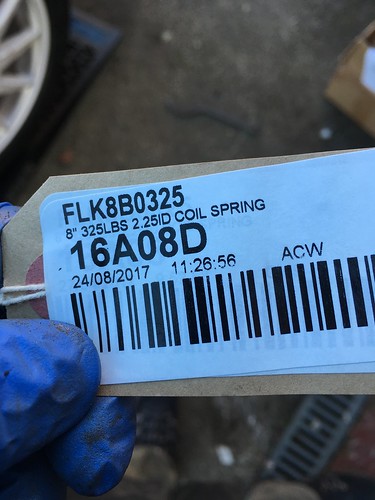 8" Faulkners 2.25" @ 325lb. When I chatted with Chris West who drives his Dad Dave's 306 Maxi in the MSN Stage Rally Champs at Oulton Park, he said he uses 340lb springs, (with no front AR and his car looks very composed as anyone who's seen him will confirm. Only the strength of the damping on the fronts, as well as the set up at the back stopped me from going all the way to 340lb, as I didn't want to risk being mismatched.Another difference this time to the original installation is that I'm using helper springs to keep everything together when the car is up in the air (thinking more on chassis stands rather than jumps, but you never know). They're 3" and about 40lb from memory. I got some little adaptors which keep the two springs in place from Motamec. And here we are fitted: 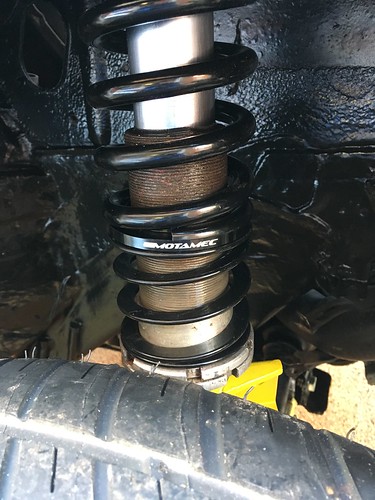 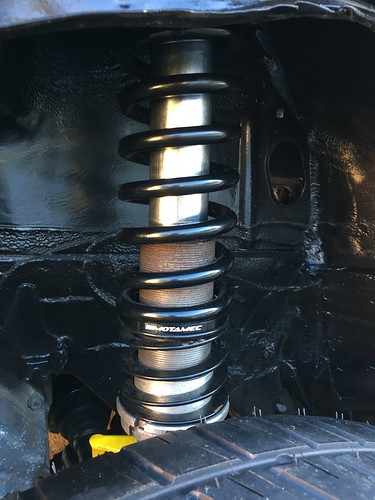 I then tackled the cam belt cover. I had a dedicated thread on this one recently. Basically the lower section near the aux belt had developed a bulge and the belt was rubbing on it. How it happened I have no idea - bit of a random thing to develop! Un-did everything and pulled it out. When it's laid on a flat surface you can see where it's developed a bulge.. 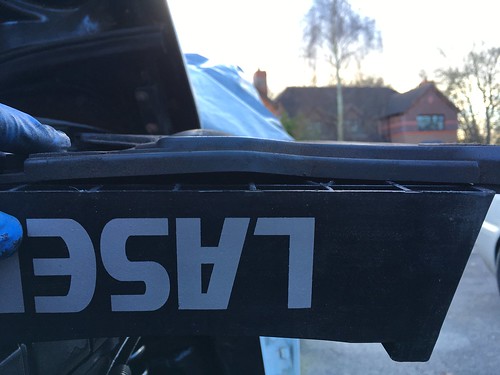 It doesn't appear to be the sort of material that if bent back will actually keep that shape, so this cover looks done for. It might be an excuse to go for something more carbon/kevlar shaped maybe...? Final job of the afternoon was to try and progress my rear bumper mold. I wet and dried one of the smaller 'ear' sections of the mold, and got through to 1200, before giving it a polish with 3G. I managed a couple of coats of wax, and then have brought inside with me tonight for a night of telly and wax on, wax off. The benefit of a doing a small bit. I'm not sure the Mrs would approve if I had the whole bumper with me on the sofa... Will get a bit more done in the morning. Aiming to tackle the larger part of the bumper mold tomorrow. Still a chance I can have a go at molding a bumper before I go back to work next week! Cheers Iain |
|
|
|
|
Seasoned Pro Location: Bristol Registered: 20 Apr 2013 Posts: 5,206 Status: Offline |
Post #250
Glad to read your better IainGreat update m8 ...I run Helper springs myself and love them ...can’t wait to try my car next year without Front ARB Keep the updates coming my friend |
|
|
|
The Peugeot GTi-6 & Rallye Owners Club - ©2024 all rights reserved.

Please Note: The views and opinions found herein are those of individuals, and not of The Peugeot 306 GTi-6 & Rallye Owners Club or any individuals involved.
No responsibility is taken or assumed for any comments or statements made on, or in relation to, this website. Please see our updated privacy policy.