displaying posts 76 to 100 of 254

Pages (11): first .. 3 [4] 5 .. last

Author Subject: 306 Maxi project
devere

Senior User

Location: Saxtead

Registered: 16 Dec 2008

Posts: 810

Status: Offline

Post #76
RallyeRed wrote:


Q for you rally types out there.. Anyone fitted a hydraulic handbrake and retained the normal handbrake? I'm interested to see where you've put it and how it's mounted.

Cheers
Iain


I have my hydraulic handbrake setup on the original positioned handbrake lever. The cylinder is mounted behind it and I still retain cables to my extra calipers for mot purposes.

Can't find a picture on my phone of it tho. If no one else chucks a picture up il try and snap some when I next see the car.
Posted 26th Apr 2017 at 21:22
RallyeRed

Regular

Location: Northwich

Registered: 03 May 2016

Posts: 353

Status: Offline

Post #77
Would like to see a pic of that if you have the chance Martin. I've enjoyed reading your thread.

Are you actually using your OEM handbrake as the hydraulic one as well then?
Posted 26th Apr 2017 at 21:24
devere

Senior User

Location: Saxtead

Registered: 16 Dec 2008

Posts: 810

Status: Offline

Post #78
This is the best picture I can find. Amazing what's still sat there on photo bucket!


I went for a twin caliper setup. I have a hydraulic caliper, mounted on the leading edge of the disc. Instead of the standard position at the rear of the disc.

The I have a small cable operated caliper mounted at the rear just to comply with mot. The cables are mounted to the standard position on the handbrake lever. The hydraulic cylinder also attaches to the standard lever.


Posted 26th Apr 2017 at 21:32
welshpug!

Capt Pedantic

Location: Bigend, Wales.

Registered: 27 Mar 2007

Posts: 25,817

Status: Offline

Post #79
sounds like what Garry needs on his saxo Martin, he's always struggled with the handbrake, could you pop some pics and details up if its ok?

________________________________________

need a part number? get on here - http://public.servicebox.peugeot.com

Bring on the Trumpets.

Posted 26th Apr 2017 at 22:13
RallyeRed

Regular

Location: Northwich

Registered: 03 May 2016

Posts: 353

Status: Offline

Post #80
Thanks for that Martin, really appreciate it.

That bracket for holding the master cylinder looks spot on!

Cheers
Iain
Posted 26th Apr 2017 at 22:36
RallyeP6

Regular

Location: West Byfleet

Registered: 11 Jul 2013

Posts: 451

Status: Offline

Post #81
As the days get longer you'll get more time after tea to work on the car too. Do you have a schedule, or just working in your free time, its coming along at a pace though. Any clues as to the final colour.
Posted 27th Apr 2017 at 09:30
RallyeRed

Regular

Location: Northwich

Registered: 03 May 2016

Posts: 353

Status: Offline

Post #82
Well I've been on leave from work since last Tues Rouben, so I've committed pretty hard to it for the last 10 days. Getting the rear panels on will be backing the back of the bodywork element, in the sense that everything else will bolt on, but these (as you know) need a bit of time and care to get right, and are much more permanent.

Today is my last day on it for the weekend, then possibly back on it bank hol Monday. Then the real world beckons and it's back to work, and snatching hours here and there on it when I can.

With colours I wanted to go for a light blue, and seen a couple I liked incl Ford Olympic blue, and a similar one I've spotted on a Fiat Panda. But in the last few days I'm having second thoughts and might go white..
Posted 27th Apr 2017 at 10:49
RallyeP6

Regular

Location: West Byfleet

Registered: 11 Jul 2013

Posts: 451

Status: Offline

Post #83
Light blue, that would be different, I too only had two colours in mind, white or yellow. Watched lots of videos on Youtube to see how the cars looked in different colours. Are you having your wheel arch liners made or are you doing them yourself?.
Posted 27th Apr 2017 at 13:42
RallyeRed

Regular

Location: Northwich

Registered: 03 May 2016

Posts: 353

Status: Offline

Post #84
I'll do them myself if I use Twintex as I already have some set aside for the impreza. (it's a plastic-carbon fibre mix, so it's flexible and v strong stuff), or if I use kevlar I might have to chat Wayne up or have a go myself.

So big day on the car today to end my little run of work - nearly 12hrs from start to finish! EZ up came in handy as the rain tried it's best early on.. Will try and update with Pics in a bit if photobucket decides to work again...

Posted 27th Apr 2017 at 22:18
RallyeRed

Regular

Location: Northwich

Registered: 03 May 2016

Posts: 353

Status: Offline

Post #85
Ooh it's back..
So EZ up, er.. up Smile


Laid on some Dolphin glaze and got sanding. It's kind of ironic you spend time and money layering something on, then spend hours mostly sanding it back off again..


Couldn't resist going back to the other side and sanding the primer filler from the other day. Not quite fully sanded back here, but spending more time on this side I could spot little bits I'd missed so I took the opportunity to get it as good as I could.


And a wee bit later with more primer back on. Still spotted a few bits that needed doing even there, but happy with progress..


It's already past tea time at this point, and I'd been swapping sides between things drying (filler, stopper, paint etc) and now I was ready to get the first primer layer on the NSR, so back out after eating. Began to run out of primer filler so used a grey primer just to get it covered, knowing it would be out in the elements from tonight...


And well, as I had the paint in my hand it would have been rude not to go back to the OSR as well...


And last ones of the night..


Definitely need to do a bit more to get it to a point where I'm ready for more paint. The OSR is just about there now, but the NSR still needs tidying up. Overall though I'm chuffed to bits with how it's looking.

Cheers
Iain
Posted 23rd Dec 2017 at 19:50
gnrlee Forum Admin

Location: Leeds

Registered: 20 Aug 2005

Posts: 8,878

Status: Offline

Post #86
rubbish start again! LOL

________________________________________

Proud Member of the ASTOR Owners Club
Posted 28th Apr 2017 at 11:36
clen666

Seasoned Pro

Location: Co. Durham

Registered: 12 Feb 2009

Posts: 2,401

Status: Offline

Post #87
Great stuff Thumbs up

________________________________________

Team 'unintentional rat look'
Posted 28th Apr 2017 at 19:09
Day666

Seasoned Pro

Location: Bristol

Registered: 20 Apr 2013

Posts: 5,209

Status: Offline

Post #88
Looking great Iain Thumbs up
Posted 28th Apr 2017 at 19:47
RallyeRed

Regular

Location: Northwich

Registered: 03 May 2016

Posts: 353

Status: Offline

Post #89
Cheers fellas Smile

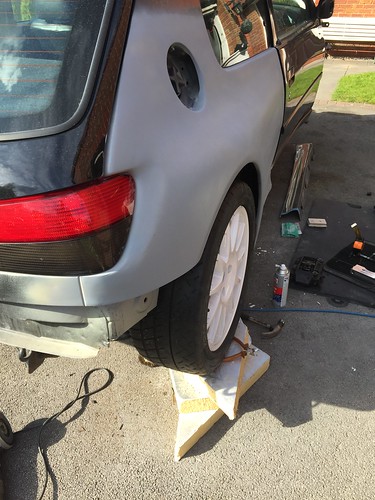
Right back on it today. Weather was kind after an iffy start.

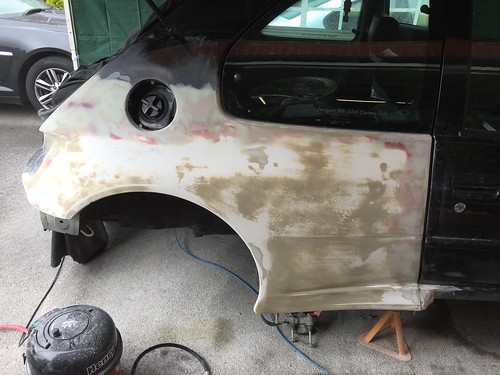
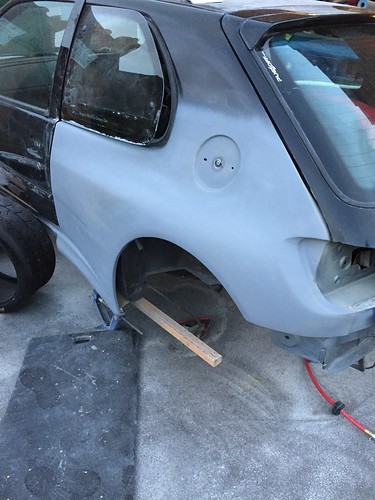
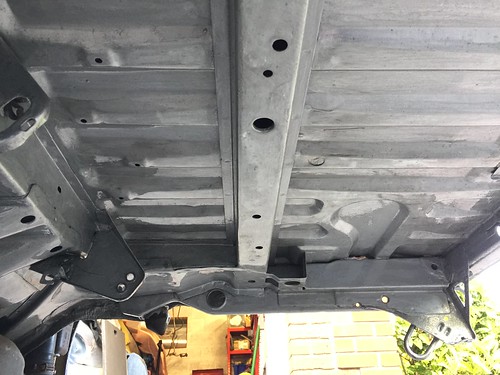
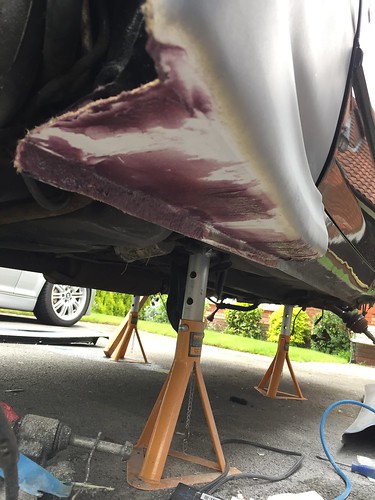
I began by tackling the underside of the rear panels. Trimmed them level to the sills, and poked out some air bubbles in the gel coat, and did some filling on both sides.


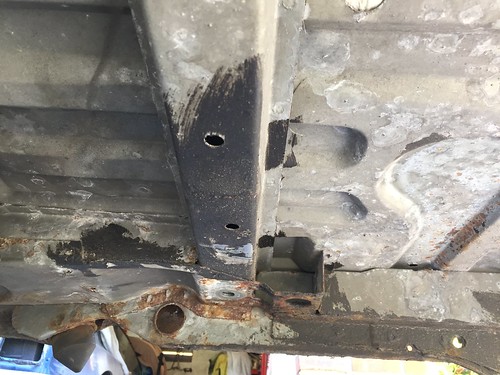
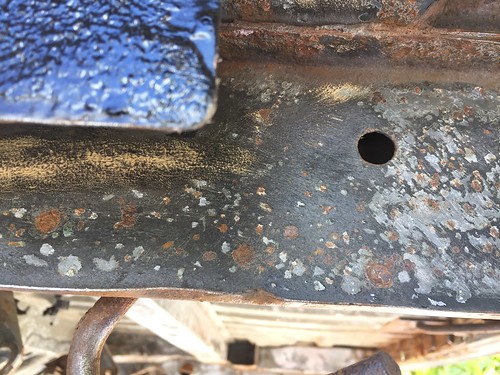
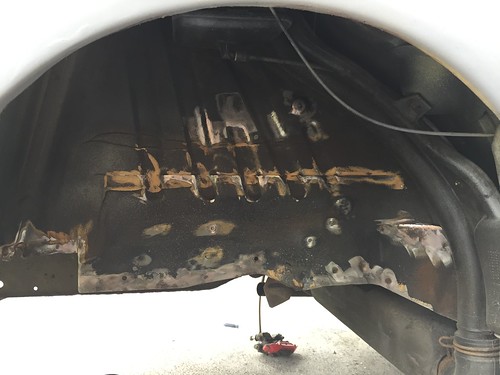
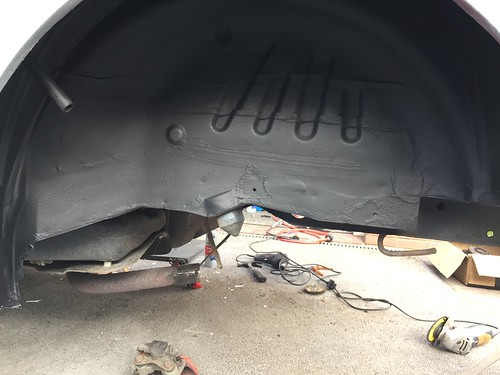
Then turned my attention whilst they were drying, to the inner arches. You can see where it's bubbling under the stone chip. Usually a spot weld rusting or a seam where panels overlap. Out came the flap wheel which took it back to bare metal and I could treat it with the Bilt Hamber.


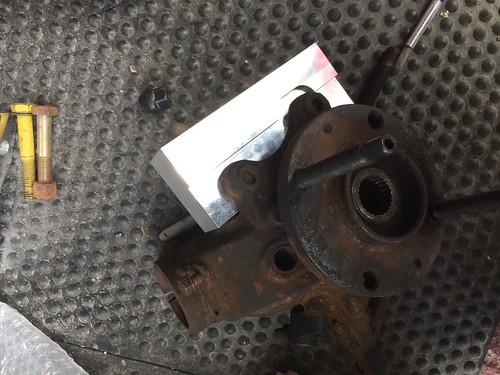
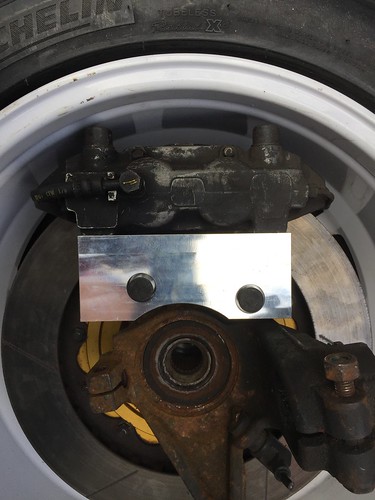
I'd already done a bit on the other side, so whilst all that was drying out I had a look at the brake calliper adapters my brother has made for me. These are so I can fit RS Brembos for 330mm discs, using the Cossie bells that he also tweaked for me.

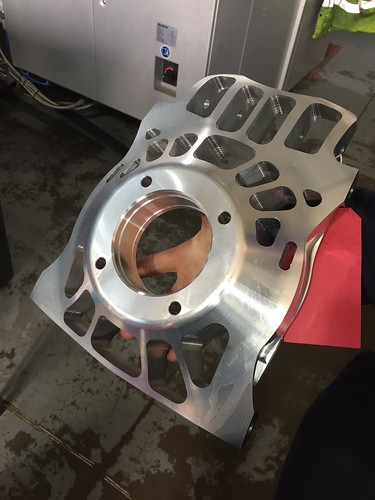
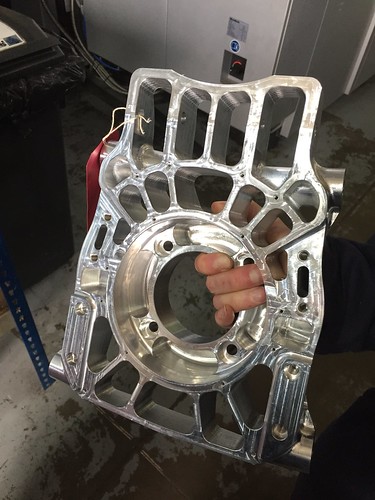
Now my brother's company turn out some nice stuff; here's some uprights for a GT3 Endurance car (can't say who, sorry)


..So he was the first to concede my adapters were a simple block that was rather agricultural in nature, and a lot more could be done for a paying punter.. and that definitely didn't describe me, but I was happy with my freebie nonetheless!


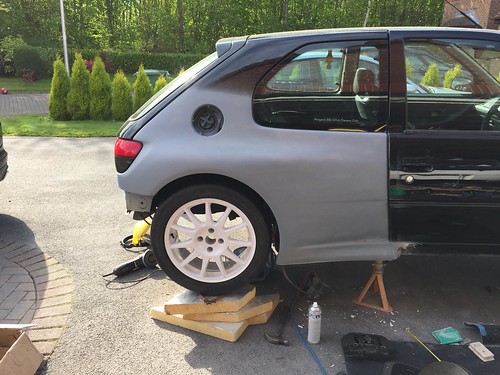
Fortunately everything fits well, and clearance all round is good!


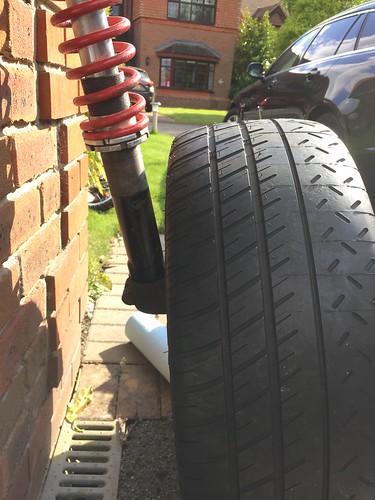
Thought as I was mocking it up I would double check strut clearance with the coilovers. Loads of room too. Can go to longer springs if I need to.


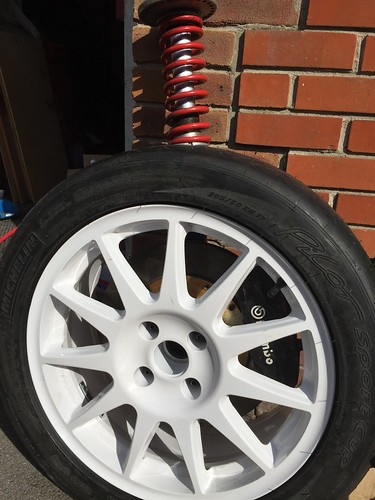
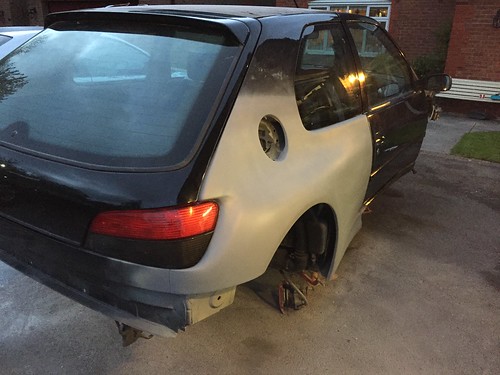
Thought also as I'd done a pic of the 18"s in, I'd look at the 17's with the 205/50 Cups..


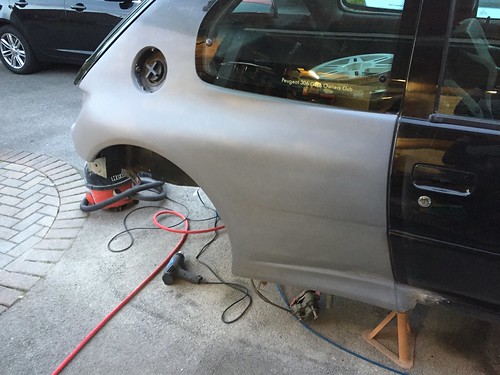
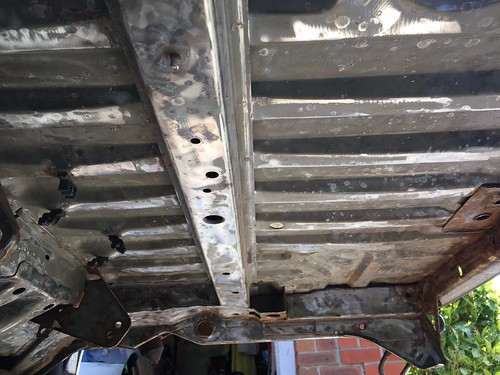
Somewhere in all of this I got some Zinc 182 primer on the bare bits of metal in the arches, and gave it time to dry out. The sun the helping me too.
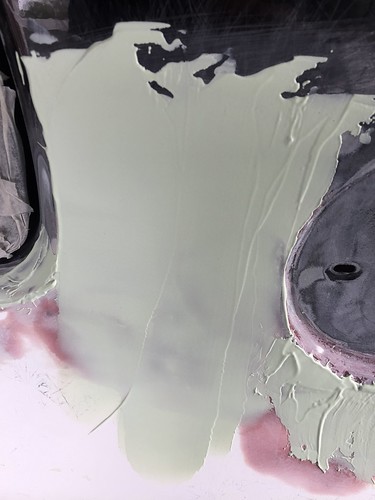
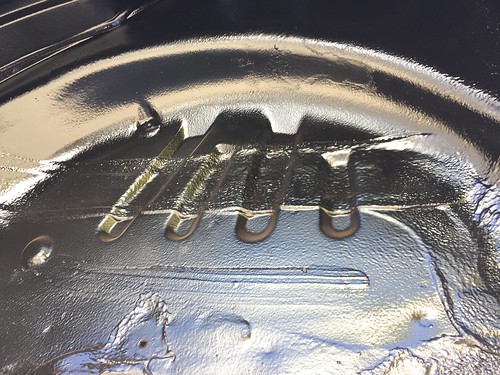
On to the stone chip. This is the slightly smoother Tretrosyl stuff from a can, and goes on like a dream and looks great too.


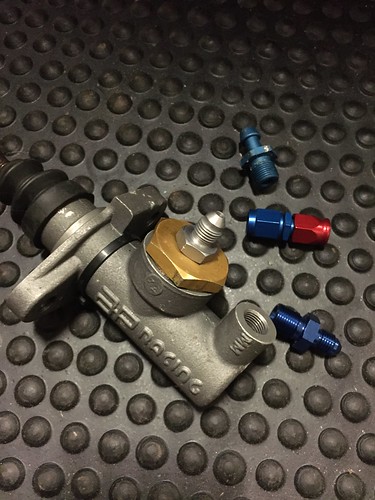
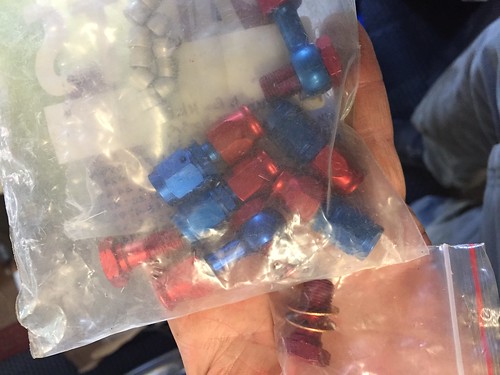
Along the way also sized up some old un-used brake fittings. Turned out I had more metric and -3 fittings than I thought I had, including 5-6m of -3 hose, so I'll work out what I else need and do the whole car in alloy Goodridge instead of the cheaper plated stuff Smile


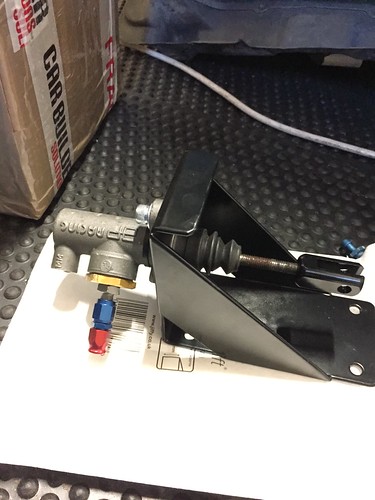
Also found a 0.625 AP Racing master cylinder in my collection, so looks like I'm sorted for my hydraulic handbrake. Just need to sort a bracket for the m/c but there's plenty around to choose from.

Back to the real world of work for me from this point on, so expect progress to grind slowly to snail's pace from this point on!

Cheers
Iain
Posted 23rd Dec 2017 at 20:03
gretsch-drummer

Regular

Location: Leeds

Registered: 12 Feb 2011

Posts: 276

Status: Offline

Post #90
Nice finish with that stone chip! I used Bilt Hamber Dynax UB on mine a few years ago, will have to see how it's holding up.

________________________________________

Ph1 Cossack 6'
Posted 3rd May 2017 at 20:01
Chr1sch

Seasoned Pro

Location: Worcester

Registered: 02 Aug 2014

Posts: 1,025

Status: Offline

Post #91
Brilliant progress mate, its going to look awesome!
Posted 4th May 2017 at 13:58
RallyeP6

Regular

Location: West Byfleet

Registered: 11 Jul 2013

Posts: 451

Status: Offline

Post #92
That Tetrosyl is good stuff, I too used it on the front and rear arches, easy to spray on and gives a good finish.
Posted 7th May 2017 at 21:59
RallyeRed

Regular

Location: Northwich

Registered: 03 May 2016

Posts: 353

Status: Offline

Post #93
Been able to make a bit more progress this week.

Started in the week with a bit of parts collecting and looking into the h'brake master cylinder.


Managed to source a widget to replace the push on fitting on the inlet adaptor - in fact found two - one from an eBay seller selling blue alloy ones (shiney, shiney) and a Goodridge steel one. I stayed away from the ebay stuff when I built the Sierra as it's a bit cheap and nasty, and I have to say it hasn't changed. The threads and fit on the Goodridge adapter (M12 to M10 btw) is leagues ahead of the ebay stuff. I'll aim to do the rest of the brakes using the alloy Goodridge stuff if I can.


My Motamec master cylinder bracket arrived. My M/C is the offset AP one which is already a benefit in keeping the lines low and out of the way (remember I'll have back seats and interior in), but if I mount it upside down it gets an even better brake line route. Needless to say I won't be using the straight female fitting in the pic; it'll be replaced by a 90deg fitting and a short line from the rotary bias adjuster.

Got some of the Por top coat on the stone chip layer I put on the previous week. A bit of me prefers the satin finish of the stone chip to be honest, but I know a gloss finish will wash better and stay cleaner. The Por top coat is also anti-rust and very tough. Need a decent facemark with this stuff though, it's pretty evil.


So to today. It was underside wire wheel, flap wheel, wire drill and every other attachment day. Got myself a car creeper, which proved invaluable wheeling myself underneath the car. Had to do a fair bit on the boot floor and section beside the chassis rails leading up to the bump stops to get down to decent metal and get rid of the flaky stuff. I didn't set out to bare metal it, but did in places. The small wire wheel attachment was good at getting under the paint to expose the rusty heads of spot welds etc. Decent looking paint just fell away.


This is about half way through..


So on to the POR15. I went for the silver one as it has more metal content and better for this application (apparently). I'll be using the black POR top coat over the top at any rate. I've not used this before. Not quite sure what I was expecting, but for intents and purposes it has a similar look and feel to Hammerite. Given the cost and reviews on it - I'm expecting a much better result though!


This was after coat one. I'll need to do one more, but that will be another day now. Also this week, dropped my RS Brembos off for powder coating, and ordered some new front hubs. Will need to get my old ones pressed out and give my uprights a bit of a spruce up before fitting.

Cheers for now
Iain
Posted 23rd Dec 2017 at 20:11
welshpug!

Capt Pedantic

Location: Bigend, Wales.

Registered: 27 Mar 2007

Posts: 25,817

Status: Offline

Post #94
torques.co.uk stuff is good quality, cheaper than Goodridge, no need to pay for the name.

________________________________________

need a part number? get on here - http://public.servicebox.peugeot.com

Bring on the Trumpets.

Posted 8th May 2017 at 07:45
RallyeRed

Regular

Location: Northwich

Registered: 03 May 2016

Posts: 353

Status: Offline

Post #95
It was the torques stuff I was referring to.
Looks like we'll have to beg to differ on the quality!
Posted 8th May 2017 at 13:10
welshpug!

Capt Pedantic

Location: Bigend, Wales.

Registered: 27 Mar 2007

Posts: 25,817

Status: Offline

Post #96
not had any issues at all, been using it a few years now and don't see the need to pay for the name.

let them know if you had problems, Alex is a pug guy himself.

________________________________________

need a part number? get on here - http://public.servicebox.peugeot.com

Bring on the Trumpets.

Posted 8th May 2017 at 17:06
fatlapit

Seasoned Pro

Location: STOCKSFIELD

Registered: 02 Nov 2010

Posts: 3,040

Status: Offline

Post #97
Torques is fine never had anyissues with it

________________________________________


Posted 8th May 2017 at 20:04
RallyeRed

Regular

Location: Northwich

Registered: 03 May 2016

Posts: 353

Status: Offline

Post #98
As I say Gents, we'll have to beg to differ on this.
Whether you consider it's worth paying more for something else is up to you, but having used both, along with other brands such as Speedflow and Aeroquip, I know where I want to spend my money. When I had problems with Torques stuff before I was able to return it for a refund, I'll say that. As for relying on it for braking my car - not a chance in hell. I'll stick with Goodridge.
Yer pays yer money, yer takes yer chance, as they say!
Cheers
Iain
Posted 9th May 2017 at 07:40
welshpug!

Capt Pedantic

Location: Bigend, Wales.

Registered: 27 Mar 2007

Posts: 25,817

Status: Offline

Post #99
i wouldn't use aluminium fittings for brakes anyway.

________________________________________

need a part number? get on here - http://public.servicebox.peugeot.com

Bring on the Trumpets.

Posted 9th May 2017 at 08:20
RallyeRed

Regular

Location: Northwich

Registered: 03 May 2016

Posts: 353

Status: Offline

Post #100
450 miles road trip today to collect these from Ross..


Think they will jog a few memories for those that followed the original car's development over the years..

The doors are carbon skinned, and original steel frames. Ideal for my needs.

They also save me from filling dents in my existing doors, and in having this pair I will be able to proceed to prep them and paint them ready to fit, whilst the car remains securely locked and weathertight. I think I will look to re-installing the door locks though.

It was great to meet up with Ross and chat all things 306's!
Cheers
Iain
Posted 23rd Dec 2017 at 20:12

Pages (11): first .. 3 [4] 5 .. last

All times are GMT. The time is now 07:38

The Peugeot GTi-6 & Rallye Owners Club - ©2024 all rights reserved.

Please Note: The views and opinions found herein are those of individuals, and not of The Peugeot 306 GTi-6 & Rallye Owners Club or any individuals involved.
No responsibility is taken or assumed for any comments or statements made on, or in relation to, this website. Please see our updated privacy policy.