


Post #51
Thanks, I've read yours with interest too. I installed the Autoleads PC99-X19/PC99-BLA (Blaupunkt) remote stalk patch lead today. Not a total success as the stalk does not alter volume without changing the radio station/music track as well! Smegal suggested it could be a worn-out stalk or an incompatibility in the wiring - the worn-out stalk contact sounds a very good possibility but but as the same lead is sold by a Blaupunkt agent the wiring incompatibility seems unlikely. Googling the Autoleads patch lead and looking on here shows a fair few people with problems getting it to work properly - seems to be somewhat hit-and-miss. [EDIT: Got another stalk and installed it but no real difference, so it was not the stalk. Sometimes it worked correctly, most of the time it didn't. Have deleted the stalk entirely for now].
I did delete the completely surplus speaker wire interface though - it adds nothing to the situation apart from giving more room to manoeuvre at the expense of adding more bulky wiring and an extra connector in the speaker circuit which for the purist like me means degradation in sound quality - as if the speaker wires weren't thin enough already!
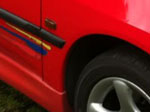
When mucking about with head units a big piece of double-thickness duct tape (masking tape didn't stick and probably too thin) around the stereo aperture is a very good idea to prevent scratching that centre console with the sharp metal corners of the rear of the head unit when connecting wires. I have put a decent centre console on now but when I got the car the original one had loads of scratches on it from botched attempts to get the stereo in/out. So duct tape FTW.
I've also persevered with the rear floorpan surface rust - after chiseling and both manual and drill-driven wire brushing is looking OK. The rust can prove quite difficult to shift initially - I now use a chisel, then manual/drill wire brush, then various grades of wet and dry. A lot of elbow grease, but the end result is something approaching the actual sound metal.
I am wondering what to paint it with as the POR-15 needs to be employed exactly right or it doesn't work well. It says "paint directly onto rust" and "don't use rust converters" but the website recommends a prep of its own that is a converter! I also tried the Wickes metal primer (water-based unusually) but it was very stiff like jelly and displayed signs of chalkiness when dry - old stock maybe? Just does not inspire confidence. The Wickes "Poppy" red non-drip enamel applied in a test part (so luckily does not need hours of re-doing) is not properly dry after 3 days and does not cover well at all - after one coat it is positively translucent. So despite the fact it is a good colour match I am not going to use it - I'll buy some decent paint thanks very much.
I am currently considering using a normal rust converter like Kurust (nice and thin so gets in all the nooks and crannies), maybe a decent primer, then painting over that with the POR-15 satin top coat Chassis Black - supposedly designed for previously painted/primed surfaces, unlike the POR-15 rust paint.
So all in all a bit of a mixed result today.
The patch lead assembled...the green plug on the right goes into the back of the head unit. The blue plug slotted onto it on the right is a separate purchase and terminates in a 3.5mm jack to plug in an iPhone/iPod. The plugs slot together and go into the 'C' (top) connector on the back of the unit - the plug comes in 3 parts depending on what you are attaching the toe head unit. The bits I have used are C2 (remote control and telephone) and C3 (CD changer/rear aux). (To complete the set there is also available a third one (C1) which can be slotted onto side of the blue/green plug for a separate amp feed).
The 3.5mm jack was fed into the upper glove box (no drilling required and took all of 30 secs) for easy attachment of an iPod. The head unit controls this via the rear aux/CD changer function. Will try it out soon.
________________________________________
Cherry Rallye SOLD


 [Fun car] >>
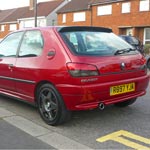


 not nice outside


