displaying posts 1 to 25 of 160

Pages (7): [1] 2 3 .. last

Author Subject: XU on R1 Bodies with video
yanni

Regular

Location: Thessaloniki

Registered: 02 Nov 2006

Posts: 309

Status: Offline

Post #1
It has been some time now since my attempt to go SC failed but today the post man had a very very nice surprice for me.

It has been covered many times here with alot of questions and answers but i will attempt to take it for all of you step by step. Comments are always welcome.

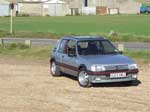
Before i begin a few info about the engine. My beloved baby is now running on its early 40000 miles had a cam/water pump service done about a few miles ago and runs super smooth. Work so far done to it:
Ported and polished free flow head
BMC filter
Free flow custom 2.5 inch exchaust with race cat.
Custom cam reprofile
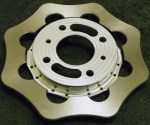
Billet steel flywheel (from Rich)
And a remap.
Dynno return 197hp on the fly (184HP at the wheels)

This is for now


So now the time has come to fit some bodies.
For my project i got a set of R1 2002 bodies from Carl (millic333) and a spare mani.


The idea is to fabricate the bodies in such way that the OEM ECU can be used. In order to do so i am using the OEM TPS ICV and MAP sensors in a way that i will describe in the following days.

First thing first. Some photos of the bodies.


To begin strip the lot down to bare metal by removing first the wirring and then the sensors. One good thing with the R1 bodies is that they use absolute pressure MAP and that can be handy


You can see the MAP bolted on the fuel rail next to the fuel pressure regulator remove the screws and take them off.

Next take the R1 TPS off


The R1 TPS axis unlike the XU10J4RS is a bit different so that one will go down to the milling machine as you will see later.
We can now remove the hoses from the bodies but keep in mind that we need these so dont brake them


Time to remove the fuel rail and the injectors


And by now we have the bare bodies


The black covers under the bodies are simmilar to the AVAC system only here they regulate the idle on tickover. Turn the bodies over undo the two screws on each cap and jently remove it. What you see inside is a rubber diaphragm that holds the regulating blade in place and a spring. Remove everything and put it on the side.


Now its time to seperate the bodies by undoing the two 10mm screws on the side. These screws run across the lenght of the bodies. Mark each one with a number before you remove so you can put them but together in the same order. Once done you have four bodies to start working with.


That is for now lads. I will continue tomorrow with more photos.
These should be finished by the end of next week so it wont take long until you have the complete how to guide.

I do hope that you will enjoy my write up and as i said before comments are more than welcome.

From Greece Yanni


Cool

________________________________________

Major stock holder of group P.S.A.
I live to pay and support the French industry.
Posted 25th Jun 2009 at 21:48
mark-house

Seasoned Pro

Location: Bury St Edmunds

Registered: 07 Apr 2009

Posts: 1,096

Status: Offline

Post #2
This is perfect just what i need for when i do mine Big grin

Top job and look forward to reading the rest!

________________________________________

Peugeot 306 GTi 6
BMW 320 td compact M-sport
1967 Mini Cooper
1990 Jaguar XJR 4.0
Posted 14th May 2009 at 02:44
welshpug!

Capt Pedantic

Location: Bigend, Wales.

Registered: 27 Mar 2007

Posts: 25,817

Status: Offline

Post #3
What's the spacing of the bodies? do they match the 92mm XU 16v spacing well?

they look very different to the Bodies that my brother has been sold as having come from an R1 Doh

________________________________________

need a part number? get on here - http://public.servicebox.peugeot.com

Bring on the Trumpets.

Posted 14th May 2009 at 02:48
phillipm

Seasoned Pro

Location: Rotherham

Registered: 15 Oct 2006

Posts: 20,607

Status: Offline

Post #4
There's lots of different 'bodies fitted to R1's, it's a bike, they change them every other year....

Saying that, they're nearly identical to my R6 'bodies, bar the black plastic cover on mine controls a CV slider, not the idle.

________________________________________

- Bespoke rollcages/additions/adjustments. Half cages right up to complete custom spaceframes - MSA/FIA spec, CDS, ROPT, T45, etc - PM me
Email me!
Custom-made polybushes available - need an odd size or fitment? - anything from batch work to one-off pieces.
Posted 14th May 2009 at 02:52
welshpug!

Capt Pedantic

Location: Bigend, Wales.

Registered: 27 Mar 2007

Posts: 25,817

Status: Offline

Post #5
hmm, damn them! these are keihin not mikuni too, and I thought pugs were awkward enough LOL

________________________________________

need a part number? get on here - http://public.servicebox.peugeot.com

Bring on the Trumpets.

Posted 14th May 2009 at 03:37
mark-house

Seasoned Pro

Location: Bury St Edmunds

Registered: 07 Apr 2009

Posts: 1,096

Status: Offline

Post #6
these are the 5PW's there is also the 5VY's and the later 4C8's

________________________________________

Peugeot 306 GTi 6
BMW 320 td compact M-sport
1967 Mini Cooper
1990 Jaguar XJR 4.0
Posted 14th May 2009 at 03:47
damien

Seasoned Pro

Location: kent

Registered: 27 May 2005

Posts: 5,853

Status: Offline

Post #7
coming from someone thats done it before, save your money and time and just get some normal throttle bodies
Posted 14th May 2009 at 13:16
yanni

Regular

Location: Thessaloniki

Registered: 02 Nov 2006

Posts: 309

Status: Offline

Post #8
I agree with you that there are far better solutions out there but when you have to stretch over the 1000GBp mark its worth the try. After all this wright up is more for the members that keep on asking about bodies how to and what it needs. Even though i believe that at the end its more the work it takes than performance.

Anyway the dynno at end will tell till then.....

Yanni.

________________________________________

Major stock holder of group P.S.A.
I live to pay and support the French industry.
Posted 14th May 2009 at 13:49
millic333

Seasoned Pro

Location: Clapham, London

Registered: 01 Nov 2007

Posts: 2,071

Status: Offline

Post #9

Yanni - great to see you have got to work on them.

Following this with great interest, makes me wish i'd got off my arse and sorted them before.

Admittedly yes you could go and buy actual throttle bodies, but the cost is significant and there is no harm in being different.

Looking forward to hearing a video once fitted.

Damien's sounded great on the dyno run.

________________________________________

sharland wrote:
Your life is like an action movie. And I want in.


CARL.
Posted 14th May 2009 at 17:30
spike_uk06

Seasoned Pro

Location: Billingshurst

Registered: 03 Aug 2006

Posts: 1,637

Status: Offline

Post #10
quote:
quote:
Dynno return 197hp on the wheels (184HP on the fly)


Correct me if im wrong but shouldn't that be the other way round? Power gets lost through the transmission I thought? Dunno

But good luck mate bet it will be sweet when finished..

________________________________________

Team China
Team Pirelli
Team Cracked Bumper
92k
20th Nov 1999 she was born
Posted 14th May 2009 at 20:44
brett-black-rallye

Senior User

Location: felixstowe

Registered: 28 Aug 2007

Posts: 573

Status: Offline

Post #11
spike_uk06 wrote:
quote:
quote:
Dynno return 197hp on the wheels (184HP on the fly)


Correct me if im wrong but shouldn't that be the other way round? Power gets lost through the transmission I thought? Dunno

But good luck mate bet it will be sweet when finished..


i think theres been a sneaky edit Dry

do you have a 5 speed box? i take it theres less power lost through a 5 speed?

its good to see someone actually going through with bike bodies other than just asking a few questions and then giving up.
Posted 14th May 2009 at 23:08
vts_tibi

Seasoned Pro

Location: Nuneaton

Registered: 27 Apr 2007

Posts: 1,194

Status: Offline

Post #12
spike_uk06 wrote:
quote:
quote:
Dynno return 197hp on the wheels (184HP on the fly)


Correct me if im wrong but shouldn't that be the other way round? Power gets lost through the transmission I thought? Dunno

But good luck mate bet it will be sweet when finished..


it's only a typo I guess!


and Yanni is on the top of it again!

I wanted to do this aswell, but the final cost would have been the same as with Jenvey - don't ask! stupid hungarian bikers and breakers!Angry


so now I'm saving for the JenveysLove

________________________________________

VTS
best 60' : 2.272
best 1/8 ET : 9.375 @ 74.42mph
best 1/4 ET: 14.603 @ 97.047mph

Team Trackday™
Posted 14th May 2009 at 23:41
yanni

Regular

Location: Thessaloniki

Registered: 02 Nov 2006

Posts: 309

Status: Offline

Post #13
Yes it is a typo and its corrected!!!
The reason behind this thread is that there are other ways of doing things undercutting the cost. What you will see at the end is a set of R1 bodies on the engine running on STANDARD ECU!!! So the cost will be down to the bodies (100-150) few bits and pieces less than a 50 and the cost of the remap. It can be done and i will show you how in a few days.

Anyway a bit of an update:
After some time with the angle grinder the mani is cut down to the rough lenght


Tomorrow is going down to the machinist to be cut down to the correct agle and get it ported and polished to match the head. Also to find some nice Samco collars to match them bodies on to it.

Just to give you the idea here it is again


You can clearly see the space between the bodies and thats the reason that it is essential to take them apart if you dont want them to look weird or even fall of their place.

Anyway thats for now.

Yanni.

________________________________________

Major stock holder of group P.S.A.
I live to pay and support the French industry.
Posted 15th May 2009 at 01:36
kit

Seasoned Pro

Location: Location: Location:

Registered: 22 Jan 2009

Posts: 2,394

Status: Offline

Post #14
This is really interesting, good work Yanni, looking forward to the finished result, and the dyno!

________________________________________

Racing driver, fighter pilot, astronaut, compulsive liar.
Posted 15th May 2009 at 16:56
yanni

Regular

Location: Thessaloniki

Registered: 02 Nov 2006

Posts: 309

Status: Offline

Post #15
Just a pick off what i have done this weekend. In detail tommorow. For the moment i am waiting for the custom ICV/MAP plenum from the machine shop. Its getting there.


Enjoy Yanni.

________________________________________

Major stock holder of group P.S.A.
I live to pay and support the French industry.
Posted 17th May 2009 at 23:42
benny87

Junior User

Location: Nr Burnley

Registered: 28 Apr 2009

Posts: 61

Status: Offline

Post #16
Looking sweet Thumbs up

Can't wait for the details, I'm thinking of doing this myself sometime soon Shifty

________________________________________

306 XSi 2.0 16v 2001
A work in progress !!!

Wanted List
£$£$£ and lots of it hahaha
Posted 17th May 2009 at 23:47
robertinho

Newbie

Location: São Paulo, Brazil

Registered: 08 Mar 2009

Posts: 43

Status: Offline

Post #17
yanni, are you going to use the original water radiator?

have you already planned the air induction?
Posted 18th May 2009 at 00:15
john gordon

Seasoned Pro

Location: Colwyn Bay

Registered: 23 Aug 2007

Posts: 1,449

Status: Offline

Post #18
Even if it dont make much of a difference in power the sound alone will be worth it. Smile

________________________________________

FORD PUMA: the gay car that will have the 6 in the twisties.
Posted 18th May 2009 at 04:59
mark-house

Seasoned Pro

Location: Bury St Edmunds

Registered: 07 Apr 2009

Posts: 1,096

Status: Offline

Post #19
Any updates? Whistle

________________________________________

Peugeot 306 GTi 6
BMW 320 td compact M-sport
1967 Mini Cooper
1990 Jaguar XJR 4.0
Posted 20th May 2009 at 03:23
yanni

Regular

Location: Thessaloniki

Registered: 02 Nov 2006

Posts: 309

Status: Offline

Post #20
Hello everybody. Sorry for tyhe delay on the updates but you know how work is.
Anyway the bodies are allmost ready.

Work done so far.

I got some 50mm high pressure hose and cut it down to about 7cm long and test fitted to the mani. These will hold the bodies to the mani.


I go me self 1 meter of threated wire and some 10mm nuts and washers to space the bodies. In order to do so you have to start from one side and move along.
Cut the threated wire in half and screw them in the threated end of the last body.


Use two nuts and washers (as shown) to lock them in place. Use another set of nuts and washers and slide the second body down. Now use the mani as a mirror to calibrate the space between them two and lock the second body in place with another set of nuts and washers.


When you do all four you will end up with something like this.


By now it is clear that we need to extend the butterfly lever so all four can open together.
I used some galvanished steel 2mm sheet that after measuring and cutting where ready to be riveted to the "ears" of each body. I have to tell you though that this is best to do before you srew everything together as i learned the hard way!!!


Once you do all the above its time to fit the bodies to the mani. Use some clamps to hold them in place and to make sure there are no air leaks. At this point you can choose if you want your mani silver or painted. I used black paint as it gives a nice contrast to the silver bodies!!!


As above fit the rubber hoses back in place and your half way there.

As i wrote at the top i am planning on using the OEM ECU and in order to do so i am keeping the TPS and MAP sensors.
The TPS is the tricky part here as the R1 butterfly axle is round where on the XU engine has a cut to lock it in place. Also the the XU TPS is inverted in comparison to the R1. Where the R1 turns clockwise the XU turns the other way. No worries though i will upload some photos tomorow of what i did in detail.


Another good thing is that the trottle cable fits in the R1 bodies so no mods here just a braket to lock the cable on the bodies. That later.


So by now this is what i have enjoy.


Yanni.


________________________________________

Major stock holder of group P.S.A.
I live to pay and support the French industry.
Posted 21st May 2009 at 02:52
mark-house

Seasoned Pro

Location: Bury St Edmunds

Registered: 07 Apr 2009

Posts: 1,096

Status: Offline

Post #21
Looking good mate. Can't wait to find out the end result!

________________________________________

Peugeot 306 GTi 6
BMW 320 td compact M-sport
1967 Mini Cooper
1990 Jaguar XJR 4.0
Posted 21st May 2009 at 03:12
adam001

Regular

Location: Camberley & Loughborough

Registered: 12 Mar 2009

Posts: 109

Status: Offline

Post #22
Very nicely done, I could see this being something I may do on my engine
Posted 21st May 2009 at 04:00
daviewonder

Regular

Location: West sussex

Registered: 01 May 2009

Posts: 307

Status: Offline

Post #23
10/10 so far, really helpful thread, looking forward to updates.

________________________________________

Why is it that shoe repairers are so good at cutting keys? - Harry Hill.
Posted 22nd May 2009 at 04:09
adam001

Regular

Location: Camberley & Loughborough

Registered: 12 Mar 2009

Posts: 109

Status: Offline

Post #24
More please Smile
Posted 26th May 2009 at 04:56
daviewonder

Regular

Location: West sussex

Registered: 01 May 2009

Posts: 307

Status: Offline

Post #25
why are we waiting, why are we waiting?LOL

________________________________________

Why is it that shoe repairers are so good at cutting keys? - Harry Hill.
Posted 27th May 2009 at 22:03

Pages (7): [1] 2 3 .. last

All times are GMT. The time is now 21:24

The Peugeot GTi-6 & Rallye Owners Club - ©2024 all rights reserved.

Please Note: The views and opinions found herein are those of individuals, and not of The Peugeot 306 GTi-6 & Rallye Owners Club or any individuals involved.
No responsibility is taken or assumed for any comments or statements made on, or in relation to, this website. Please see our updated privacy policy.