Post #626
you do have to cut a bit of plastic off of the catch otherwise it wont shut 
but they are designed to be cut like that I think.
like so


|
| Author | Subject: Project PUG |
|
Seasoned Pro  Location: Southampton Registered: 16 Feb 2003 Posts: 5,366 Status: Offline |
Post #626
you do have to cut a bit of plastic off of the catch otherwise it wont shut but they are designed to be cut like that I think. like so |
|
|
|
|
Seasoned Pro  Location: Durham Registered: 20 Oct 2008 Posts: 8,716 Status: Offline |
Post #627
chris with a pug wrote: you do have to cut a bit of plastic off of the catch otherwise it wont shut but they are designed to be cut like that I think. like so  still have the 1s on my bonnet to fit 1st. When you hoping to be finished by? still have the 1s on my bonnet to fit 1st. When you hoping to be finished by?________________________________________ Clicky: [url =http://www.306gti6.com]click here[/url] remove the space between [url & = |
|
|
|
|
Seasoned Pro Location: Southampton Registered: 16 Feb 2003 Posts: 5,366 Status: Offline |
Post #628
next years French car show is the aim if funds allow. |
|
|
|
|
Seasoned Pro  Location: Co. Durham Registered: 12 Feb 2009 Posts: 2,401 Status: Offline |
Post #629
What do you think of the CBS fuse box? Has it simplified the wiring much?________________________________________ Team 'unintentional rat look' |
|
|
|
|
Seasoned Pro Location: Southampton Registered: 16 Feb 2003 Posts: 5,366 Status: Offline |
Post #630
clen666 wrote: What do you think of the CBS fuse box? Has it simplified the wiring much? I think for what it costs it is a great place to start, just bear in mind it is designed for a kit car so you might need to add a few things to it, the one problem I do see with it is there is no relay for the fuel pump, but I am going to wire one in just to be sure. |
|
|
|
|
Seasoned Pro Location: Co. Durham Registered: 12 Feb 2009 Posts: 2,401 Status: Offline |
Post #631
Hmm, might be a worthwhile purchase for me then.Mine will be running the bare minimum so hopefully shouldn't need much more added ________________________________________ Team 'unintentional rat look' |
|
|
|
|
Seasoned Pro Location: Southampton Registered: 16 Feb 2003 Posts: 5,366 Status: Offline |
Post #632
for a bare minimum system its perfect, but just bear in mind the work involved |
|
|
|
|
Seasoned Pro Location: Southampton Registered: 16 Feb 2003 Posts: 5,366 Status: Offline |
Post #633
So I did a fair bit on Puggy this week so I should update.Got a big parcel through this week containing the rear quarter windows and the rear.  and fitted 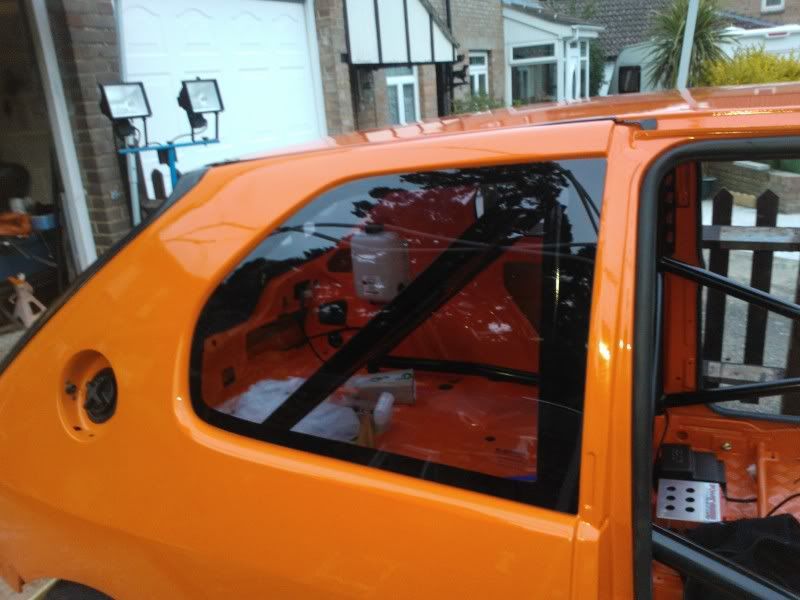  Very happy with them although they aren't a perfect shape. I finally drilled the holes and bolted the battery box down. 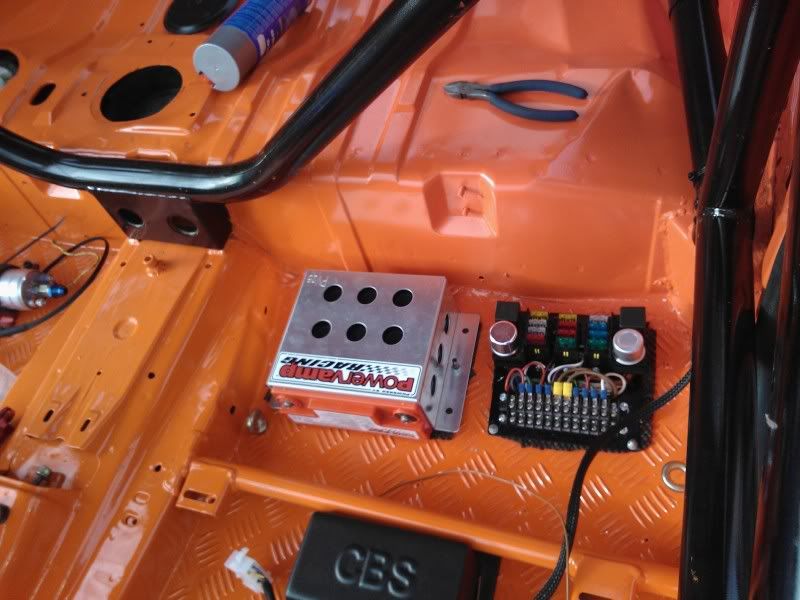 Then next I started the wiring for the standard fuel pump. I cut all the cables to the right length and fitted the seals  then I did the crimps 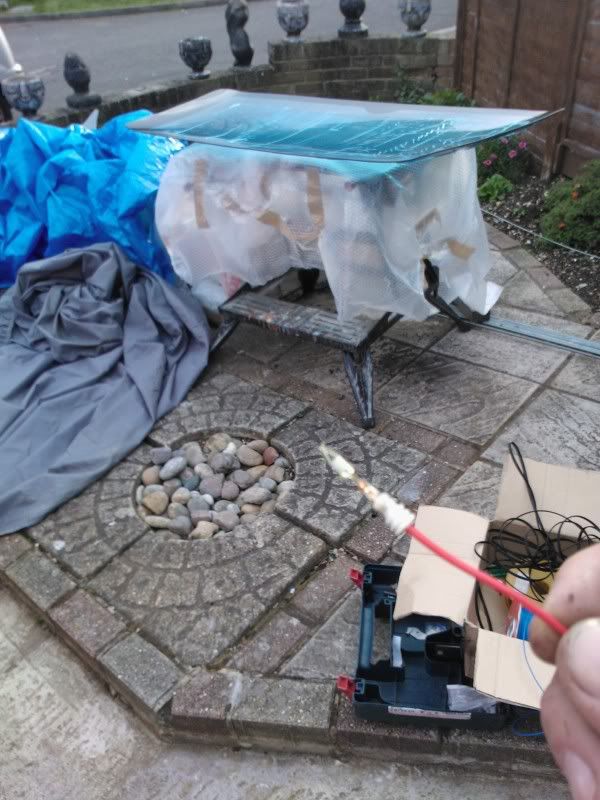 I didnt take any more of making it up but the seals push down in the hole and then a flap shuts down on them. Here is it fitted with the grommet fitted. 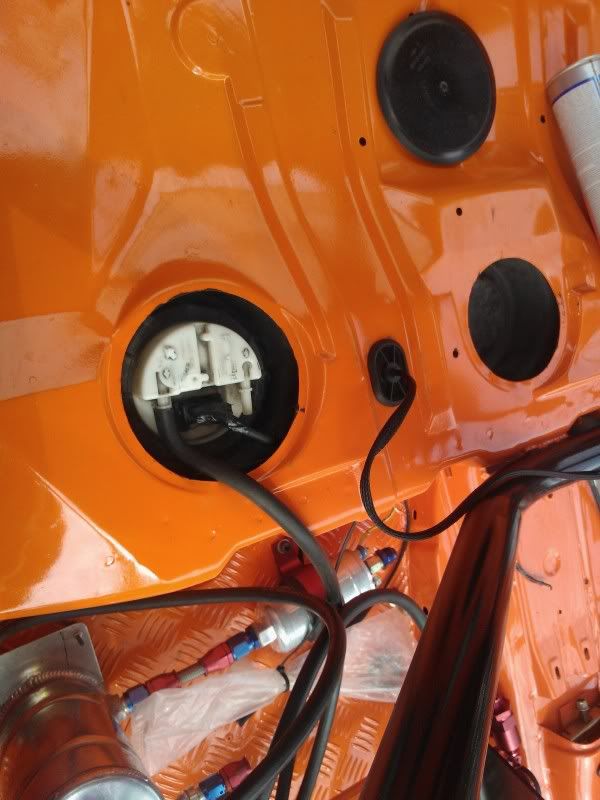 I then thought I would do a nice simple job and fit the brake switch, how wrong was I, now the dash bar is fitted the steering column and the bit it bolts to has to be removed. I did that and fitted the switch. and ran the cables 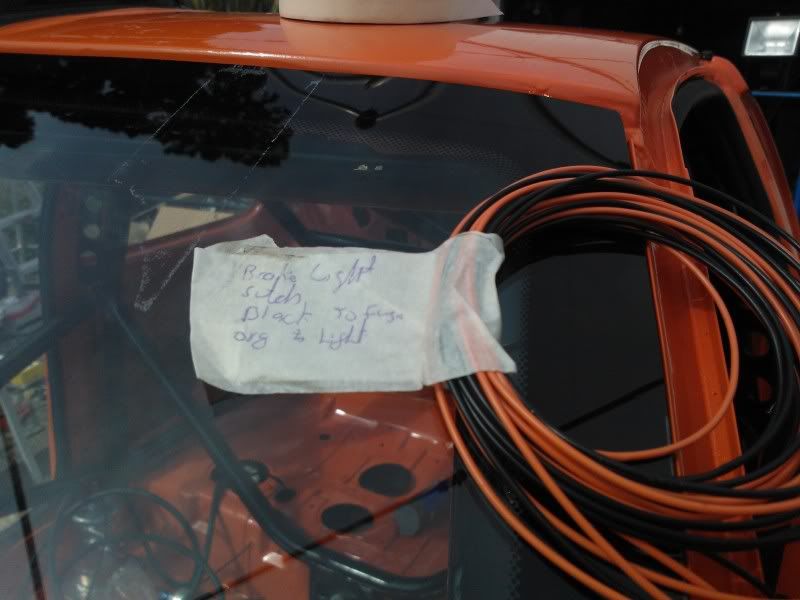 Then the big job of the day I started the wiring for the front lights, horns and washer bottle. I decided to adapt the connectors from the original loom as it seemed to make more sense than tracking down all the different connectors new.   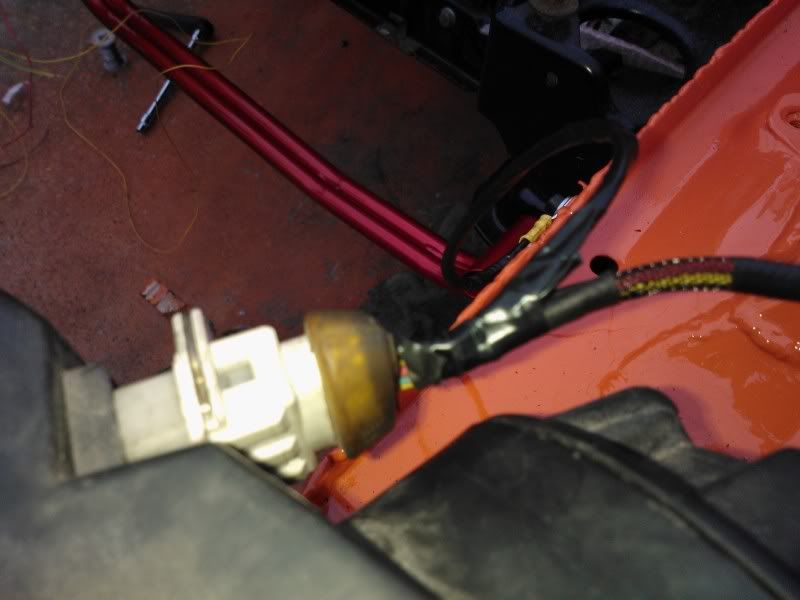 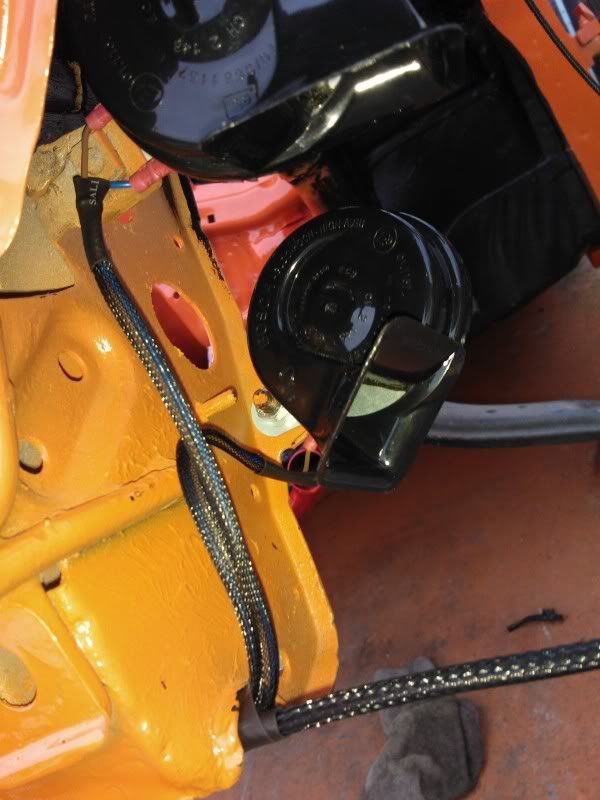  I just cable tied it underneath the front cross member.  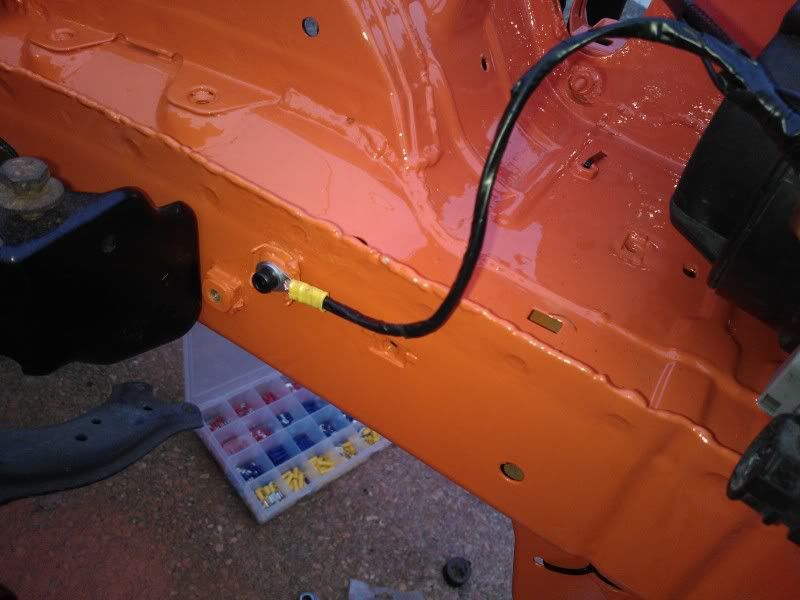 I need to wire in the drivers side and the washer motor, which is quiet clever, power it one way and it runs the front, change polarity and it does the rear. One little gadget I brought and its really good is a heat shrink gun thing. 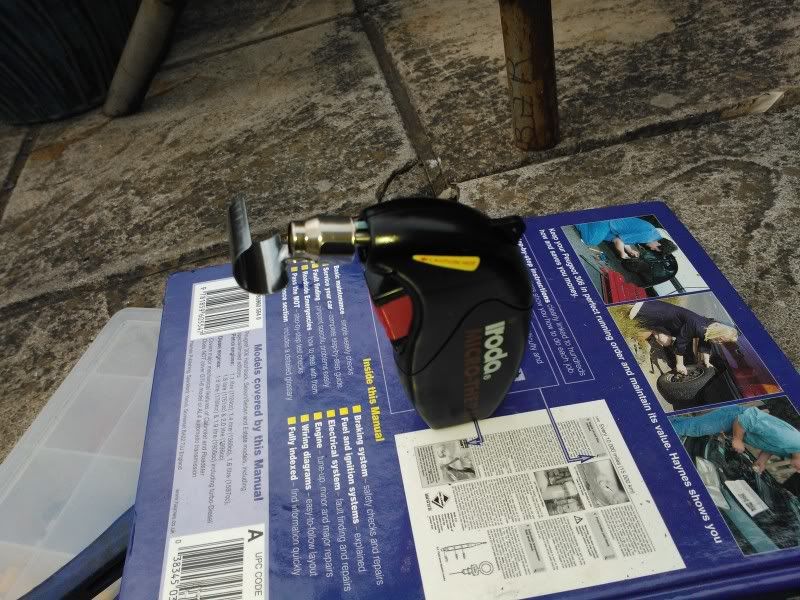 I am off on holiday tomorrow so wont be any updates for a couple of weeks. |
|
|
|
|
Seasoned Pro  Location: Maidstone Son! Registered: 27 Jun 2011 Posts: 1,464 Status: Offline |
Post #634
Awesome project mate, now following this thread  ________________________________________ 306 1.8 xs moonstone blue-SOLD306 gti6 supercharged china blue-SOLD 406 coupe D9 3.0 V6-SOLD |
|
|
|
|
Seasoned Pro Location: Southampton Registered: 16 Feb 2003 Posts: 5,366 Status: Offline |
Post #635
So another update.Fist off I removed the ignition barrel. So out came the angle grinder. 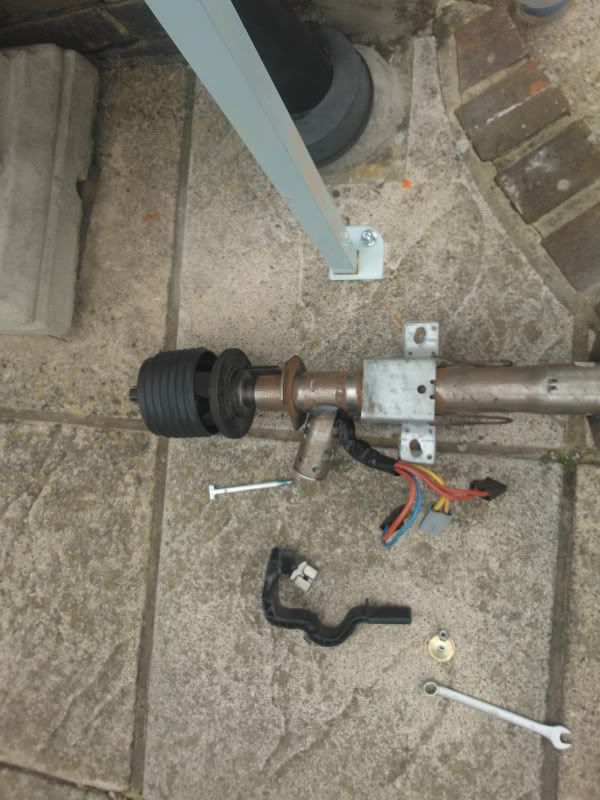  Then I attached the new indicator stalk.  I invested in one of these, if you do intend on rewiring a car then you should buy one. 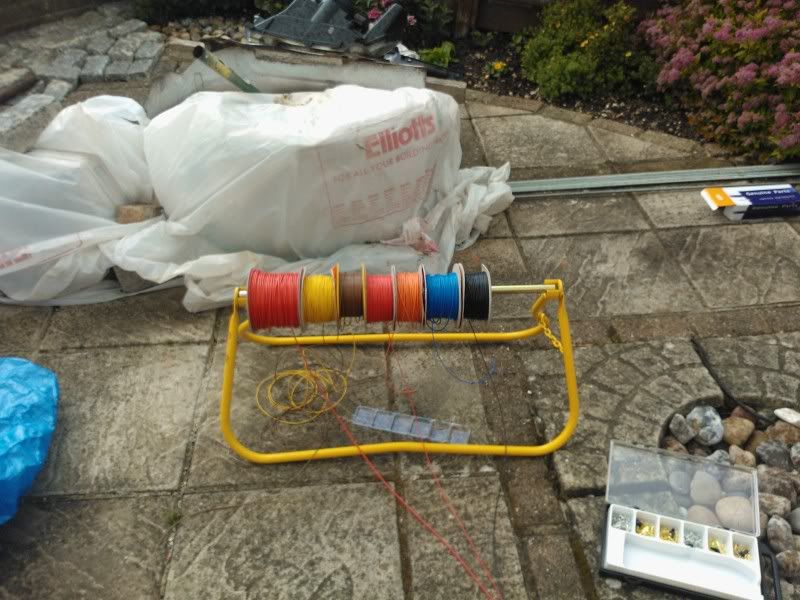 Then I wired in the relays in the engine bay. The two bright orange ones are for the heated windows, the others are for the ecu/sensors and the other is to start the car. I will tidy them all up next weekend, I just ran out of time this weekend.  If you are going to take on something like this, then I really recommend CBS. there catalogue alone has lots of wiring info and diagrams in which are really helpful. I rang them this week with a missing bulb from a switch and I had the replacement the next day and on top of that he spent 20 mins on the phone just going over the best way to wire stuff. Really helpful and a good company with quality parts. |
|
|
|
|
aka Jim Davey  Location: Southampton Registered: 01 Oct 2007 Posts: 8,648 Status: Offline |
Post #636
That indicator stalk is well retro ________________________________________ R H Davey Welding Supplies. I sell new and used welding equipment in the Hampshire area. I take on welding jobs in the evenings, ally casting repairs are one of my specialities but I can weld pretty much anything. PM me with your requirements.Some of my services: (See my for sale threads) Engine mount/chassis repair Solid Beam Mounts BACK IN PRODUCTION Harness bars |
|
|
|
|
Seasoned Pro Location: Southampton Registered: 16 Feb 2003 Posts: 5,366 Status: Offline |
Post #637
So I managed to get a fair bit done this weekend, but not many photos I am afraid.First off my jubilee clips turned up so I whipped off the rear wheel and fitted the fuel filler elbow.  I then cut and tidied up the relay wiring and fitted the fuse for the ECU/sensor relay 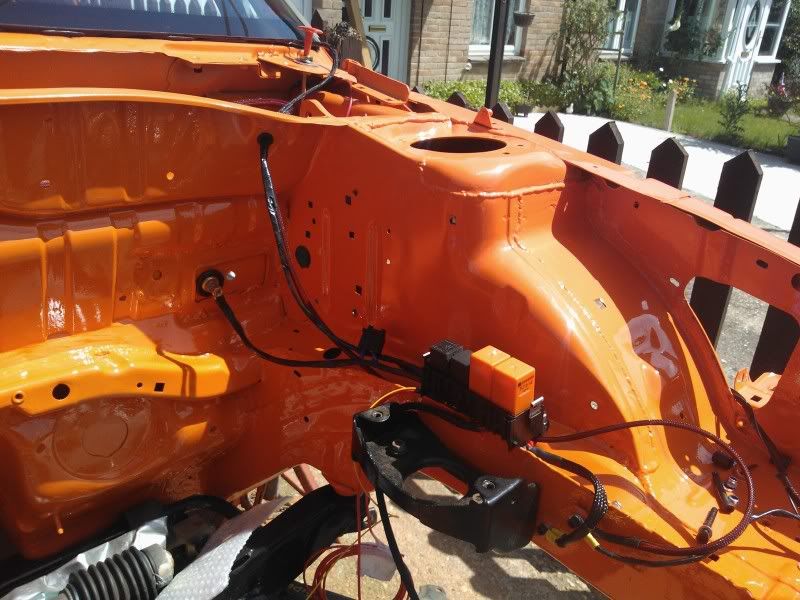 The oil catch tank was refitted and I now have most of the wiring done for the lights in the engine bay. |
|
|
|
|
Seasoned Pro Location: Southampton Registered: 16 Feb 2003 Posts: 5,366 Status: Offline |
Post #638
So I got in from work about 6 tonight and the weather was so nice I thought I would do a few hours on her, was still out side at 10 but hey was worth it getting the light loom finished.Here are a few pics    I used the original grommet to get through the inner wing, just made the hole slightly larger.  I'll get out there soon and get it all p clipped in but its slowly getting there. |
|
|
|
|
Seasoned Pro Location: Southampton Registered: 16 Feb 2003 Posts: 5,366 Status: Offline |
Post #639
I have been doing a few evenings out side on here lately, just doing all the little jobs that need doing.I cut the wires and tidied up the rest of the loom for the lights and also terminated the wires for the relay into the connector.  I am not sure if people will ever used the sealed crimp connectors, I have used several differnt types in this project, so I thought it might be handy for other people if I did a quick how to. first off cut the cable to the required length . 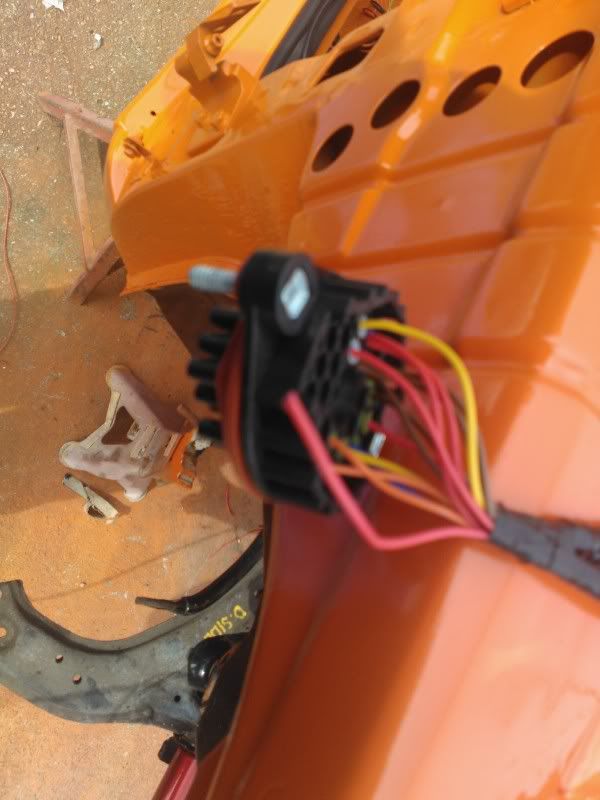 Slide on the rubber seal (do this before stripping the cable) 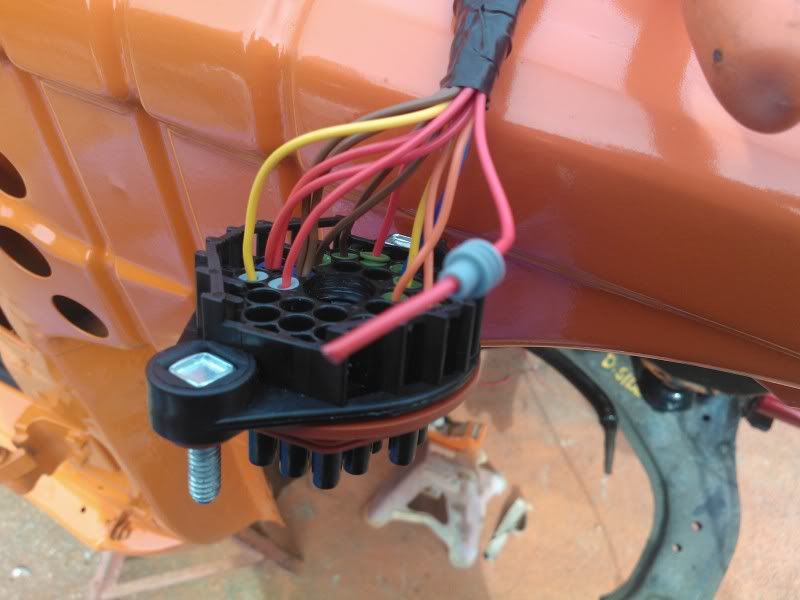 Strip off 5mm or so of insulation  crimp on the terminal 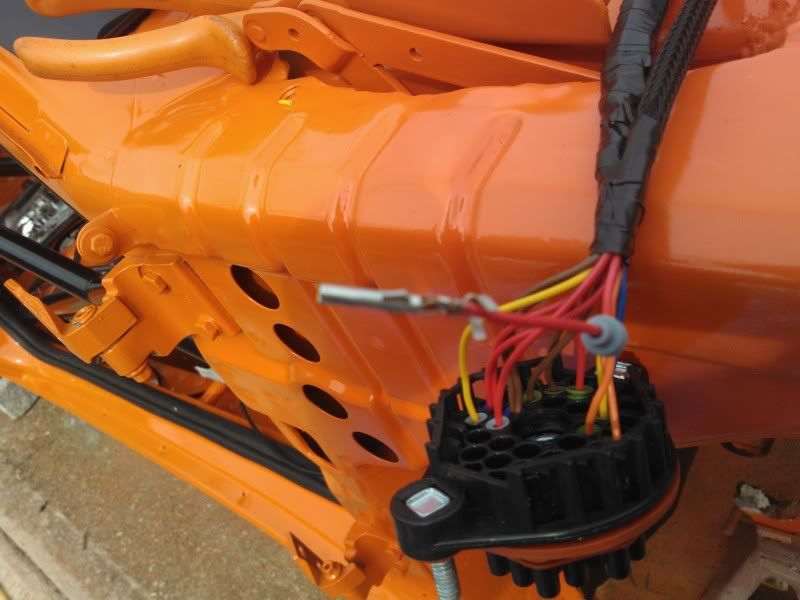 then slide the rubber seal down 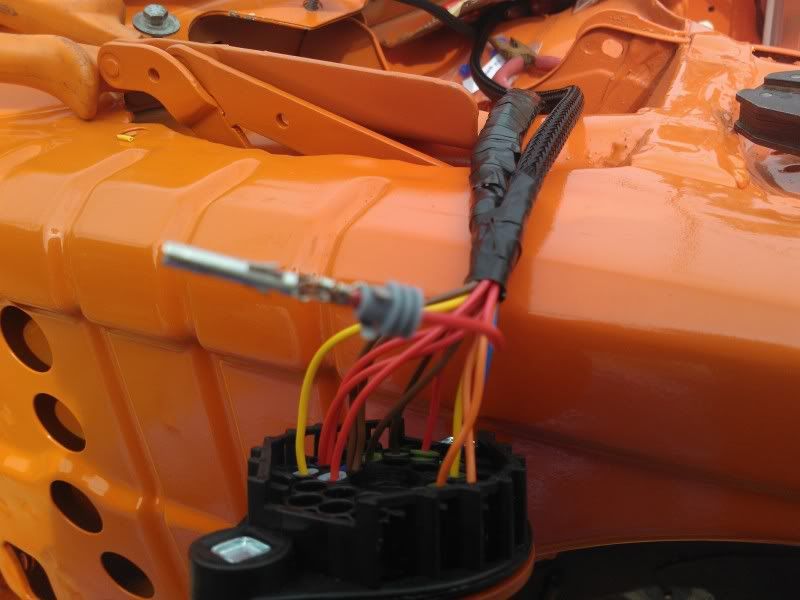 then crimp the rubber bit in place 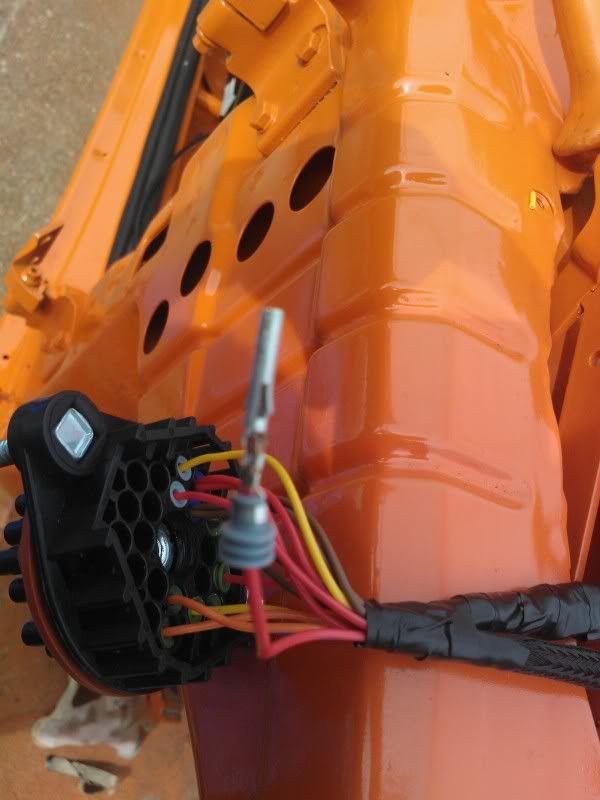 the connectors are all marked up so I have my list of what terminal is what 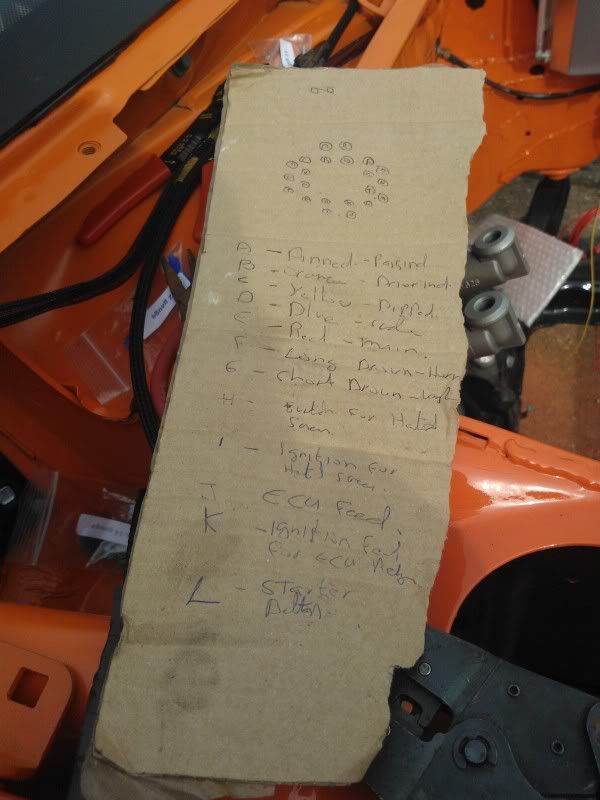 I also put terminal blocks on to the stalk 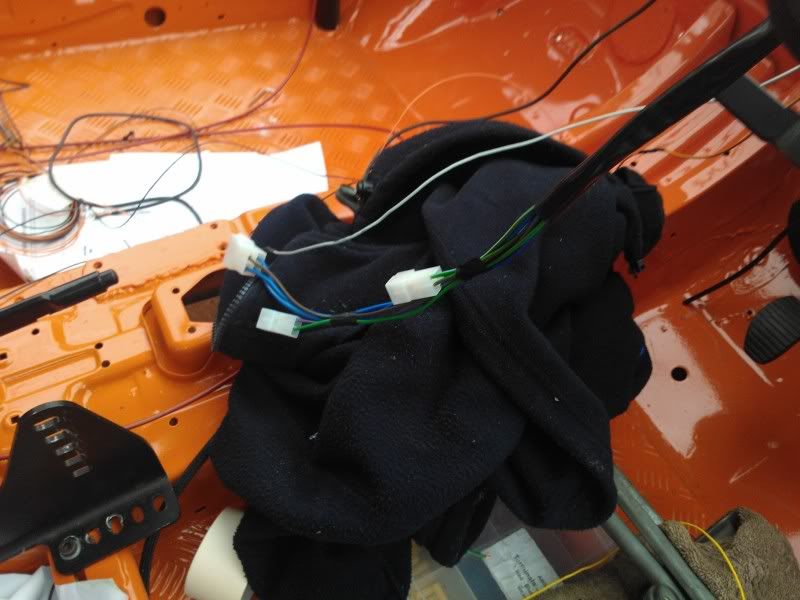 I also put one on the dials, but I forgot to take a picture of that. I then turned my attentions to the dash, I cut out a new centre bit 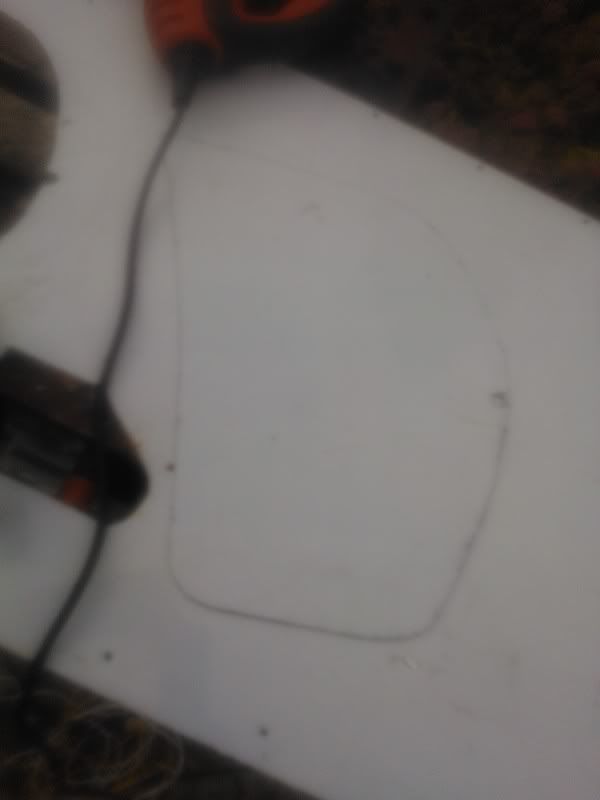 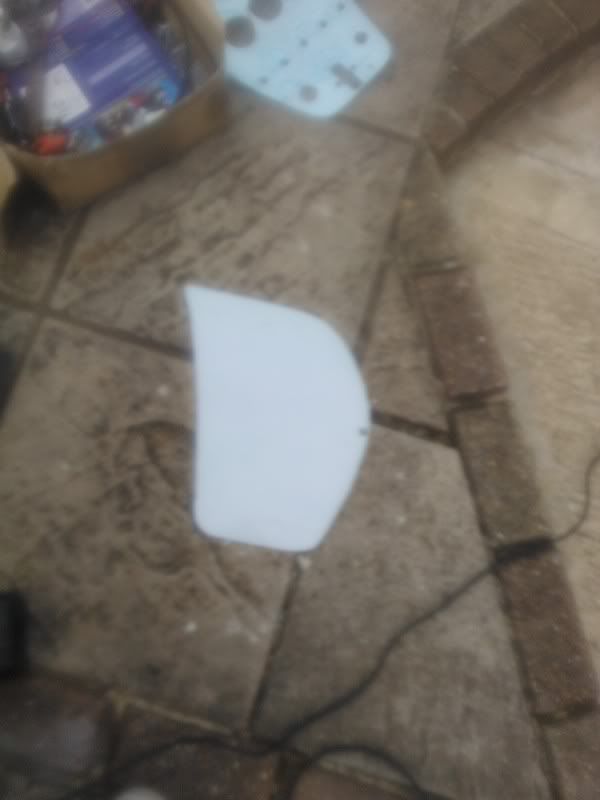 Fitted it and the dash pod 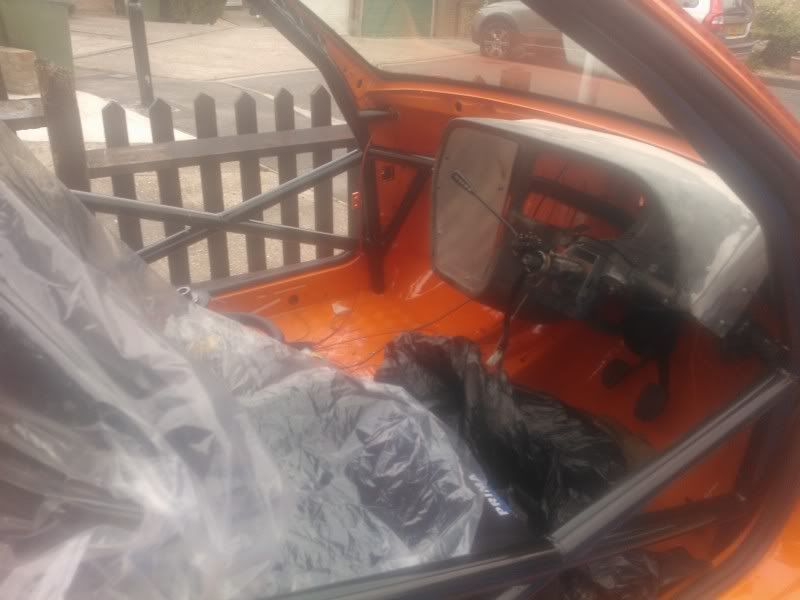 but after sitting in the seat and getting it to a confortable position, I have found I cant reach the buttons very easily, so I emailed a company local who do fibre glass dashes but no answer so I thought I would have a go. I dont really do stuff like this often, but I thought about it and had a few ideas and settled on the following. Went to B and Q and got the following 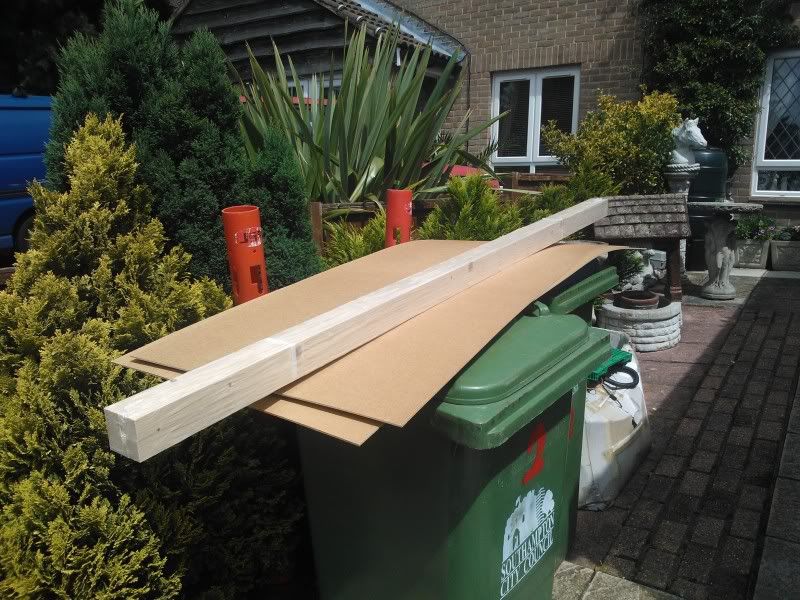 Basically I am going to make a mould out of the hardboard and then make a fibreglass pod from that. I started it today, but is going to take a while to get it right, but I am pleased with what I have so far. 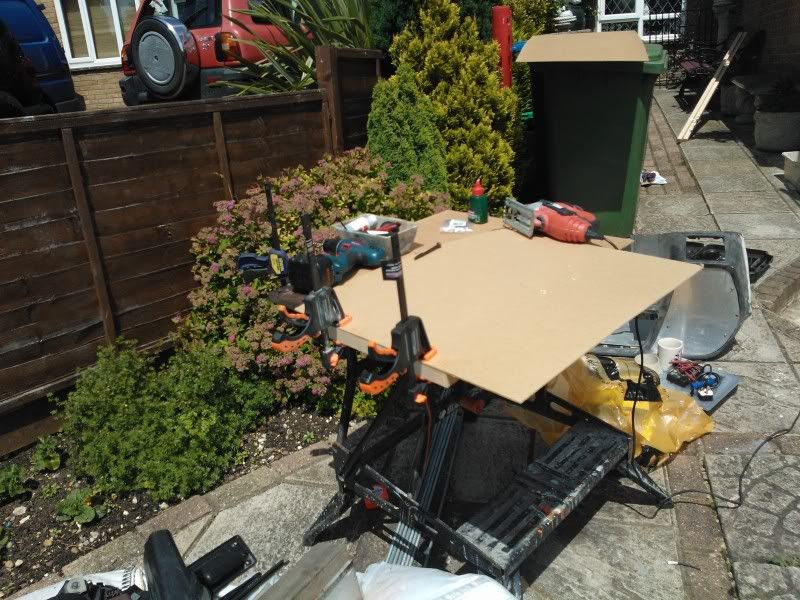 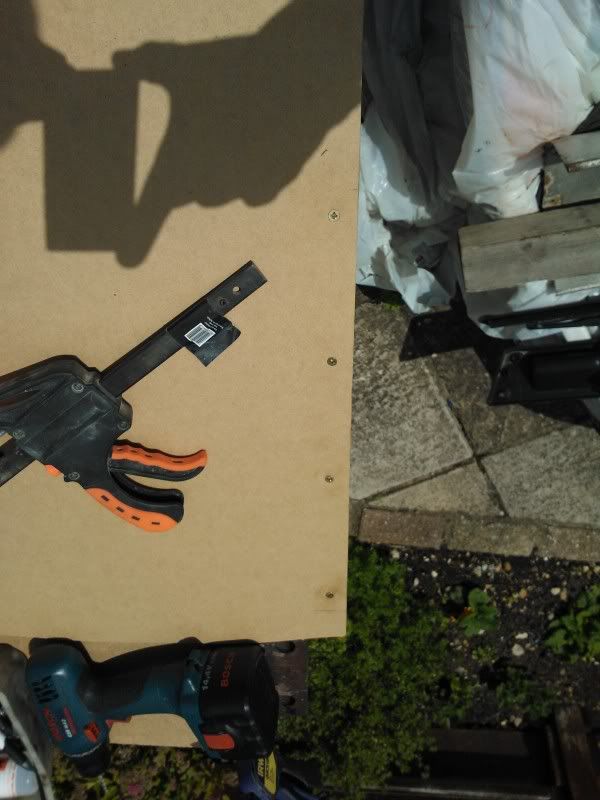 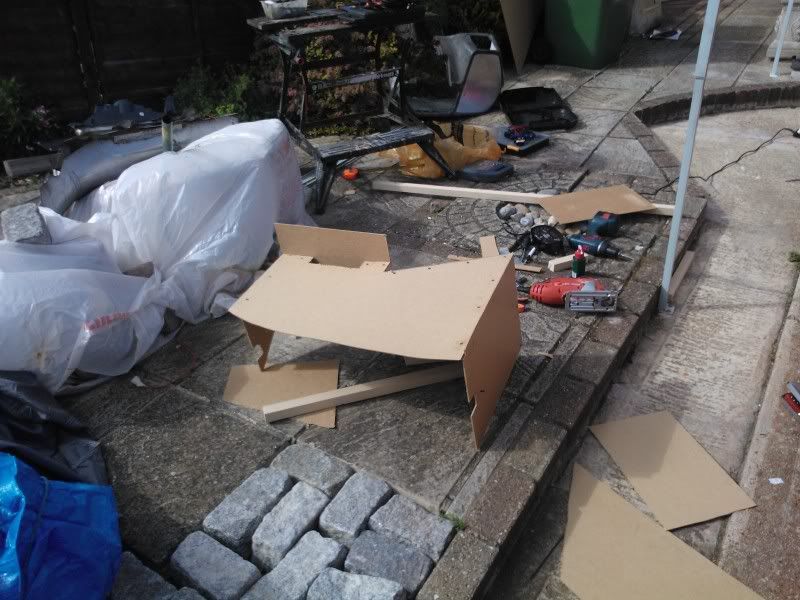 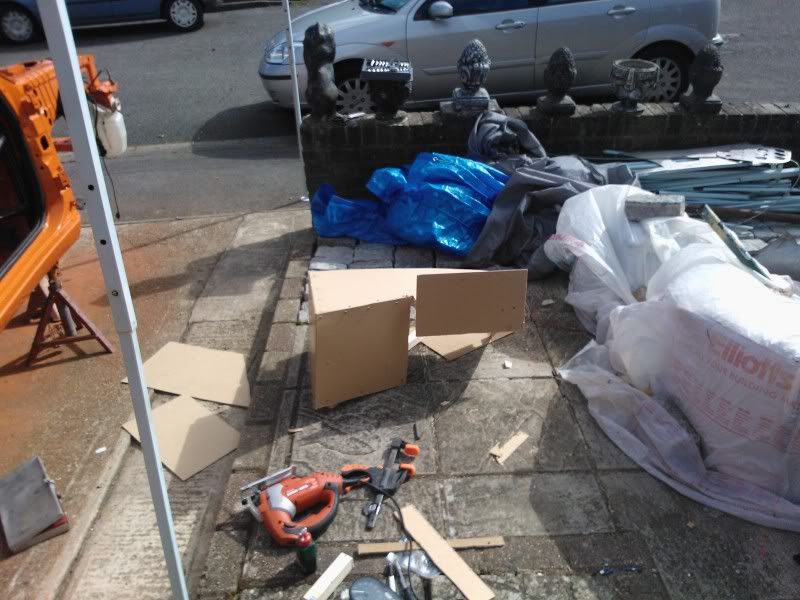 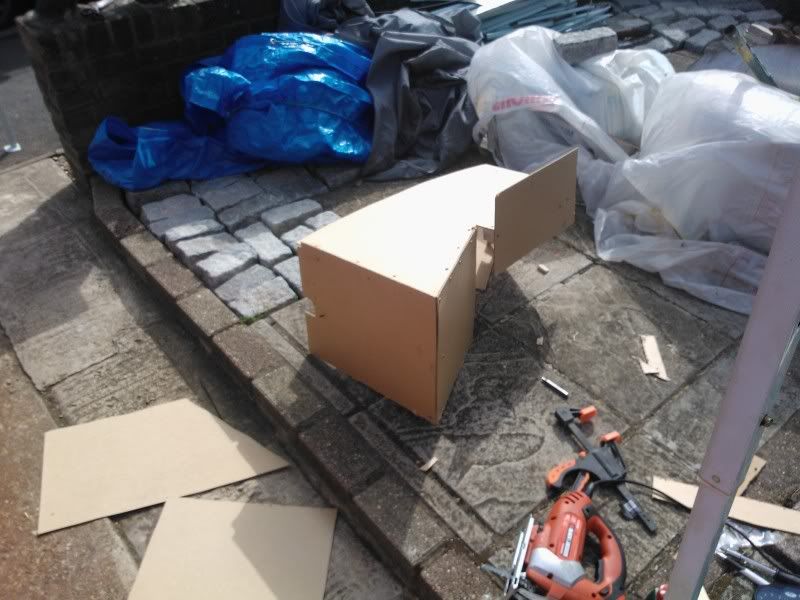 It will need a lot of filling and sanding, but its getting there slowly. |
|
|
|
|
Seasoned Pro Location: Southampton Registered: 16 Feb 2003 Posts: 5,366 Status: Offline |
Post #640
So I best update this.I am still buying bits and pieces so slowing getting all the bits I need, but the list is still huge. I managed to finish the mould for the dash pod. and here are the pics: After I finished all the wood work and counter sinking all the screws I got the poly filler out   As you can see from the above I cut a hole out, this is so I can get under the pod gauges to fibre glass them in so it hopefully makes it stonger. Here are a couple of the gauge pod   I then spent a few hours getting the filler all rubbed down 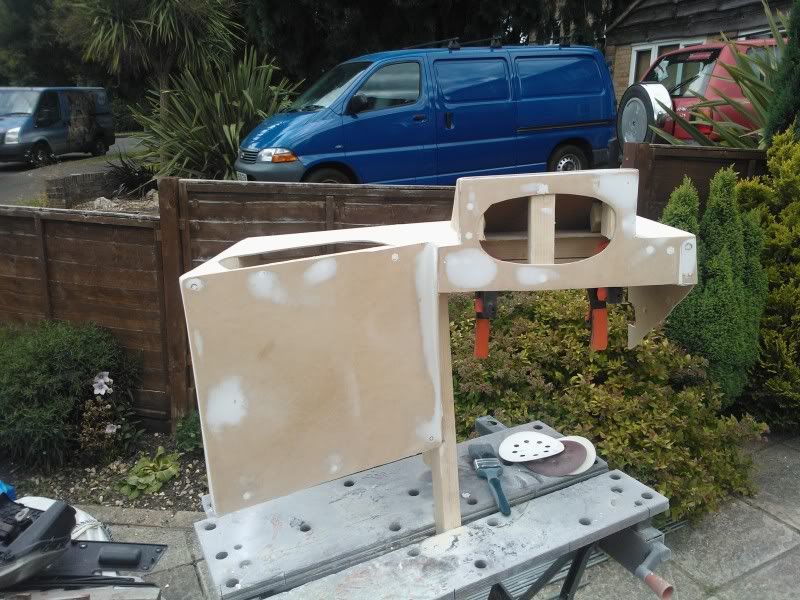 And finally it got a few coats of varnish 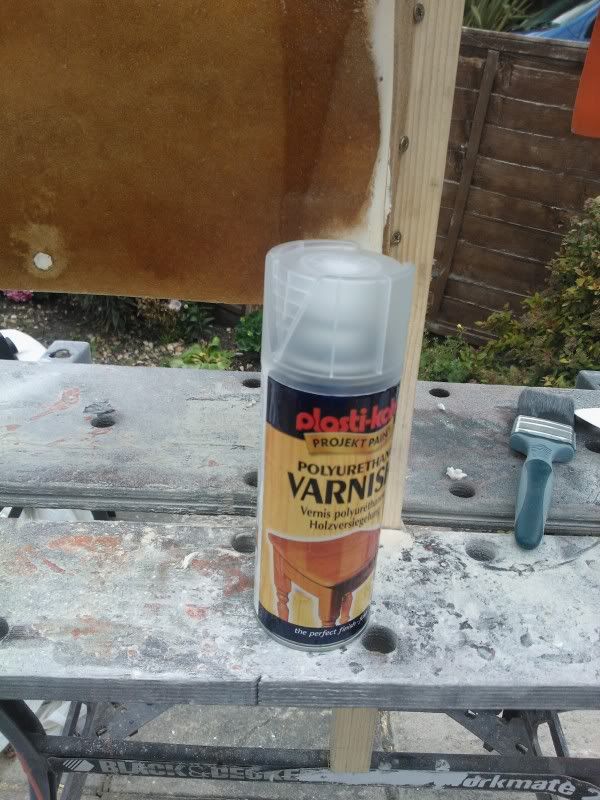 Sorry I haven't got any pics of it varnished, but it just looks like the above just shiny. Next step is to give it a good coat of wax then a coat of release agent, then I can get it fibre glassed, hopefully I can get this done this week end. |
|
|
|
|
Yeeeah Rat fans!  Location: Swansea Registered: 29 Nov 2006 Posts: 22,282 Status: Offline |
Post #641
Welcome back no get some updates on this beast |
|
|
|
 Location: Leeds Registered: 20 Aug 2005 Posts: 8,878 Status: Offline |
Post #642
nice  Creating wiring looms from scratch has surely got to be the fastest way to see a sane man to the Loony bin in record time   ________________________________________ Proud Member of the ASTOR Owners Club |
|
|
|
|
Seasoned Pro Location: Southampton Registered: 16 Feb 2003 Posts: 5,366 Status: Offline |
Post #643
Lol well it has never been said I am normal.Just moved so once the house is all sorted need to get on this. Really struggling with a dash, might just end up folding a piece of aluminium. |
|
|
|
The Peugeot GTi-6 & Rallye Owners Club - ©2024 all rights reserved.

Please Note: The views and opinions found herein are those of individuals, and not of The Peugeot 306 GTi-6 & Rallye Owners Club or any individuals involved.
No responsibility is taken or assumed for any comments or statements made on, or in relation to, this website. Please see our updated privacy policy.