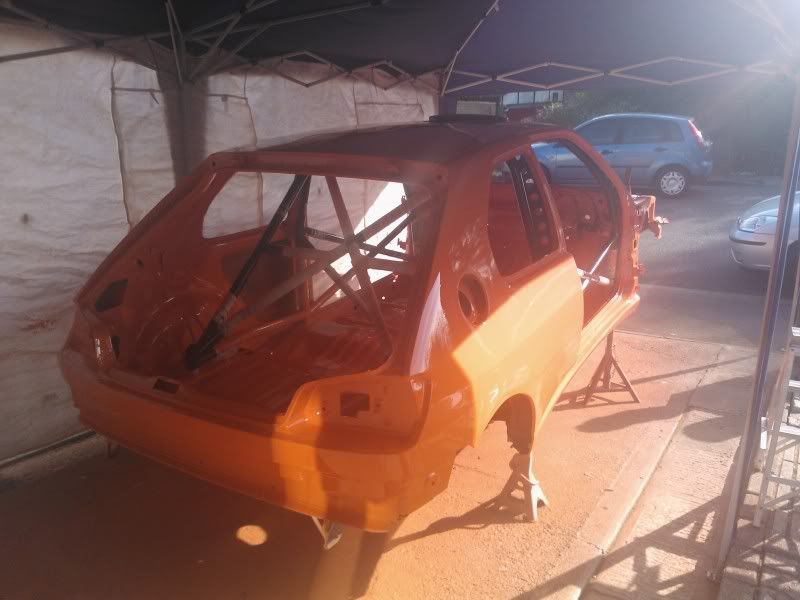
displaying posts 601 to 625 of 643

Pages (26): first .. 24 [25] 26

Author Subject: Project PUG
chris with a pug

Seasoned Pro

Location: Southampton

Registered: 16 Feb 2003

Posts: 5,366

Status: Offline

Post #601
I hope you all have your sunglasses handy!!

Well today we got some paint down, we didnt have enough to do all the car (my fault) so we did the inside and got a few coats on the outside. Which we will flat in a week or so for a really good base.

Well that is enough of my waffle here are the pics,


Doing the cage a different colour was such a pain in the arse, but after seeing it against the colour it was so worth it.
Posted 15th Jan 2012 at 14:09
mike rallye

Seasoned Pro

Location: mold

Registered: 03 Sep 2008

Posts: 1,618

Status: Offline

Post #602
very nice am liking the colour choice to.excellent project so far to Smile
Posted 15th Jan 2012 at 19:36
chris with a pug

Seasoned Pro

Location: Southampton

Registered: 16 Feb 2003

Posts: 5,366

Status: Offline

Post #603
Right about time I updated this.

First off have been collecting lots of parcels ready for putting her back together. Braided sleeving, thin walled cable, connectors, horns a new supercharger kit, allsorts.

I brought a bulk head battery terminal so last week I went about fitting it. I already had a hole in the bulk head so I just opened it up to the right size and this is the end result.


and fitted


I just think that's a better idea than to have the cable running through a grommet.

Once that was done I set about prepping the car ready to be finished painting.

I really do hate doing it, but it has to be done.

This morning she got a lovely new coat of bright orange and it looks spot on.


Once the car was painted I set about finishing off the under-sealing. Last week end I took a wire brush to all the rust underneath and burnt off under-seal from welding in the cage. Treated the areas and then gave it a coat of Zinc primer. Then today it all got finished off with some hammerite under-seal.


And finally I really wanted to fit something, but I don't have a set of ARB bushes for the front yet so I fitted the new set of horns.


If anyone can supply me a new set of genuine front ARB bushes please get in touch. I will put an ad in wanted too.

Posted 25th Mar 2012 at 18:17
daveyboy

aka Jim Davey

Location: Southampton

Registered: 01 Oct 2007

Posts: 8,648

Status: Offline

Post #604
I have a mould to produce uprated ones Ninja

________________________________________

R H Davey Welding Supplies. I sell new and used welding equipment in the Hampshire area. I take on welding jobs in the evenings, ally casting repairs are one of my specialities but I can weld pretty much anything. PM me with your requirements.

Some of my services: (See my for sale threads)
Engine mount/chassis repair
Solid Beam Mounts BACK IN PRODUCTION
Harness bars
Posted 28th Mar 2012 at 15:26
chris with a pug

Seasoned Pro

Location: Southampton

Registered: 16 Feb 2003

Posts: 5,366

Status: Offline

Post #605
daveyboy wrote:
I have a mould to produce uprated ones Ninja


But isnt that for bigger ones? I just got mine from pug today. Tenner each and thay are polly. Do you remember which way up the ARB goes?
Posted 28th Mar 2012 at 15:44
daveyboy

aka Jim Davey

Location: Southampton

Registered: 01 Oct 2007

Posts: 8,648

Status: Offline

Post #606
chris with a pug wrote:
daveyboy wrote:
I have a mould to produce uprated ones Ninja


But isnt that for bigger ones? I just got mine from pug today. Tenner each and thay are polly. Do you remember which way up the ARB goes?


Yeah I do LOL

________________________________________

R H Davey Welding Supplies. I sell new and used welding equipment in the Hampshire area. I take on welding jobs in the evenings, ally casting repairs are one of my specialities but I can weld pretty much anything. PM me with your requirements.

Some of my services: (See my for sale threads)
Engine mount/chassis repair
Solid Beam Mounts BACK IN PRODUCTION
Harness bars
Posted 29th Mar 2012 at 10:04
chris with a pug

Seasoned Pro

Location: Southampton

Registered: 16 Feb 2003

Posts: 5,366

Status: Offline

Post #607
So spent a couple of hours on her today.

First off I got the fuel tank refitted. Not the easiest thing to do on your own.


Next thing was to sort out the Bias box, the finish on it was shocking, so out came the sander and primer, then it had a few coats of gloss black and then re-assembled and fitted.


I then test fitted the drivers seat to make sure the swirl pot will not foul anywhere and it didnt, so I set about drilling and fitting . As the floor isnt level I used some nylon spacers. Also I drilled and fitted the fuel pump.


The windscreen is getting fitted tomorrow. I have ordered the fuse box and cable so that should be here next week and I can get some of the wiring done.


Posted 31st Mar 2012 at 19:17
jimmyrallye

Seasoned Pro

Location: portsmouth

Registered: 19 Apr 2008

Posts: 3,144

Status: Offline

Post #608
Awesome progress finaly all starting to come together

________________________________________


"Police arrested two kids yesterday, one was drinking battery acid, the other was eating fireworks. They charged one and let the other one off."
Posted 31st Mar 2012 at 21:30
chris with a pug

Seasoned Pro

Location: Southampton

Registered: 16 Feb 2003

Posts: 5,366

Status: Offline

Post #609
So another sunny day and my nephew had chicken pox so I spent another day on the car.

It is always the same when you think a job will only take a few mins, but ends up taking for ever, well every job seemed to be like that today.

First off I refitted the boot lid.


getting it to line up and close properly was a nightmare especially with the rubber fitted, but I got there.

Next I fitted the tube for the trailing arms, again a ball ache. Sorry no picture.

Next I fitted the eyelets for the harnesses, something that shouldn't of taken long, but paint in the thread put stop to that. I feel like all I am doing it re-tapping and re-drilling holes.

Any way next up I fitted the roller bearing wish bones to the subframe, Ironically I thought it would be a b**ch to get the washers in, but they went in first time no hassle at all.

Any way I got it fitted.


Then my mate turned up to fit the windscreen.


A word of warning, the heated screens are slightly too big so its impossible to fit the trim to the screen, so I am going to have to find a way of doing that, but that can wait.


The wires for the screen actually go on the out side which I haven't seen before, but my mate told me its quite common now.

I also fitted the oil catch tank, in order to get at the drain plug I spaced it out away from the body.


Am just waiting on Jim now to pull his finger out and machine my rear shafts so I can get her rolling to finish off the rest of the paint.

Posted 1st Apr 2012 at 20:10
daveyboy

aka Jim Davey

Location: Southampton

Registered: 01 Oct 2007

Posts: 8,648

Status: Offline

Post #610
Hint hint LOL good progress fella!

________________________________________

R H Davey Welding Supplies. I sell new and used welding equipment in the Hampshire area. I take on welding jobs in the evenings, ally casting repairs are one of my specialities but I can weld pretty much anything. PM me with your requirements.

Some of my services: (See my for sale threads)
Engine mount/chassis repair
Solid Beam Mounts BACK IN PRODUCTION
Harness bars
Posted 2nd Apr 2012 at 16:19
chris with a pug

Seasoned Pro

Location: Southampton

Registered: 16 Feb 2003

Posts: 5,366

Status: Offline

Post #611
LOL you know me subtle as ever.

On your race car does the screen fit ok?

Posted 2nd Apr 2012 at 16:25
daveyboy

aka Jim Davey

Location: Southampton

Registered: 01 Oct 2007

Posts: 8,648

Status: Offline

Post #612
As far as I can tell, and the wires are on the inside too.

________________________________________

R H Davey Welding Supplies. I sell new and used welding equipment in the Hampshire area. I take on welding jobs in the evenings, ally casting repairs are one of my specialities but I can weld pretty much anything. PM me with your requirements.

Some of my services: (See my for sale threads)
Engine mount/chassis repair
Solid Beam Mounts BACK IN PRODUCTION
Harness bars
Posted 2nd Apr 2012 at 17:18
chris with a pug

Seasoned Pro

Location: Southampton

Registered: 16 Feb 2003

Posts: 5,366

Status: Offline

Post #613
Maybe they have changed them then. Oh well I will think of something
Posted 2nd Apr 2012 at 21:13
daveyboy

aka Jim Davey

Location: Southampton

Registered: 01 Oct 2007

Posts: 8,648

Status: Offline

Post #614
Have you thought of what to tell your Mum when she finds out you've sprayed her driveway orange!? LOL

________________________________________

R H Davey Welding Supplies. I sell new and used welding equipment in the Hampshire area. I take on welding jobs in the evenings, ally casting repairs are one of my specialities but I can weld pretty much anything. PM me with your requirements.

Some of my services: (See my for sale threads)
Engine mount/chassis repair
Solid Beam Mounts BACK IN PRODUCTION
Harness bars
Posted 3rd Apr 2012 at 02:25
chris with a pug

Seasoned Pro

Location: Southampton

Registered: 16 Feb 2003

Posts: 5,366

Status: Offline

Post #615
She already knows and doesn't care. and it will jet wash off fine.
Posted 3rd Apr 2012 at 08:43
owain

Seasoned Pro

Location: Essex

Registered: 20 May 2009

Posts: 9,185

Status: Offline

Post #616
Mate this looks absolutely awesome, so good that people are still willing to put the time and money into these cars. Fair play, keep up the good work.

________________________________________

Membership expiring soon, get in contact on our new little forum project.
Posted 3rd Apr 2012 at 08:52
chris with a pug

Seasoned Pro

Location: Southampton

Registered: 16 Feb 2003

Posts: 5,366

Status: Offline

Post #617
So had a lazy day yesterday so I thought I had best get on and do something.

I do love payday week. I always get lots of parcels.


Included in that lot was a set of multi connectors


and also wire and the light terminals.


This could possibly be the best 80 quid I ever spent, an absolute must if you are going to do something like this.


So armed with my haynes manual and my power probe I terminated the drivers side rear.


and with the boot on.


Sorry I didnt take any of before the braid went on, I will do that with the others.

And here is the finished article.


I also terminated the water/methonal pump and tank. (only one pic I am afraid.)


and I have saved the best for last. I was going to go for a cheaper kit car dash set, but to be honest I have spent so much on the car I decided to push the boat out, I could of brought another GTI6 for what these cost, but oh well, well worth it.


Watch out for another update Monday.
Posted 7th Apr 2012 at 16:21
daveyboy

aka Jim Davey

Location: Southampton

Registered: 01 Oct 2007

Posts: 8,648

Status: Offline

Post #618
Only 9 thousand rpm? LOL

________________________________________

R H Davey Welding Supplies. I sell new and used welding equipment in the Hampshire area. I take on welding jobs in the evenings, ally casting repairs are one of my specialities but I can weld pretty much anything. PM me with your requirements.

Some of my services: (See my for sale threads)
Engine mount/chassis repair
Solid Beam Mounts BACK IN PRODUCTION
Harness bars
Posted 8th Apr 2012 at 02:47
chris with a pug

Seasoned Pro

Location: Southampton

Registered: 16 Feb 2003

Posts: 5,366

Status: Offline

Post #619
Well I thought 16000 was a bit too much lol. I thought they get mapped to 8.5 anyway
Posted 8th Apr 2012 at 10:43
daveyboy

aka Jim Davey

Location: Southampton

Registered: 01 Oct 2007

Posts: 8,648

Status: Offline

Post #620
They do, I'm pulling your leg.

________________________________________

R H Davey Welding Supplies. I sell new and used welding equipment in the Hampshire area. I take on welding jobs in the evenings, ally casting repairs are one of my specialities but I can weld pretty much anything. PM me with your requirements.

Some of my services: (See my for sale threads)
Engine mount/chassis repair
Solid Beam Mounts BACK IN PRODUCTION
Harness bars
Posted 8th Apr 2012 at 19:13
chris with a pug

Seasoned Pro

Location: Southampton

Registered: 16 Feb 2003

Posts: 5,366

Status: Offline

Post #621
So the rain stopped so I thought I would go get some more done.

My bulkhead connectors turned up from the states this week, so I thought I would go about fitting them.


I thought I would fit the plat on the inside so the cutting I had to do wouldn't be seen, unfortunately the connector hit the roll cage strut so It had to go on the out side. So the cutting can be seen. once the dash is in it should be fine but still could of been better.

How I wanted it


Was so close to fitting too but oh well.

Here is how it looks now


I have 4 all together, 2 going here, one will go on the other side and one will go in the middle somewhere.

I then extended the cables for the heated screen on the passenger side and put on a connector


the wires are all ready to go into the bulkhead connector.

then with the wire motor fitted

.

I was looking for something to put under the stuff being bolted to the floor and I found some of the none slip mat and its perfect.

I got the fuse box fitted and bolted down.


and with the cover fitted


and all the terminals ready to be fitted


Posted 15th Apr 2012 at 20:05
chris with a pug

Seasoned Pro

Location: Southampton

Registered: 16 Feb 2003

Posts: 5,366

Status: Offline

Post #622
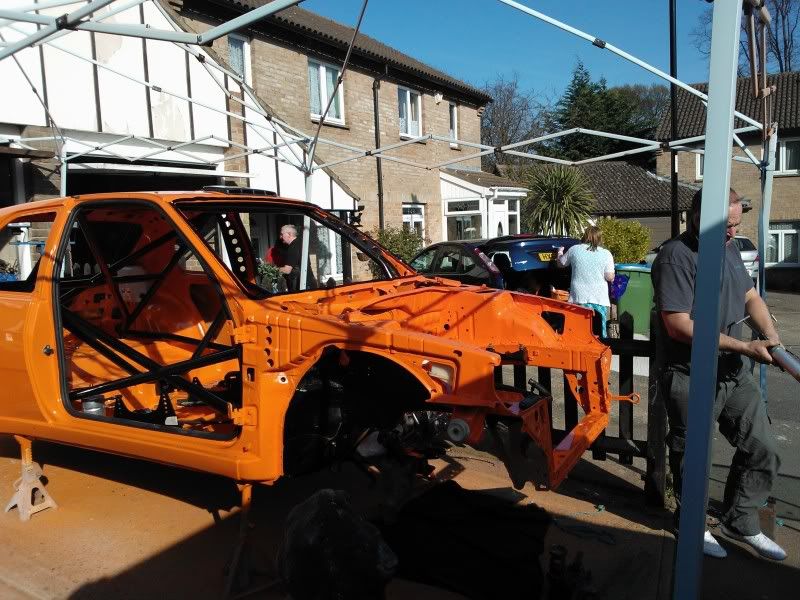
So time for another update.

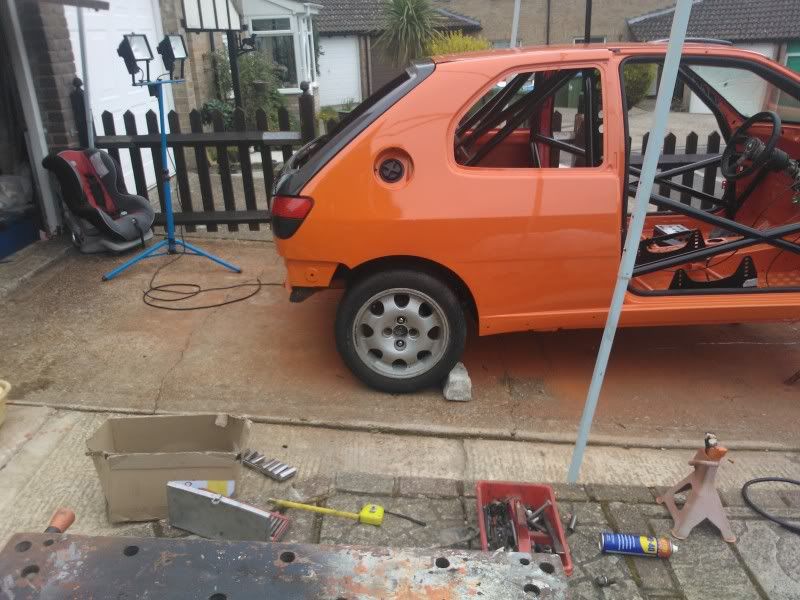
I had a few hours off this week so I got a few bits done.

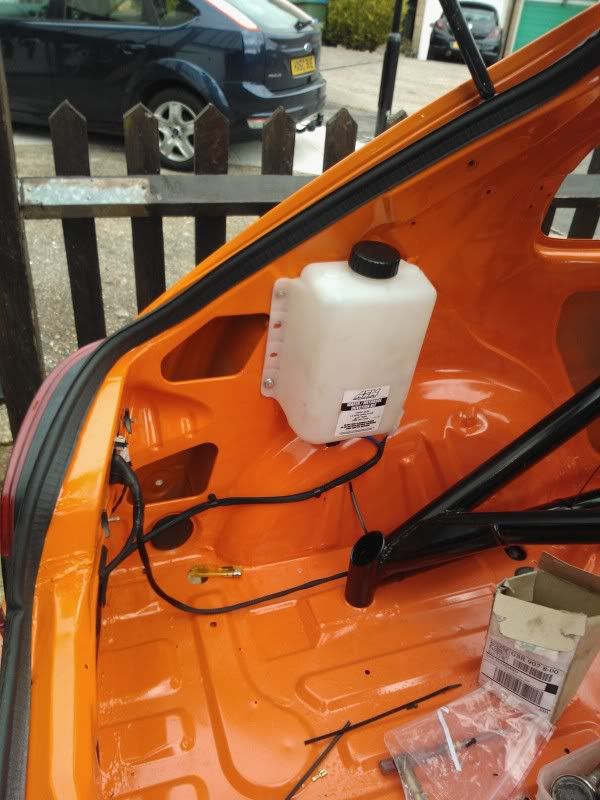
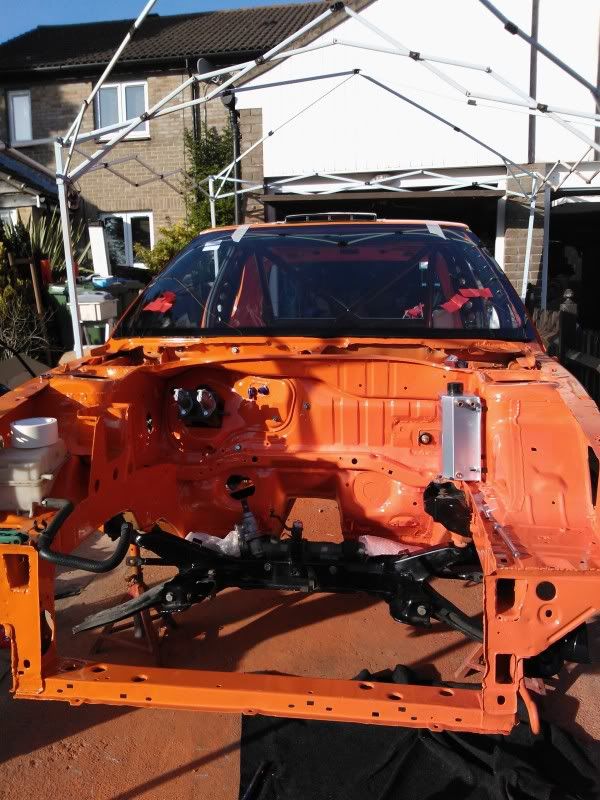
First thing was to fit the power steering reservoir as it was just balanced there.

I couldn't find the captive stud that came out of it, but a good thing about working in IT is a infinite supply of cage nuts.


and with the bolt fitted


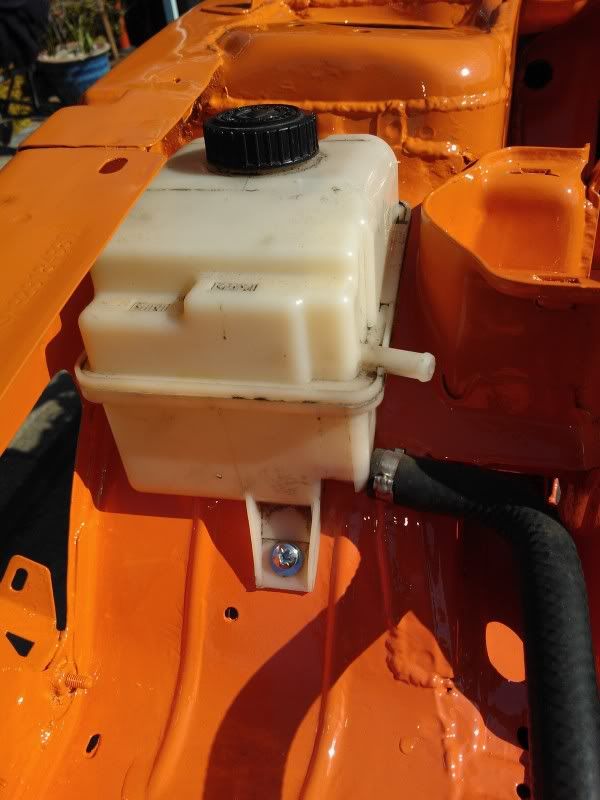
and the reservoir is not yellow which is always a bonus Big grin

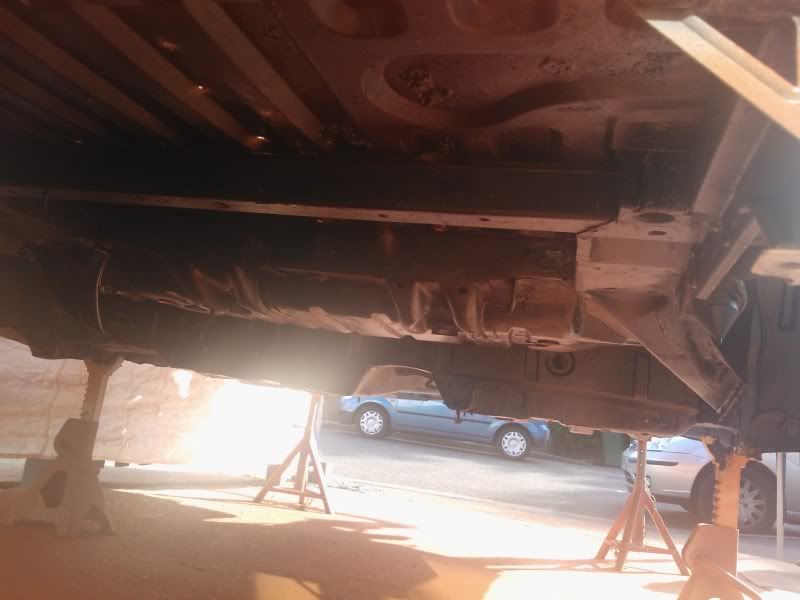
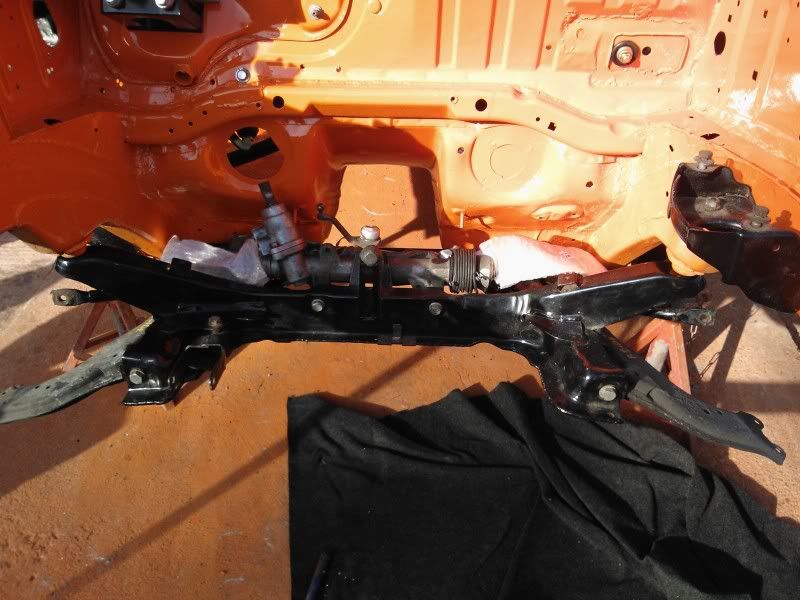
I then got the wire brush out to clean up the trailing arms and ran a tap down all the holes


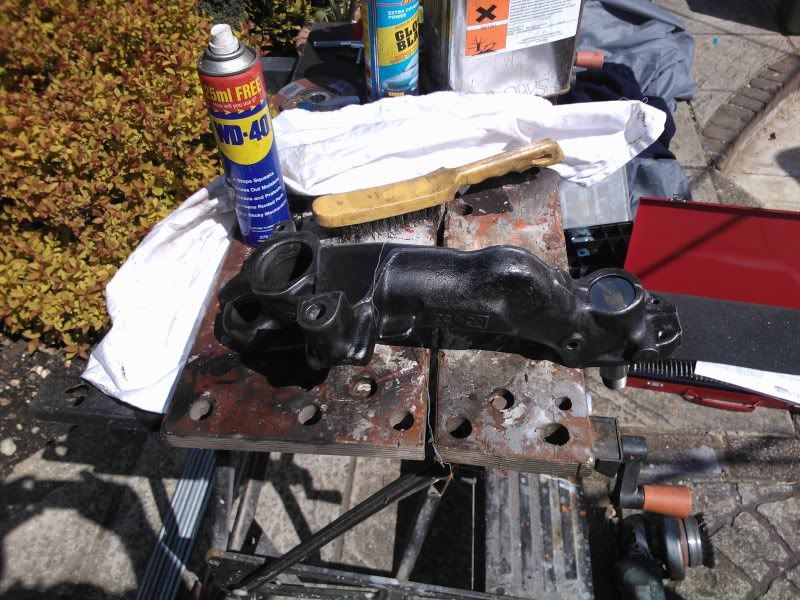
then a coat of primer.


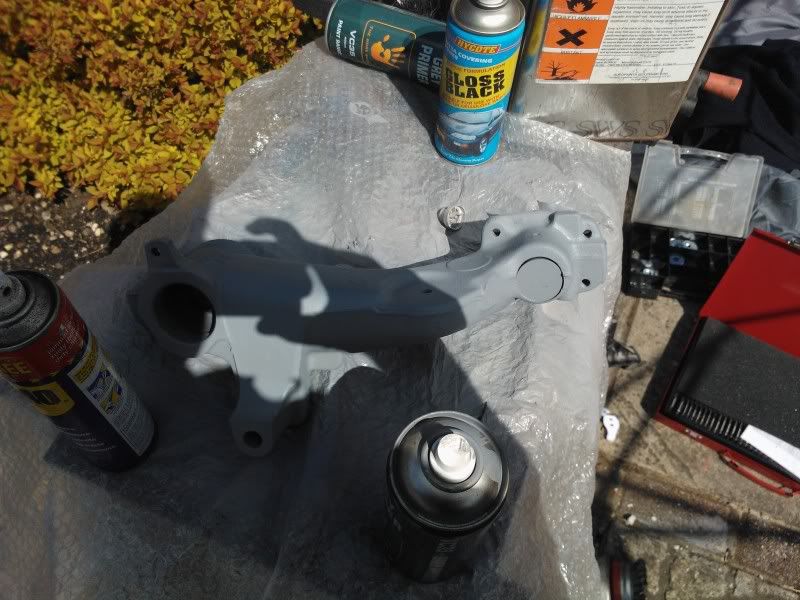
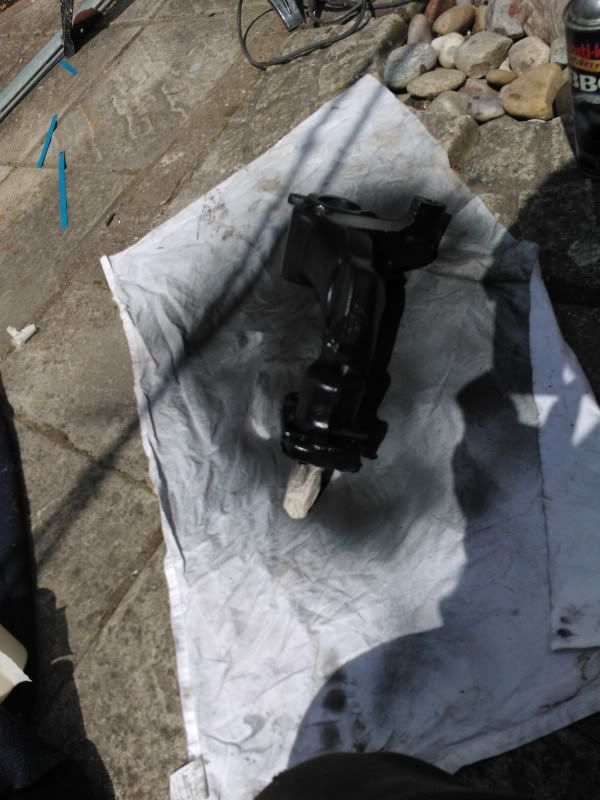
then a coat or two of black


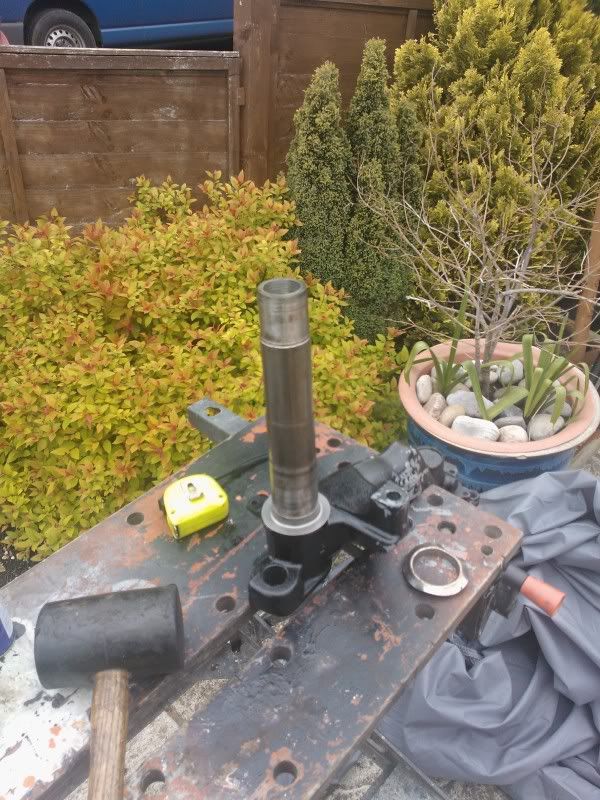
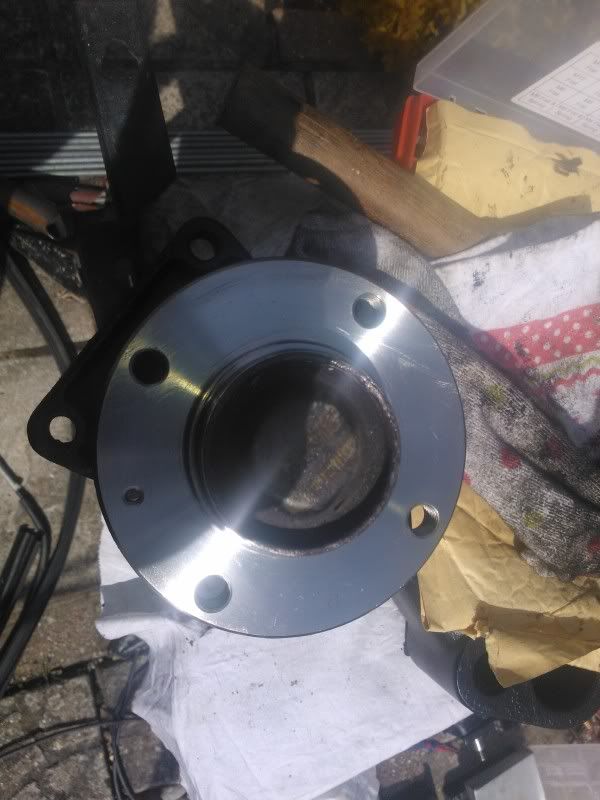
Then today I set about fitting the new wheels bearings/hub assembly.

I ordered some m8 x15mm high tensile bolts this week to refit the carriers.


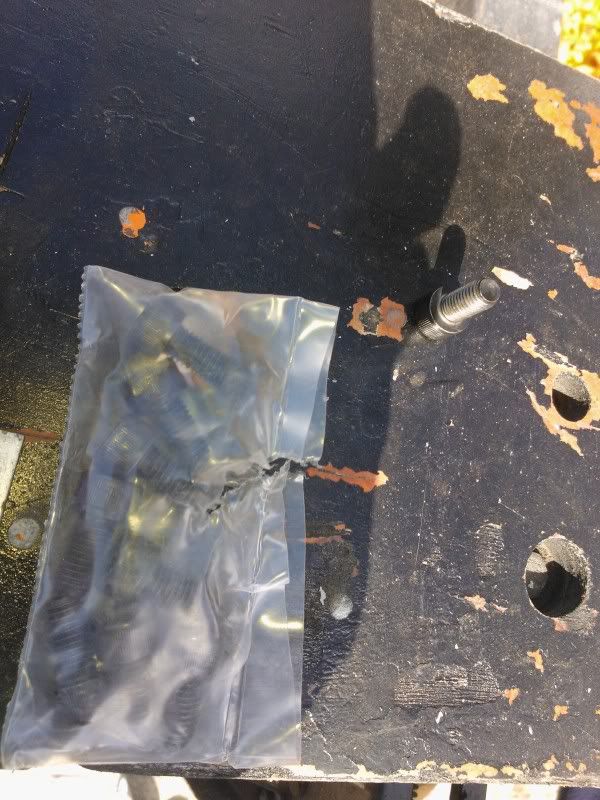
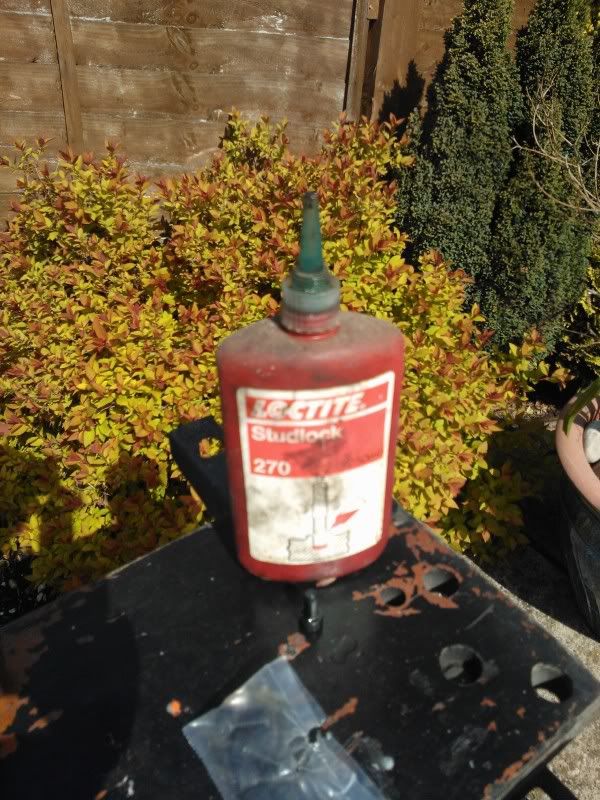
put on a bit of loctite


then fitted them, I couldn't find the torque so out came the breaker bar and the got torqued up to FDT.


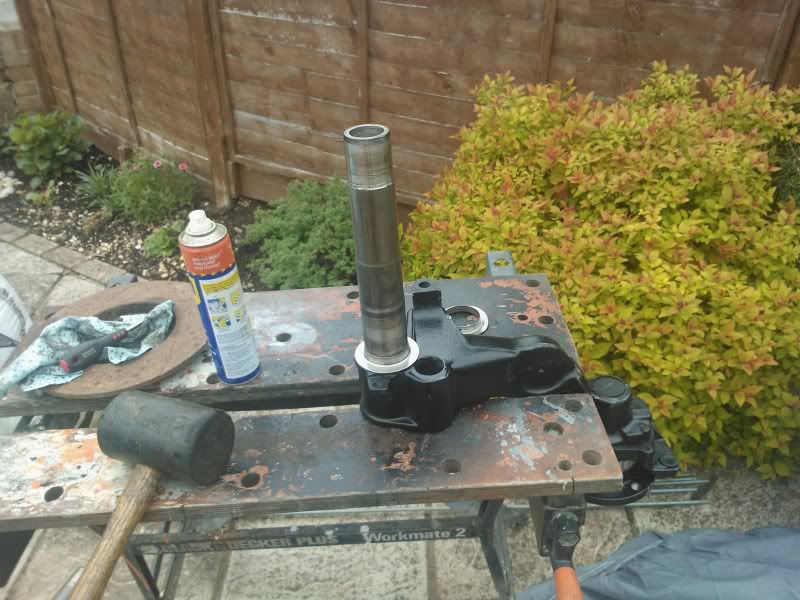
Then the spacer went on, I can now see why they are almost 30 quid each, they actually seal the rear of the bearing.


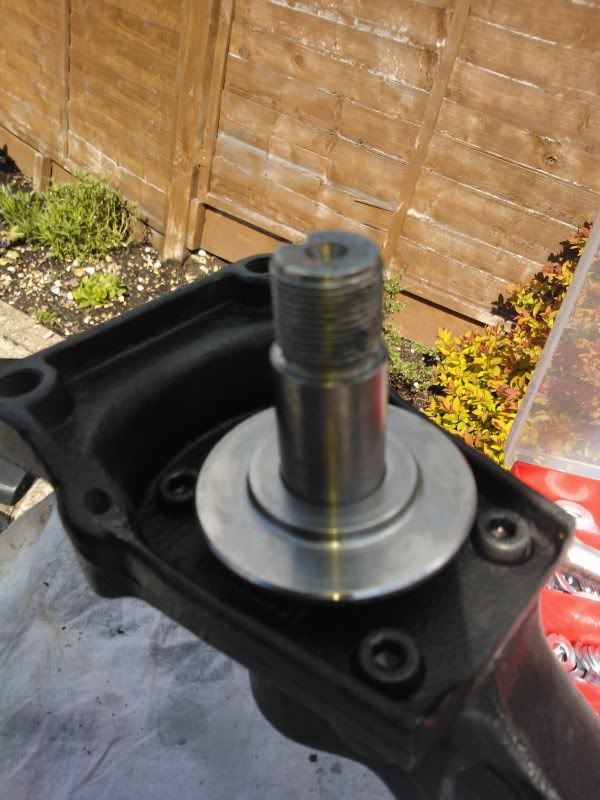
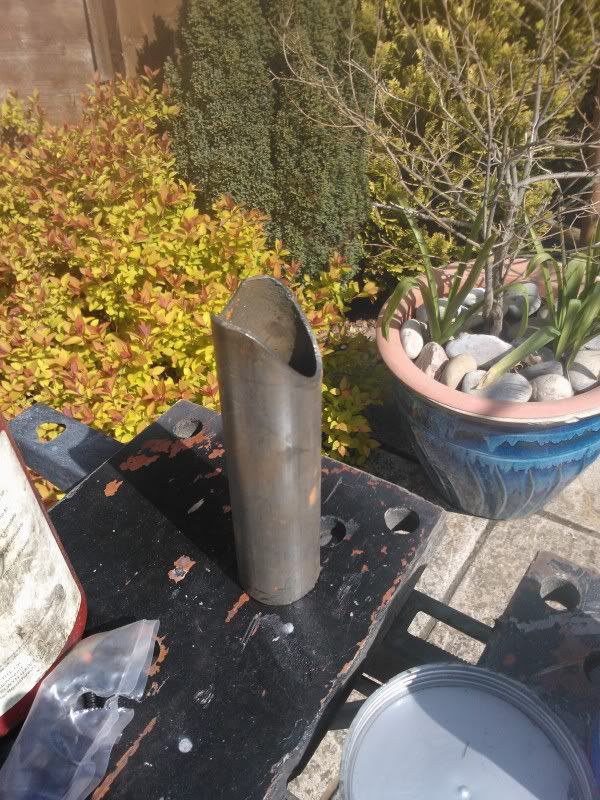
according to the Haynes manual you need a hollow drift, but I don't have one, so I used a bit of roll cage that I had laying around.


I then got the nut tightened up, 185 NM is bloody tight so it went in the vice and I managed to do it and then fold the nut down.


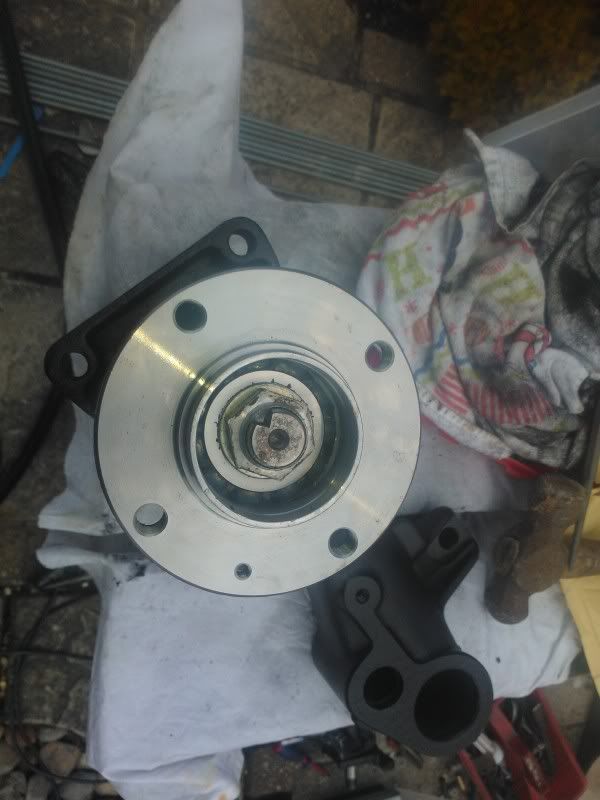
I then filled it with grease and attempted to fit the new cover which was too bloody small, bloody E bay so I has to reuse the old one, lucky I have to go to silverlakes tomorrow to find some poverty spec steering column stalks so ill pick another one up then.


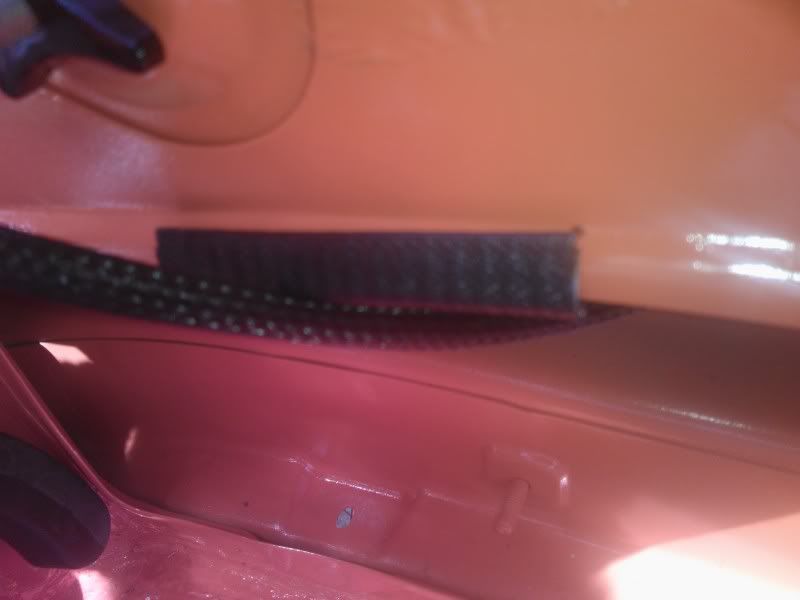
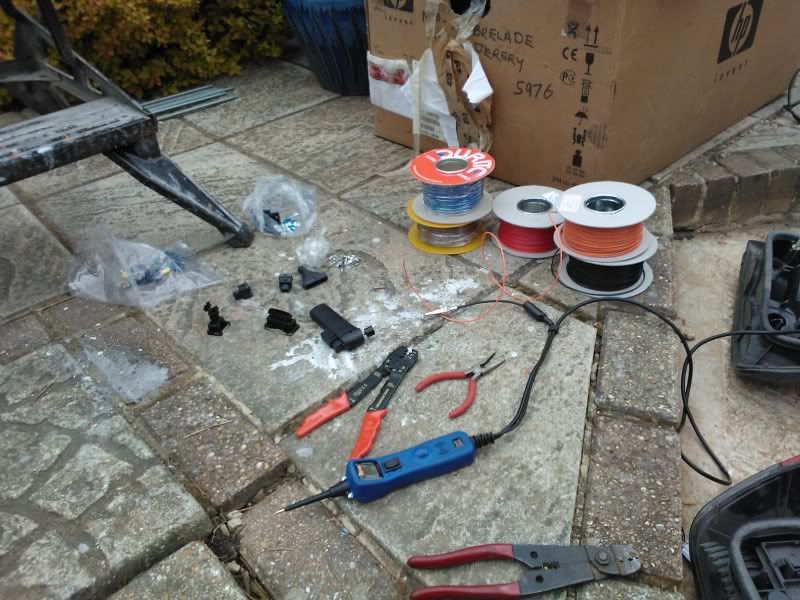
I cut some edge trim for where the wire loom might rub on the body, this was donated very kindly by Daveyboy.


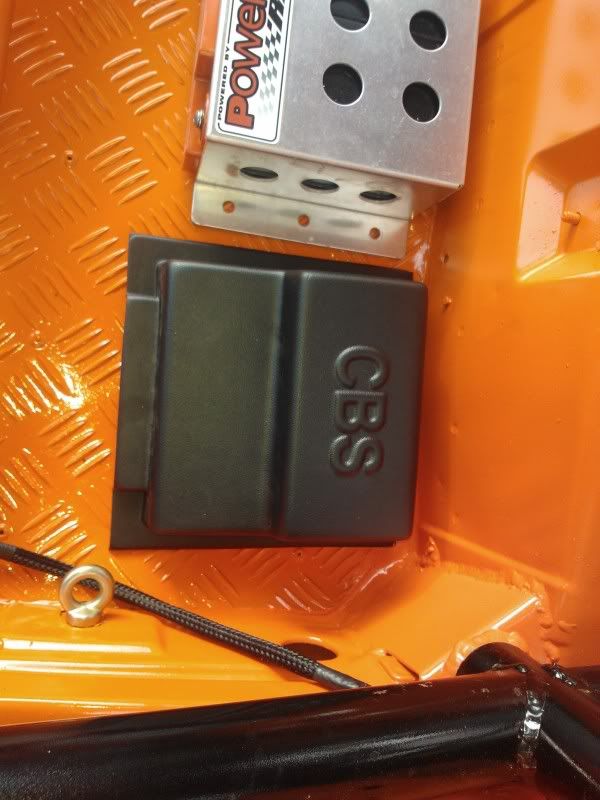
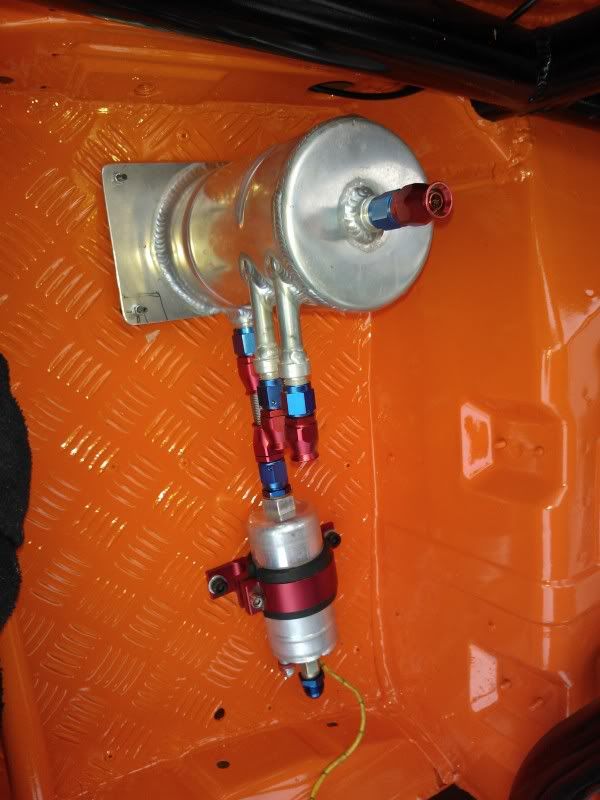
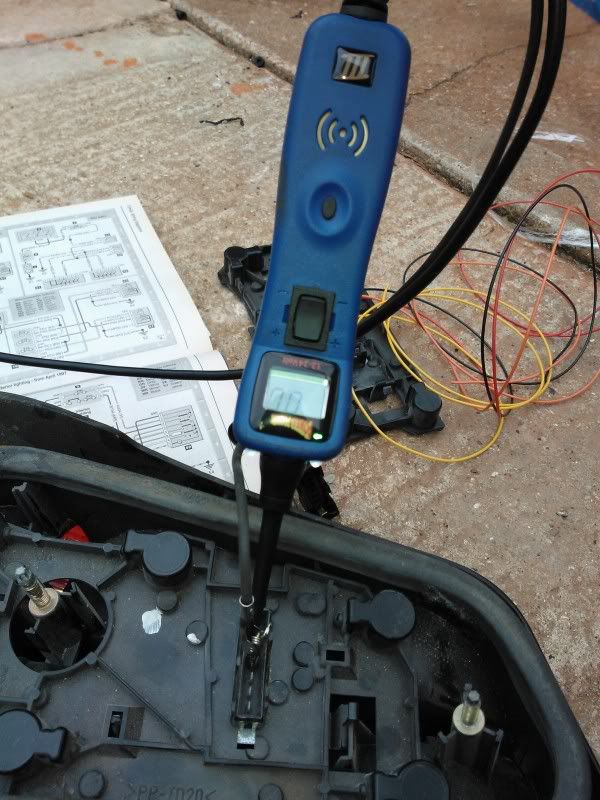
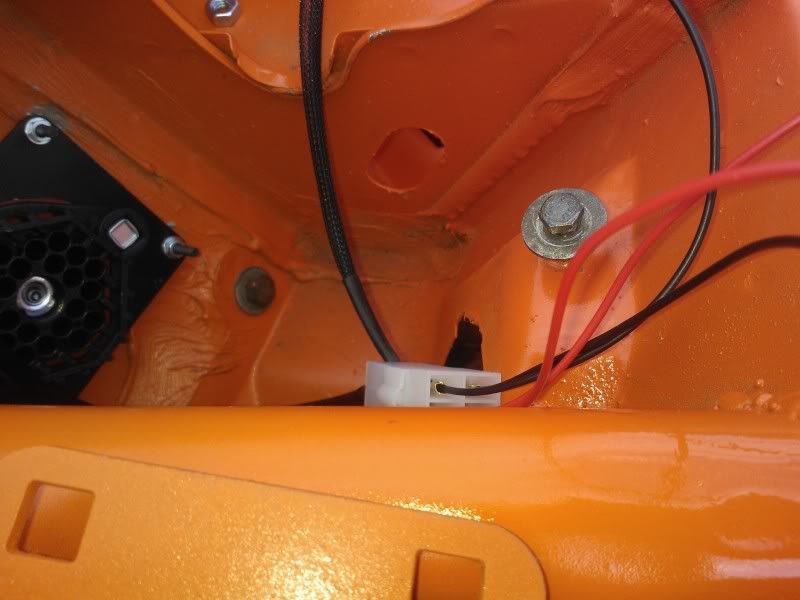
I then got the tank and pump for the water/methanol kit wired in

wire striped and terminal on


then the connector on


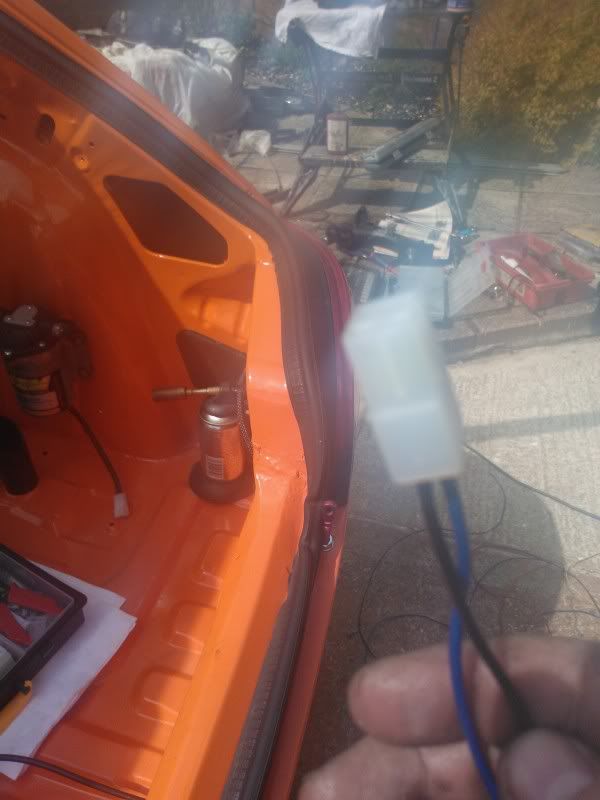
I melt the end of the braid to stop it fraying when threading the wire


the loom for this is now complete, but as it started raining I did not get a chance to get take photos of the finished article but will next time i am out there.


Posted 22nd Apr 2012 at 15:48
chris with a pug

Seasoned Pro

Location: Southampton

Registered: 16 Feb 2003

Posts: 5,366

Status: Offline

Post #623
So thought I would get out and do some bits today.

First off here is the pictures of the looms I have made.


I was struggling to find a socket for my connectors as they are imperial (AF) and the 6mm is too small and 7 slightly too big, but halfords have a little socket set on offer at the moment with imperial sockets in so I brought that, a little excessive for 1 bolt, but needs must I suppose.


Then I set about re-assembling the rear beam.

First off I fitted the rear cup things, a bit fiddly but got there in the end.


Next out came the copper grease and libral amounts put on and the new torsion bar studs fitted.


being 25mm bars they are a right pain to fit.

First attempt was a bit high


So I had another go


Still might be slightly high, but the whole thing has to come apart again as something is not quite right getting the seals to meet the arms, but I have my resident oracle Daveyboy popping round at some point, so together we will get it sorted, if not its off to miles!!

the camber looks great


And while I was out there today I decided to fit the lower strut brace.


if the weather holds I will do a bit more tomorrow.

Posted 6th May 2012 at 17:36
eddy_gti6

Seasoned Pro

Location: Durham

Registered: 20 Oct 2008

Posts: 8,716

Status: Offline

Post #624
Coming along well now. Like the locking pins on the boot lid Smile

________________________________________


Clicky: [url =http://www.306gti6.com]click here[/url] remove the space between [url & =
Posted 6th May 2012 at 20:03
prism7guy

Seasoned Pro

Location: DoncastAAAAARGH

Registered: 13 Jan 2008

Posts: 4,638

Status: Offline

Post #625
eddy_gti6 wrote:
Coming along well now. Like the locking pins on the boot lid Smile


Good idea, i was thinking of how i could do mine, now i know. LOL
Good project Chris, good to see your progress. Smile

________________________________________

Goldie the track car.
Posted 6th May 2012 at 21:08

Pages (26): first .. 24 [25] 26

All times are GMT. The time is now 19:25

The Peugeot GTi-6 & Rallye Owners Club - ©2024 all rights reserved.

Please Note: The views and opinions found herein are those of individuals, and not of The Peugeot 306 GTi-6 & Rallye Owners Club or any individuals involved.
No responsibility is taken or assumed for any comments or statements made on, or in relation to, this website. Please see our updated privacy policy.