Post #373
Have copied and pasted my last two posts from DW as forgpt to update here too.....
Today, having watched the last half hour of Le Mans (really got into that this year….watched it late into the night last night, loved it!) and having done all the fathers day stuff (including going to see my dad, who wasn't in, and landing sunday dinner cooking duties!!), i got to play a bit with the Rallye.
Started out by doing a test section on the underside where i wet sanded the zinc primer. Like the small section of Epoxy mastic, im not happy with the brush marks in the finish. BHs guide say it can be wet sanded to a point. Im planning on wet sanding and then asking my mate if he can spray the new 1ltr tin i have (again, can be sprayed if thinned correctly). I'd like a really decent finish on the underside too. Not sure if i'll have to wet sand too much of the original coat to the point it wont protect properly so as i've got some more, i'll get it sprayed on. Didn't get any pics of this although i'm sure you've all got an imagination

Next step was to get rid of some more of the blast media that still seems to in there. This inside the inner wing.

A slight opening up of the panel and out it came.

[/url]
So with that done, i decided to move onto the heater fan….thanks to Mr Blaster who just seemed to shove the nozzle anywhere, including fan air intake, the fan was full of media. Joy. So i started by popping out the glovebox (pain as the hinges have two plastic pins needing removal, one of which you need to be a contortionist with the hands of a 5 year old to get to. Removed eventually. Popped the rubber cover off the power & earth wires and media is peeing out already. Not good.

Wires removed. You can see around the joint line on the fan unit and on the bracket i removed the evidence of the matrix failure.

What has someone been doing to the wiring? I need to chase this back further and see what is what...

The fan innards…..yuck.


This is what came out of it….

Evidence of the previous (known about) matrix failure

Then, the piece de resistance…. I had a look at the bulkhead and though hmmmm, sound deadening looks a bit odd. Because it is. Someone has been at it with a stanley knife.

Couldn't figure out why, until i pulled the carpet forward. WTF is that i thought? Very quickly dawned on me that someone has drilled the bulkhead. Ill guess to run a power cable to the boot for some stereo gear, i can't think why else, unless its had a battery relocation done at some point in its past (i know it was stripped to be a track car) but havent found anything else to suggest this is the case

The offending bulkhead hole.

So a little more welding to do and more parts on the shopping list. Ill test the fan motor on the bench but might put a new one in for good measure. The housing it sits in has clearly been prised open as the two halves don't go together properly and clips are broken. Pain to change that and i may well yet have the dash out completely. Need to chase back that fan wiring and see whats what and im half tempted to chuck another matrix in it while the dash is out.Did a bit more to the Rallye today. Since finding what i found previously, its becoming more obvious the dash needs to come out. But for now, it was about removing the passenger seat and carpets.
First job was to get it off the jig again as i need to be in and out of the car frequently. Not doing that with it on the jig so for now, its back on axle stands again and with it back in terra firma, out came the seat and i got busy on removing the carpet. Centre console comes out first and the first thing i find is a broken mount.


Not the end of the world but maybe something else to replace. With that out, i undid the dash mounts at the base of each A pillar and removed door seals. Little surface rust underneath but nothing to worry about.


Then removed the front carpet. First thing i noticed is that its been cut in half and it's in two pieces rather than one. Not a huge issue as you cant tell once everything is in and it's perhaps easier to remove. The foam backing to the front carpet sections was very wet though, so they are in the back garden drying out. Interesting there is a polystyrene section under the drivers side carpet which goes under the footrest to the left of the clutch pedal.

Then the lump in the floor from being jacked in the wrong place..

The bigger surprise was the passenger side floor. The sound deadening was already cracked and lifted but taking out the body plug, which had been sealed in, revealed it hadn't sealed very well at all…..

The bigger surprise was yet to come…..i pulled up the bottom of the bulkhead sound deadening to find…….

A 13mm ring spanner thats clearly been there for some time! And then, on removing the rear carpet….

A T10 torx bit! I know this car has been apart before but leaving tools in it? Well, ill take them.
So, with all the carpets removed, there was plenty of mess to clean up.


I took the opportunity to have a look at the seat pretensioner wiring for the driver's seat. This is the one i had to cut off from the seat and, i suspect, the cause of the airbag light on the dash. Interestingly, the drivers side wiring has an odd date code, 18/10/1999, which leads me to think this has already been replaced once as its different to the date on the other side, and, manufactured after the car was built.


Still, it will be replaced again and see where we go. Theres also plenry of evidence of it being poorly put back together at some point. Hacked fittings, and thats assuming they actually bother to do the nuts/bolts/screws up etc...

There isn't a huge amount else i can do right now until i find this other stiffener panel, which still hasn't appeared anywhere. I may well investigate and see if this panel is common across the 306 range (im hoping so and cant see why not?) and may try and find a shell with one still intact. No point having any of the welding work done until i know what's happening with that.
________________________________________
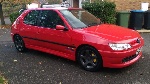
Cherry Red Rallye .... On going OEM spec resto
China Blue GTi6 .... Weekend toy
Black 208 GTi .... Wife's car now
Silver BMW 550i.... The executive missile