displaying posts 576 to 600 of 775

Pages (31): first .. 23 [24] 25 .. last

Author Subject: Track Cars for Dummies
phillipm

Seasoned Pro

Location: Rotherham

Registered: 15 Oct 2006

Posts: 20,607

Status: Offline

Post #576
Might have been...

________________________________________

- Bespoke rollcages/additions/adjustments. Half cages right up to complete custom spaceframes - MSA/FIA spec, CDS, ROPT, T45, etc - PM me
Email me!
Custom-made polybushes available - need an odd size or fitment? - anything from batch work to one-off pieces.
Posted 9th Sep 2011 at 13:26
cwspellowe

Seasoned Pro

Location: Calderbank

Registered: 19 Jul 2009

Posts: 6,496

Status: Offline

Post #577
cjm_harris wrote:
owain wrote:
Unfortunately there's a big pipe for "cooling" of the power steering fluid, and it's right in my way. Shame it's there really, as I've never heard of anyone having problems with overheating power steering fluid. If only it had some kind of accident involving a hacksaw.


Laugh my ass off

I love your approach to doing things mate, top work!

Also, good to see the top mounts going to good use Thumbs up


Similar approach to mine, only mine was a case of "oops, guess that's not the aircon pipe and I shouldn't have ripped it out" Laugh my ass off

Nice update buddy. I shall do the same soon Ninja

________________________________________

Bye bye Sundance Kid Sad
Posted 9th Sep 2011 at 18:37
owain

Seasoned Pro

Location: Essex

Registered: 20 May 2009

Posts: 9,185

Status: Offline

Post #578
Right, after a monster Photoshop session with the latest photos, it's time to bore people with another update.

First up, the picture I didn't have before - trial and error to an extent as I couldn't be arsed with drilling up from below, add another hole, penny washer and bolt and the topmounts are now actually secured properly.


Right, this oil cooler. While I was there it seemed appropriate to remove the useless poverty-spec towing eye, which looks frankly ridiculous cowering below its big brother.


I believe I'm right in saying that the Spice Girls penned their 1996 hit balad "2 Become 1" whilst performing this very act of weightsaving.


If there was headscratching done over the positioning of the cooler, the cogitation that went into the running of the pipes was enough to leave your scalp bleeding. Each pipe has a 90 degree end and a straight end, which only served to add to the confusion. Still, eventually it became clear the left outlet would need a 90 degree bend, as it was too close to the bumper when it was back on. It fitted well enough, but some minor work was still needed on the bumper to make sure there was plenty of clearance.


While I was poking around, I found my air inlet pipe was in this kind of condition:


Which was pleasing to see. Luckily I had some spare pipe so it's been sorted for now, but something will need to be done there as it'll just happen again.

The right-hand pipe was easy enough - there was a convenient hole to run it through and round the rad.

The left-hand pipe proved a bit more tricky - I didn't want to ever risk them getting scraped along the floor, so did not want to run them under the car. I decided in the end to take advantage of my single-fan goodness, and to run it up and over.


Plenty of clearance from the bonnet, all good. Just make sure you don't over-tighten those connections.

Having removed the fog lights and a lot of the plastic stuff from the bumper, I was left with a big gaping hole in the front, which not only looked a bit crap but would also let stones and bits up into the washer bottle, some random wires and rad pipes. Not ideal, but metal mesh is hard to work with and heavy, and anything too serious would block air. In the end I bought some plastic mesh from eBay to give that a go - not a glamourous solution but does the job nicely enough for me. Cost a couple of quid, weighs zero and can be attached with a staple gun.

Apply to inside:


I left some of the original plastic in the middle to stop the lower part flapping about too much.


True enough it's not fantastic, but it does a good job of blocking the light to all the crap behind it, whilst allowing pretty much unrestricted airflow to the cooler.


________________________________________

Membership expiring soon, get in contact on our new little forum project.
Posted 10th Sep 2011 at 13:44
owain

Seasoned Pro

Location: Essex

Registered: 20 May 2009

Posts: 9,185

Status: Offline

Post #579

Next up, time to remove that dastardly ABS. It's heavy, it gets in my way when I'm trying to do things, and it means putting in more liquid gold RBF660 than is necessary. Few bolts and bits later the ABS pump is out, leaving behind a mass of wires and pipes.


I thought initially I'd need to cut wires to get these out, but was assured I wouldn't; sure enough follow enough wires, unscrew enough fuseboxes you never realised were there...


...and it's free.


Best option seemed to be to just rip out everything involved, then start again from scratch. Bit of bending and scraping later, and you've got yourself a big ol' spider of steel brake line.


Which leaves you with a nice bit of space to work with.


Oh yes - and get those hose clips on that power steering loop from earlier.


Cooling my arse.

The next hour or so was just a bit of playing around with awkward reels of copper pipe and my good friend The Bender. Bulkhead connector for the rears, and you get something like this:


That's one pipe from the MC going straight to the bulkhead for the rears, and the other into the t-piece for the two fronts. The front pipes go through the holes straight into the arches, not underneath as the standard ones do for no apparent reason. Fronts done:


Hmm, bulky.


The grommet below the connector is ready for the power cable when I move the battery, thought I'd do that while I was here. Which looks something like this from the inside:


I'm never really sure with these copper lines how tight you're meant to do them up - not tight enough and they'll weep, too tight and you start deforming the copper end as they're so soft. Not a problem on the plain flared ends, but on the other kind (I don't know the name) they'd distort quite a lot I'd imagine. We'll see.

Anyway, bias valve needs to go in. I had a couple of straight brackets (same ones I used for the oil cooler), and bolted it up.


Big of marking up, and bend then trim one side.


And self-tappers for the W.


The line to the rears was run straight up the car, keeping it as close to the bodywork as possible to avoid me catching or damaging it when I load stuff into the car. Plenty of clips to keep it from knocking about.


I intended on running another bulkhead connector at the back, until I realised there's actually a bit of box section exactly where I wanted to run the pipe, so had no way of doing so. Instead I drilled straight through, and used grommets on both sides to make sure the brake line wasn't touching the chassis.


Luckily just about managed to do the rear without removing the backbox, another t-piece and some bender action, so more siezed compensators for me.


Next up, time to get those lovely new discs and calipers on. Nice.


Nice shiny new wheels to go over them, and with a nice bit of camber they really do look the monkey's nuts.


Annoyingly the missus was out at this point, so after about an hour of gravity bleeding and pumping the pedal myself, I was left with appalling brakes with clearly still lots of air in them. Win.

I'll bleed them through properly at some point, but took the car up to an industrial estate up the road and they did at least stop, albeit with SpongeBob Brownpants having reserved the top two inches of travel for himself.

________________________________________

Membership expiring soon, get in contact on our new little forum project.
Posted 10th Sep 2011 at 14:11
owain

Seasoned Pro

Location: Essex

Registered: 20 May 2009

Posts: 9,185

Status: Offline

Post #580
Last up for this little stint, it seemed pointless going to all this effort just to put the battery and wiring back in, so ordered myself a Red Top 25 and decided I'd fit that instead.

Determined not to screw anything up, I was careful to remove one wire at a time, and relocate it. I cut the negative battery clamp off, crimped on some M10 spade connectors and bolted them to the chassis earthing point the gearbox used. There was one wire from the block, one from the gearbox and another from elsewhere. In the name of neatness I ran a new cable from the chassis to gearbox, then piggybacked another new cable onto the block.


There were three cables going to the positive terminal - a twin going to the fusebox and another fat one going off somewhere. Again, spade terminals on them, along with the new 170A cable running into the cabin.


All three heatshrunk to the max to make sure nothing can short, and bolted up tightly.


Then one final bit of heatshrink over the whole lot to insulate it:


And job done - use some of the old brake line clips to hold it down, and you've got a nice secure, insulated connection to the cabin.


I've got an FIA killswitch to fit, but Rikky buggered off on holiday and didn't reply to my PM so I'm yet to fit that. Apparently I'm looking for a thick brown wire going to the relay on the back of the ECU/battery box, which will cut the spark if opened. Havn't had a chance to look yet, I'll probably try and fit that tomorrow. For now I'm just running the positive straight onto the battery (and disconnecting it when not in use, as these Varleys are much more susceptible to drain), and an earth lead is currently going from the battery to one of the passenger seat mounting points. I'll attach it directly to the chassis when I get the bits to secure the battery, at the moment it's just sat on the passenger seat for testing.

Seems silly wasting space on the battery box when it's no longer got a battery in it, but silly buggers went and stuck the ECU in there as well. Not really sure what to do here, but once you've cut the battery part off there's no going back.


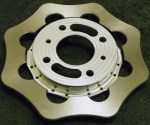
After a bit of a think, I came up with this solution. The steel used for the arches is quite thick, so I drilled two holes through the side of the ECU box and into the metalwork. After lots of swearing and pain, I managed to tap the holes out to M6. I *hate* tapping threads.

Squeeze fat hands into ECU box with a short screwdriver, and it's actually a lot more secure then I expected. WIN.


Quite frankly after that amount of dicking about with electrics I was pretty sure I'd have shorted something, or screwed something up but hey, no way of finding out without checking it up. The battery only came part charged, so was not holding out much hope for a tiny battery starting an old engine with new electrics.

Fair play to the battery, started up first time. I did not see that coming. Just goes to show that as long as you're careful and think about what you're doing, any old monkey can do this kind of thing.

So.

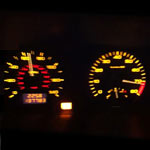
Next day, knowing I hadn't overtightened the oil cooler connectors, I decided I'd take the car to work to give it a decent drive. No silliness, no throwing it around corners, just a decent run out. Keeping a *very* close eye on the oil temp, oil pressure, water temp guages and the distance between me and the car in front, I made my way to sunny Southend - without incident. Again, was not expecting that. Brakes were still pretty poor but they're new discs, new pads and need bleeding. Again, quick test on the industrial estate and when you push your foot down it's easy to lock up the rears, so they're clearly working. Had a play with the bias valve and it all seems a bit weird, even with the bias to full front I could lock the rears.

I spoke to a mate about this, who made a valid point - with no real pressure to the rears, the fronts are doing all the work. Your car then dives more, lifting the rear and making them lock easily. Putting more to the rears will actually help them *not* lock up, as the car will be flatter. All makes sense, but haven't had a chance to try yet and seems little point until they've all been bled through properly.

The oil cooler appeared to be doing its job, as expected a little too well on normal motorway driving. The oil temp never really got high enough, so clearly the ever-successful "bit of cardboard wedged in front of the cooler" is required.

So I was a little disheartened by the brakes to be honest, but at the end of the day I now have such a basic setup - MC, good fluid, solid lines directly into braided lines directly into massive calipers pushing amazing pads into great discs - it can't really *not* work once it's all set up properly. So here's hoping. Had a look around under the car and had a bit of weep from a couple of the brake connections, which I nipped up with the spanners I'd taken along for this very purpose.

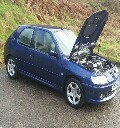
And then I noticed the oil cooler.

Yeah, there was quite a lot of oil everywhere. All over the cooler, inside the bumper and a little puddle on the floor. Interesting, I'd been pretty damn careful to heed those over-tightening warnings.

Funny story.

In trying not to over-tighten them, it would appear I'd not done then up tight enough. I did them tight, don't get me wrong - it's got to contain hot oil under pressure after all. Unfortunately saying "no more than 30nm" is great, except there's no way of getting a torque wrench on there and trying to estimate 30nm with a spanner is a pretty impossible task. So I got the car home, and whipped the bumper off again, only too aware of the big dark raincloud heading my way.

Long and tedious story short, I managed to get them tightened up and all back together just in time to run inside as the rain fell like a bath was being emptied on my head. I had a chance to get the car started up to get it back into the garage, but as it's got a thermostatic sandwich plate the oil cooler isn't pressurised until the oil gets hot, which is unlikely to happen when reversing it ten feet.

Hopefully tomorrow I'll take it out for a proper drive and get it up to temperature, see if it's sorted.

It's in a bit of a weird state at the moment, lots of work done so on paper the car's awesome, but currently have no confidence in the car as I've had no seat time since the work. I think booking up a day at Woodbridge is in order to get it all tested somewhere safe.

Bring a toolkit, I'll be the guy with the bumper off looking fed up.

________________________________________

Membership expiring soon, get in contact on our new little forum project.
Posted 10th Sep 2011 at 14:44
prism7guy

Seasoned Pro

Location: DoncastAAAAARGH

Registered: 13 Jan 2008

Posts: 4,639

Status: Offline

Post #581
Nice updates, those top mounts look familiar. LOL

I could be wrong and hope that i am, but it might be worth putting your power steering through its paces before going on a track. I tried jubilee clips to hold the high pressure hose onto the PAS pump and that resulted in epic fail, I then tried the mikaor boost pipe style clamp, also epic fail. That was onto a banjo fitting with the grooves, though the rubber pipe is redonculously thick there so it wasnt easy to get a lot of securing pressure onto the fitting.
Power steering fluid is gay when it decides to spray itself all over the engine bay, leaving you to look like a tool with a smoke trail and puddle, not to mention a pain in the arse to try and wash away.

________________________________________

Goldie the track car.
Posted 10th Sep 2011 at 16:04
owain

Seasoned Pro

Location: Essex

Registered: 20 May 2009

Posts: 9,185

Status: Offline

Post #582
Yup it's definitely one I've thought about, been there when someone's PAS pump cracked and it made a right mess.

The clips holding it on originally weren't all that tight, and came off pretty easily. Being aware of how high pressure it is, I've put a fair bit of the solid pipe down inside the flexi (over an inch) then done them up nice and tight.

I'll definitely be keeping a close eye Thumbs up

________________________________________

Membership expiring soon, get in contact on our new little forum project.
Posted 10th Sep 2011 at 16:37
prism7guy

Seasoned Pro

Location: DoncastAAAAARGH

Registered: 13 Jan 2008

Posts: 4,639

Status: Offline

Post #583
You will probably be alright with that setup tbh, i assume the pressure will be lower after the rack anyway. You could try going full lock to full lock to test it as thats when mine liked to pop off.
I left a nice puddle in the petrol station near the dover ferry port on my return trip from the 'ring having attempted to do a sharp turn. Doh LOL
I attempted to reach down to push the pipe back on for the drive home, burned my arm and decided to sack it off and live with the risk of damaging the pump (It had been a very long day!).

My pump is still going strong after i had a proper sleeve crimped on to the hose and havent had any issues since.

________________________________________

Goldie the track car.
Posted 10th Sep 2011 at 19:04
roland rat

Yeeeah Rat fans!

Location: Swansea

Registered: 29 Nov 2006

Posts: 22,282

Status: Offline

Post #584
Excellent work mate,wish i had the motorvation to suc things to my car LOL
Posted 10th Sep 2011 at 19:59
cwspellowe

Seasoned Pro

Location: Calderbank

Registered: 19 Jul 2009

Posts: 6,496

Status: Offline

Post #585
Weird, my PAS pipe has been fine for a while now with jubliees but they're done up bas**rdly tight.

Nice updates, brakes and wheels look EPIC Cool With regards to the locking up, it's more likely that the fronts need bled properly. The rears will have stayed full of fluid after the lines were removed so only the pipes needed bled, the fronts will probably be full of air. Might be an idea to wind the pistons in and fill them from the bleed nipples with a syringe, get the air out of the actual caliper. Don't know about your bias valve but mine can reduce rear pressure down to a measly 10% if wound all the way in. Can understand the rears locking up first if there's too much pressure in the line but with the bias valve reducing that to a minimum the fronts should be locking up, even with Brembo's. My money's on massive amounts of air in them still Thumbs up

________________________________________

Bye bye Sundance Kid Sad
Posted 10th Sep 2011 at 22:14
prism7guy

Seasoned Pro

Location: DoncastAAAAARGH

Registered: 13 Jan 2008

Posts: 4,639

Status: Offline

Post #586
I imagine that i had issues with mine because all the pressure from the pump is stuck when it hits the rack which is the main resistance. After the rack it just has to make its way back to the reservoir so theres much less pressure.

Cooper666 will confirm the 'pop' noise mine made when sat on axle stands and the amount of fluid that went everywhere just because i was dicking about going lock to lock. LOL

________________________________________

Goldie the track car.
Posted 11th Sep 2011 at 00:30
cwspellowe

Seasoned Pro

Location: Calderbank

Registered: 19 Jul 2009

Posts: 6,496

Status: Offline

Post #587
Ah ok, mine's the low pressure return pipe so that makes sense. Need to top up the fluid though, it dropped below the MIN line and steering gets randomly heavy at times

________________________________________

Bye bye Sundance Kid Sad
Posted 11th Sep 2011 at 00:34
phillipm

Seasoned Pro

Location: Rotherham

Registered: 15 Oct 2006

Posts: 20,607

Status: Offline

Post #588
Don't think the rears need more bias, as someone said, either the fronts needs bleeding through a few times - probably a few bubbles stuck the to walls of the pipes/calipers, or those pads need bedding in.

Look like bluestuff NDX? In which case mine needed a complete pasting before they came good.

________________________________________

- Bespoke rollcages/additions/adjustments. Half cages right up to complete custom spaceframes - MSA/FIA spec, CDS, ROPT, T45, etc - PM me
Email me!
Custom-made polybushes available - need an odd size or fitment? - anything from batch work to one-off pieces.
Posted 11th Sep 2011 at 02:00
owain

Seasoned Pro

Location: Essex

Registered: 20 May 2009

Posts: 9,185

Status: Offline

Post #589
Given the fact it's a complete new setup I'd completely agree with everyone that there's still air in there - they're new calipers full of air, the pedal's spongy and brakes don't ever respond normally when there's any air in there. The plan was to drive it around a bit to shake up all the bubbles to the top of the calipers, then I'll bleed them again today.

They are indeed Bluestuffs Yes

Part of the problem with bedding in pads on this car is on normal roads there is rarely any need to brake LOL

________________________________________

Membership expiring soon, get in contact on our new little forum project.
Posted 11th Sep 2011 at 10:23
owain

Seasoned Pro

Location: Essex

Registered: 20 May 2009

Posts: 9,185

Status: Offline

Post #590
If anyone knows anything about ignition wiring, please check this out Thumbs up

________________________________________

Membership expiring soon, get in contact on our new little forum project.
Posted 11th Sep 2011 at 11:44
phillipm

Seasoned Pro

Location: Rotherham

Registered: 15 Oct 2006

Posts: 20,607

Status: Offline

Post #591
owain wrote:

Part of the problem with bedding in pads on this car is on normal roads there is rarely any need to brake LOL


Just find a clear road at night and do some 70-30mph stops with 20-30 seconds between them, you just need to build heat up in the disc without overheating the pad surface.
They do the usual EBC trick and stink to high heaven as the compound transfers across the discs and feel a bit ropey even taking it steady home to let them cool down, but they were spot on the next morning after cooling.

________________________________________

- Bespoke rollcages/additions/adjustments. Half cages right up to complete custom spaceframes - MSA/FIA spec, CDS, ROPT, T45, etc - PM me
Email me!
Custom-made polybushes available - need an odd size or fitment? - anything from batch work to one-off pieces.
Posted 11th Sep 2011 at 13:02
owain

Seasoned Pro

Location: Essex

Registered: 20 May 2009

Posts: 9,185

Status: Offline

Post #592
Righty ho, shall do. Didn't get a chance to bleed the brakes today, need to try and convince the girlfriend it's a good idea to get a curry tonight, and that just won't fly if I'm out in the garage all day.

________________________________________

Membership expiring soon, get in contact on our new little forum project.
Posted 11th Sep 2011 at 14:05
owain

Seasoned Pro

Location: Essex

Registered: 20 May 2009

Posts: 9,185

Status: Offline

Post #593
Well due to issues involving wire colours, I have no idea where to cut into the management relay to cut the ignition, so that'll have to wait while I sort something out. Still, no reason not to get the switch physically located, and at least be able to use it as an isolator if not a cut-off.

My dash doesn't really have anywhere suitable, and the cardboard insert is great for little switches but isn't rigid enough to take the torque required to turn a killswitch. Luckily, the oil cooler came with a couple of handy brackets I never ended up using, so with a bit of bending they'll do the job nicely.


All done and securely in place, with the feed to the engine attached and another positive feed ready to wire up the surge protection bit.

Once that's done, just need to crimp and attach the wire to the battery, and all's good.


Excellent stuff, although sadly now I don't have a killswitch to sit and fiddle with in front of the telly. I've got some bits and pieces coming this week to attach the battery properly. Then maybe I'll get those brakes sorted...

________________________________________

Membership expiring soon, get in contact on our new little forum project.
Posted 11th Sep 2011 at 14:14
cjm_harris

Seasoned Pro

Location: Parts for Sale section

Registered: 04 Dec 2007

Posts: 7,442

Status: Offline

Post #594


This is full of win, looks stunning mate Big grin

Wish I kept those top mounts now Blush

________________________________________

Chris
1999 China Gti6 Supercharged Devil [Fun car] >>Project Thread<<
2000 Bianca 306 Diesel [Work runabout]
Posted 11th Sep 2011 at 22:32
prism7guy

Seasoned Pro

Location: DoncastAAAAARGH

Registered: 13 Jan 2008

Posts: 4,639

Status: Offline

Post #595
cjm_harris wrote:
Wish I kept those top mounts now Blush


Tell me about it. Doh

________________________________________

Goldie the track car.
Posted 11th Sep 2011 at 23:23
phillipm

Seasoned Pro

Location: Rotherham

Registered: 15 Oct 2006

Posts: 20,607

Status: Offline

Post #596


Wtf is that?!

You missed half the old tow hook you tart, think of the extra weight!

________________________________________

- Bespoke rollcages/additions/adjustments. Half cages right up to complete custom spaceframes - MSA/FIA spec, CDS, ROPT, T45, etc - PM me
Email me!
Custom-made polybushes available - need an odd size or fitment? - anything from batch work to one-off pieces.
Posted 11th Sep 2011 at 23:39
pete_rallye

Seasoned Pro

Location: Yorkshire

Registered: 12 Dec 2002

Posts: 5,253

Status: Offline

Post #597
Theres a big thick white wire that goes into the main relays on the back of the battery box. That supplys power to the fuel and ignition relays. Thats the one to splice your cut off switch in to.

________________________________________

Oulton Park in a BTCC 306 vid 1
Oulton Park in a BTCC 306 vid 2
Lap of the 'ring
Posted 12th Sep 2011 at 00:47
owain

Seasoned Pro

Location: Essex

Registered: 20 May 2009

Posts: 9,185

Status: Offline

Post #598
cjm_harris wrote:
Wish I kept those top mounts now


In your face Thumbs up

phillipm wrote:
You missed half the old tow hook you tart, think of the extra weight!


I know, I know - I didn't have the Dremel at the time so could only cut off what I could get to with a massive hacksaw LOL

pete_rallye wrote:
Theres a big thick white wire that goes into the main relays on the back of the battery box... Thats the one to splice your cut off switch in to.


Alas there is not. As discussed in this thread the wires going to mine are completely different colours, and there are five white ones.


Annoying.

________________________________________

Membership expiring soon, get in contact on our new little forum project.
Posted 12th Sep 2011 at 08:04
phillipm

Seasoned Pro

Location: Rotherham

Registered: 15 Oct 2006

Posts: 20,607

Status: Offline

Post #599
Get an angle grinder in there, bugger the dremel!

________________________________________

- Bespoke rollcages/additions/adjustments. Half cages right up to complete custom spaceframes - MSA/FIA spec, CDS, ROPT, T45, etc - PM me
Email me!
Custom-made polybushes available - need an odd size or fitment? - anything from batch work to one-off pieces.
Posted 12th Sep 2011 at 12:39
owain

Seasoned Pro

Location: Essex

Registered: 20 May 2009

Posts: 9,185

Status: Offline

Post #600
phillipm wrote:
Get an angle grinder in there, bugger the dremel!


That sounds awfully painful Phil, I really am not sure I want to do that.

________________________________________

Membership expiring soon, get in contact on our new little forum project.
Posted 12th Sep 2011 at 12:51

Pages (31): first .. 23 [24] 25 .. last

All times are GMT. The time is now 05:32

The Peugeot GTi-6 & Rallye Owners Club - ©2024 all rights reserved.

Please Note: The views and opinions found herein are those of individuals, and not of The Peugeot 306 GTi-6 & Rallye Owners Club or any individuals involved.
No responsibility is taken or assumed for any comments or statements made on, or in relation to, this website. Please see our updated privacy policy.