Post #1
Ok this is a rough quide to doing a heater matrix on a BEHR system. With locations of all the main bolts the rest is common sense.All in all it took me 7 hours in and out and all bled through.
REMEMBER TO REMOVE THE BATTERY TERMINALS!
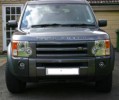
Heres how it will look when you start

Then you need to remove the centre console the bolts and screws are as below.

One t20 torx screw each side
Remove the rear ashtray to reveal two more screws.

Two 10 mm nuts under the gear gaitor as here (the two removed at the back)

Once you have removed both bits of centre console you will see this


Underneath the centre facia behind the gear knob you may see 3 more T20 torx screws as shown here.
Also there is a small 10mm bolt hiding underneath here you need to remove this so you can remove the heater matrix box thingy at a later stage.

Next remove the radio

Too reveal these two 8mm nuts one either side holding the fascia

And then the airbag!

Too reveal the bolt holding the steering wheel either a T45 or T50 torx cant remember now, remove the steering wheel and the 3 screws holding the surround on as seen here.

You will need to remove the stalk housing too. Three little screws then unplug all the wires.

Also remove the speedo clocks and surround only a few screws unfortunatly no pictures of that but its easy enough and im sure there is a FAQ on that.

Remove the bottom part of the central fascia (where the clock is) to reveal the screws holding the clock and the fascia remove these and remove the centre fascia.

The heater vents at the top are held in with screws underneath them and then just wiggle them out

On the left handside of the dash underneath you will see these two 10mm bolts

Remove the on holding the dash.
On the other side you will see another i removed the bonnet release not sure if you have to though


Behind where the radio was you will see this little 10mm bolt, remove this too.

Now too the outside. You will need to remove the wipers and scuttle panel along with the wiper linkage becareful with this as it is close to the bonnet coming out and can easily scratch.
Under there you will see three nuts these are holding the dash and need to be removed.


Remove all 3 and you will be able to move the dash. At this point all thats stopping you is wires behind the speedo (cable tied on just cut them off) and then the passenger airbag wires need to be disconnected and you should be able to get the dash to turn around enough to get in there as seen here.

In the centre you will see your matrix.

You need to remove a 10mm nut from the bulkhead sorry no picture. But again easy to find and do.
Then to the left of the offending item there are 2 10mm bolts and a T20 torx screw holding the big plastic box in place.
One 10mm bolt at the top

One 10mm bolt at the bottom

One torx screw in the middle

Remove the pipes from the outside (mine worked like this yours may not please look into this before you start to pull, just ask welly!)


You can then wiggle the matrix through to the inside and remove the centre box if you want i just left mine in there and pulled the matrix through the top and replaced it.
Refitting is the exact reverse obviously.
But make sure all the wiring goes back where it come from otherwise the dash will not go back in place, make sure you plug everything including the passenger airbag back in before refitting the dash or you wont be able to get to it!!

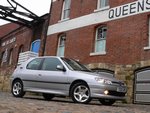
Finally back together.

Hopefully this coupled with the Rallye one in the FAQ will make this job easier for anyone who is willing to attempt it.
Rallye one
Ask me any questions if ive missed anything and i will try and add it.
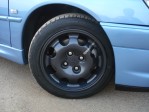
The only thing i broke
Bigger pics, plus a few more in my album, here:
My Album