


Post #1
An extremely easy fix to do, was actually my first ever repair by myself, so I’m proud of it lol 
I realised that my fuel pump needed changing when my car wouldn’t start. The fuel pump wouldn’t prime (you wouldn’t get the whirring noise on the 2nd click of the ignition), and was told to sort this, and it sorted it out all fine, so hope this helps you to.
The tools you will need are…
- a flathead screwdriver
- a hammer
- roll of kitchen roll
- a roll of brown tape
- a tub/bowl/jug/cup that you don’t wish to ever use again
- possibly a Haynes manual if you don’t trust this FAQ lol
- common sense
Took me 30mins from start to finish.
Apologies for the size of the pics and the amount of typing


Step 1:
DISCONNECT YOUR BATTERY! ONE TINY SPARK FROM SOMETHING AS SIMPLE AS TAPPING THE SEAL WITH THE SCREWDRIVER COULD SEE YOU WITH A NICE TAN!

Then lift up your rear seats, and place them outside the car in a safe place where some pikey won’t run off with them when your back’s turned. Lift up the carpet underneath the seats and you will see two black circles. The one on the drivers side is the one you want to play with.
Step 2:
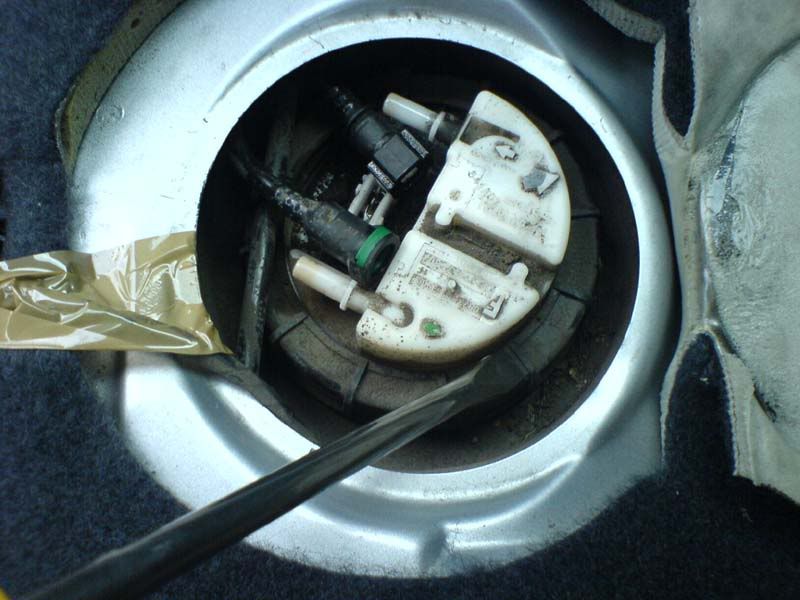
Get your flat head screwdriver, and try and un-pop the cover using the little groove in the cover itself. Put it to one side once removed. Take a note of which way the tank is sitting and at what angle as you will need to replace it in the same position later on (take a pic on your phone).
Step 3:
Unclip the wiring harness/plug and use the brown tape to attach it to the bodywork so it doesn’t fall into the tank later on. I attached it to the seat bolster (pic below):
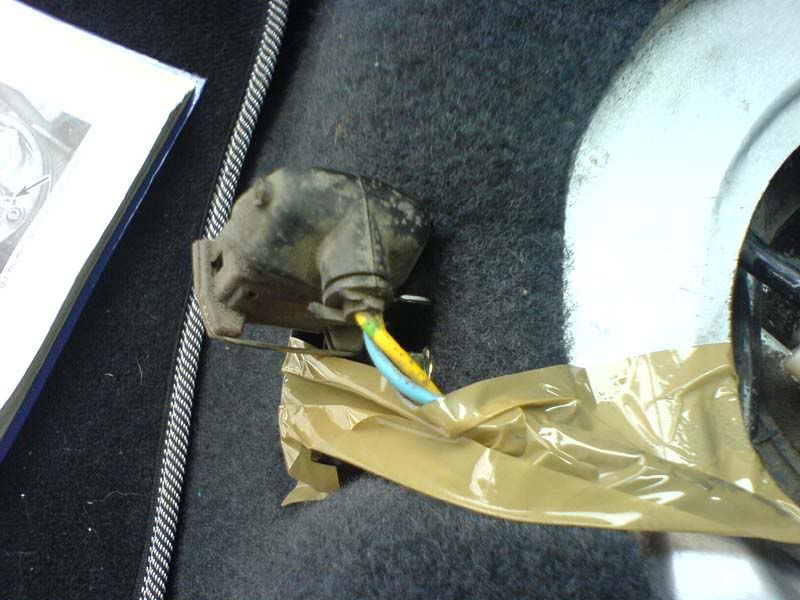
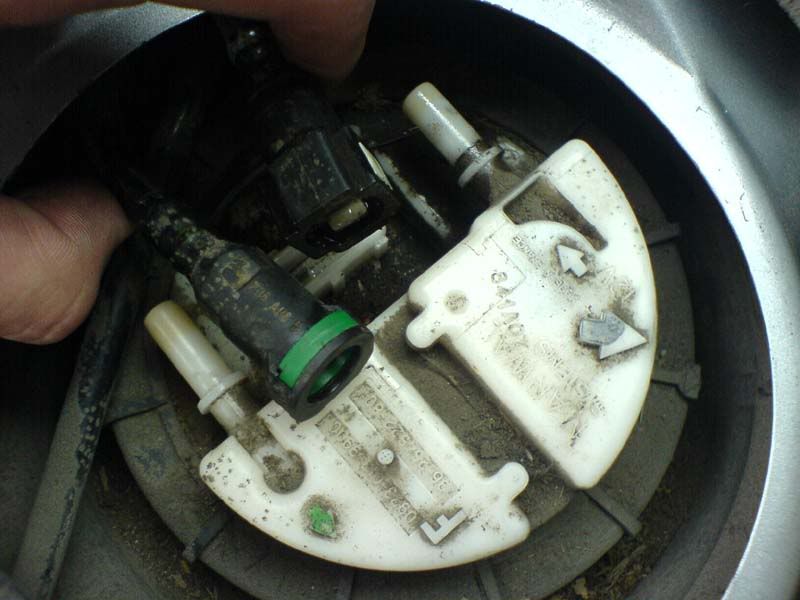
Then unclip the two fuel lines. The left one is green, and the white one is right as in the pic. Push the button in and pull out and tuck down the side, wipe them clean with kitchen roll as fuel will leak a little bit:
Step 4:
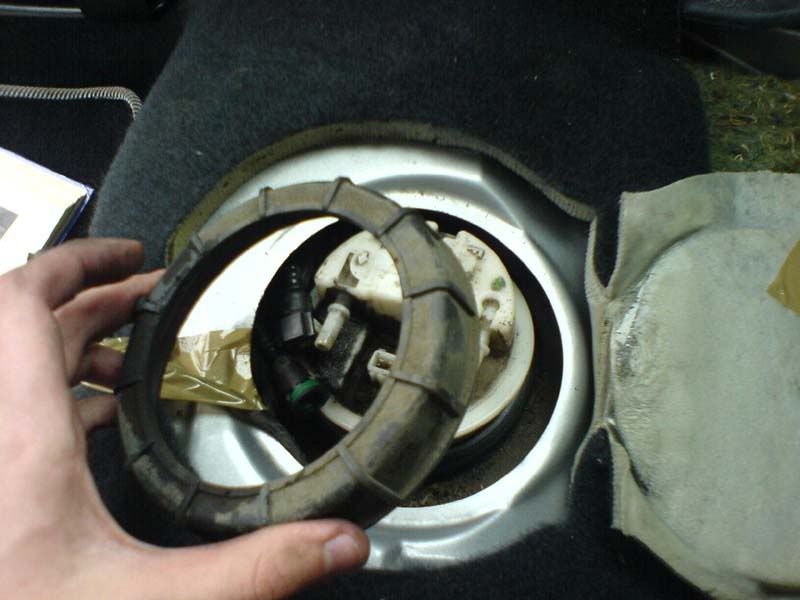
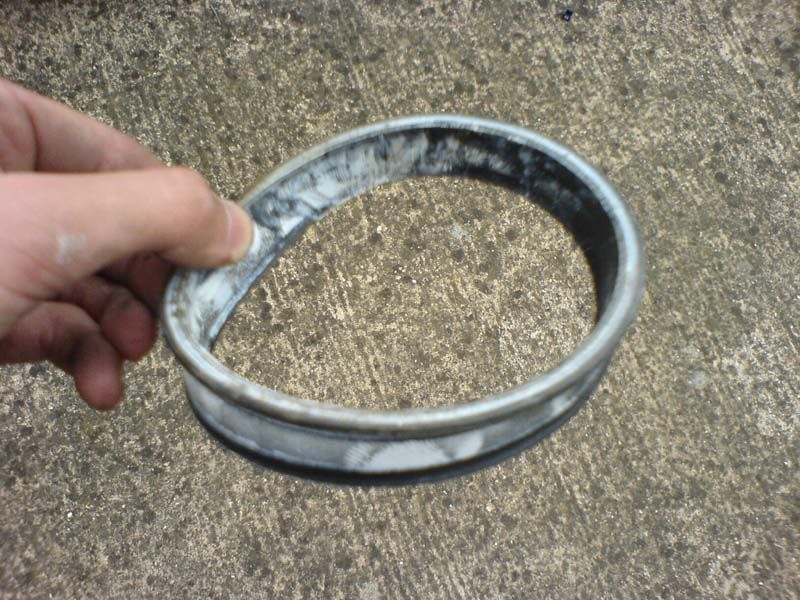
Now that it’s unconnected, you can remove the black seal around the pump case. It twists anti-clockwise and is pretty tightly on to keep the pump pinned down into the tank.
Grab your flathead screwdriver and hammer, and tap the seal around, so as to release it:
Then pull the seal out and put to one side:
Step 5:
Now the casing is free, you need to pull out the entire thing (will be very loose by now).
Put a fair bit of kitchen roll around it as fuel will leak as it’s pulled out.
When pulling it out, you will see that it’s attached to a little brown circular thing that measures the amount of fuel in the tank. Spring this back (it comes out with it so don’t try and break it off) and pull it out the way, trying not to get fuel over you and your interior. Don’t touch or damage the filter on the bottom either.
Step 6:
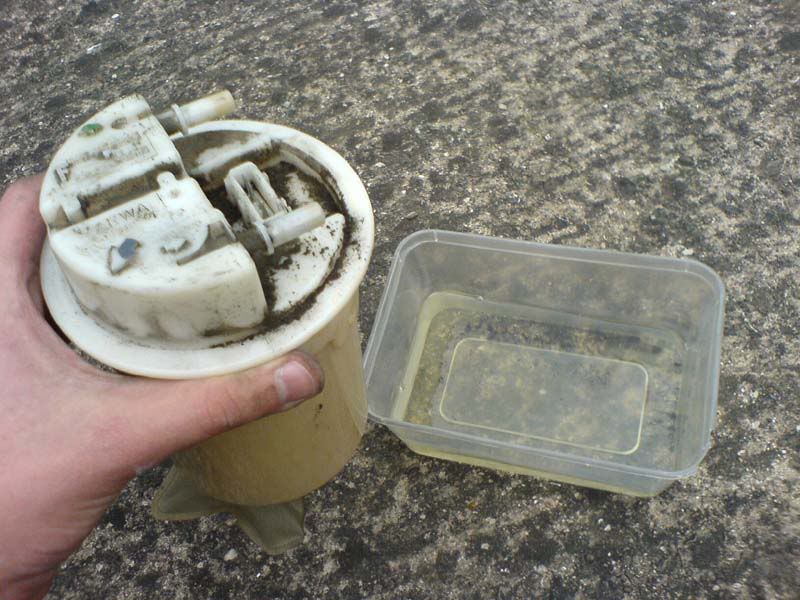
Chances are, this little casing will now have a fair bit of fuel inside it, so grab your jug/bowl/tub/cup and empty the contents into that. Then put this safely to one side, out of harms reach:
Step 7:
Remove the rubber washer from the inside of the ring, and put to one side:
Give the top of the casing a wipe down to remove the dirt.
Now you need to pop the top off of it. Can be hard, but get your flathead screwdriver under each of the little security notches and un-pop them one by one and it’s much easier.
When un-popped, don’t try and pull the top right off as it has spade connectors which the pump is attached to inside it, so just pull it back.
Step 8:
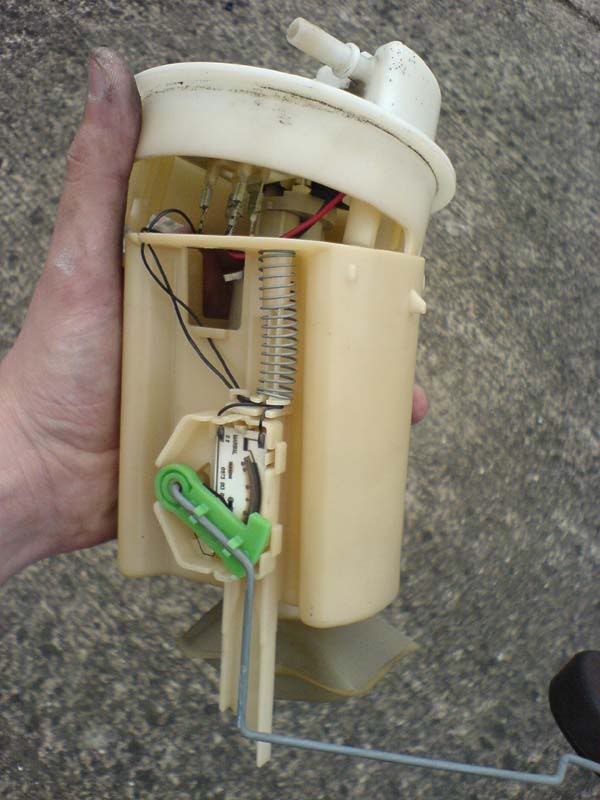
Your pump casing will look like this:
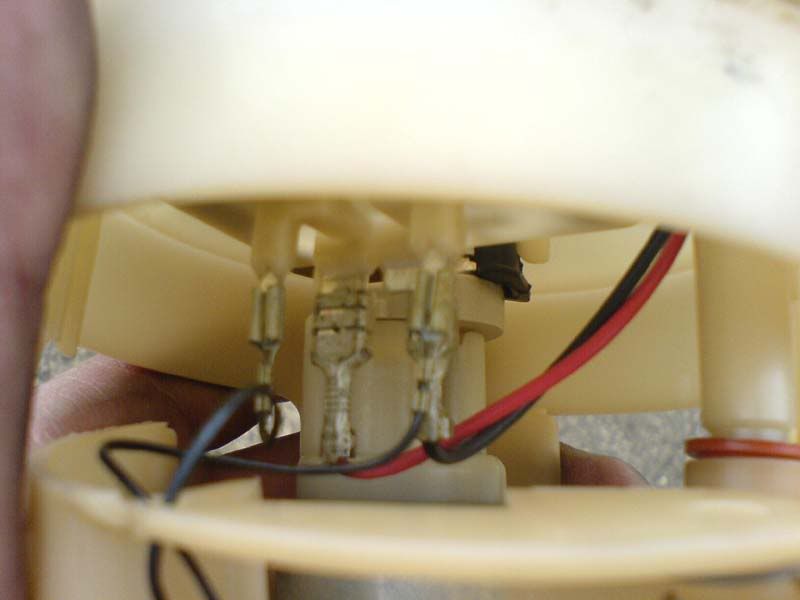
Now underneath, the connectors look like this, you only need to remove the red and black wires which the pump is connected to (don’t need to remember which is which as the red spade is bigger than the black, so can only fit one connection each):
Step 9:
The pump should come out of the top of the cap, and the bottom of the casing. It should all lift out now. This part is the part you will be replacing. Now you should have all these parts laying on the ground in front of you:
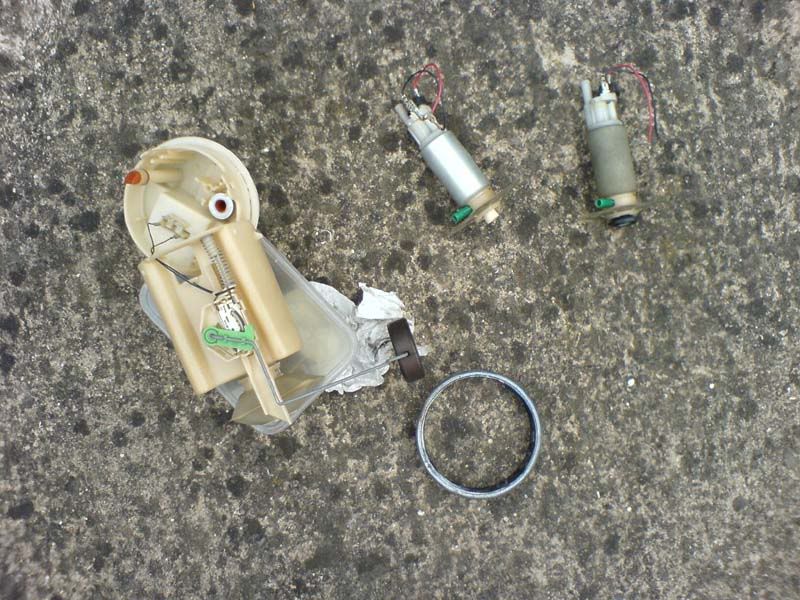
(Note: The pump on the left is my old one, the one on the right is the one I’m replacing it with)
Step 10:
Now refit it all the same way, which is:
- Fit new pump into the case, making sure the bottom of the pump is sat in the hole, and the top is pushed into the cap securely.
- Refit the spade connectors (red and black)
- Refit the case lid (there’s only one way it fits on)
- Refit the rubber washer around the hole.
- Place the case back into the tank, remembering which way it was facing before you started.
- Refit the black plastic seal using the flathead screwdriver and hammer till it’s nice and tight and the pump doesn’t move. Again, make sure the casing is facing the original way.
- Refit the two fuel lines (white is on the right, and green on the left)
- Reconnect the wiring harness
- Refit the black rubber cover over the hole
- Switch on the ignition, and let it prime (wait till all the usual lights go out), then turn it back off. Do this 3 times so as to get fuel back in the lines.
- Restart the car and should be fine.
- If not, follow the steps again.
- Refit the carpet and seats and then let it warm up and go for a blast.
I AM NOT GOING TO BE HELD RESPONSIBLE FOR ANY ACTIONS YOU TAKE, AS I SAID, IT’S ALL COMMON SENSE, THIS FAQ WORKED FINE FOR ME!
Hope this helped and saves people searching the forum and asking others like I had to

I appreciate there's prob better ways to do this, so if you're unsure, ask in the 'ENGINES' section of the forum

________________________________________
Pugzy...aka MikeEx-Platinum silver 306 GTi6 owner...now an Ex-Scarlet Red 406 3ltr V6 Coupe owner too

Now driving a China Blue 106 1.5 Diesel..."The Money-Saving and Debt-Busting Machine"
