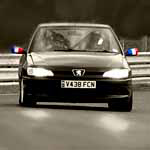
displaying posts 1 to 9 of 9

Author Subject: Speedo and dial removal FAQ
kip76

Seasoned Pro

Location: back in the driving seat :devil

Registered: 26 Sep 2005

Posts: 1,483

Status: Offline

Post #1
Hi guys

I took some pictures while removing my speedo unit to disable my now redundant seat belt pre-tensioner light.

I've done a quick FAQ below to help you as it took me a bit of guessing to get it all apart.

This should be of use for:

Changing dash bulbs
Speedo / dial replacement
Changing speedo face

________________________________________


Posted 17th Apr 2006 at 18:05
kip76

Seasoned Pro

Location: back in the driving seat :devil

Registered: 26 Sep 2005

Posts: 1,483

Status: Offline

Post #2
You will need the following:

1 - patience
2 - just about every Torx screw from T10-T30 but definitely T10,T15,T25

Step 1 - Remove the cover on the top of the steering column.

There are two deep screw holes underneath the column (roughly in line with the wiper and indicator stalks)

Use a torx key to undo the two screws and place them somewhere safe.

Screw holes highlighed below


The cover (circled in red below) should lift easily off the top. The bottom bit will flop around but shouldn't fall off.


________________________________________


Posted 17th Apr 2006 at 16:40
kip76

Seasoned Pro

Location: back in the driving seat :devil

Registered: 26 Sep 2005

Posts: 1,483

Status: Offline

Post #3
Step 2 - Remove the trim surrounding the speedo cluster

First undo the two screws at the top (T10)

There's an identical screw above the speedo


Then the two lower screws that were hidden by the steering column cover (T15 IIRC).

Left hand lower screw


Right hand lower screw


Wiggle the trim slightly and it will come out. Put it where you won't stand on it.

________________________________________


Posted 17th Apr 2006 at 16:44
kip76

Seasoned Pro

Location: back in the driving seat :devil

Registered: 26 Sep 2005

Posts: 1,483

Status: Offline

Post #4
Step 3 - Remove the speedo cluster from the car

Unscrew the screws holding the speedo into the car. 1 in the centre at the top and 2 at the bottom.

You can't see the top one in this pic but I've circled where it is.


The top also clips in at the screw point so gently ease it out and then tip amd pull the speedo unit forward.

You will then be able to see the wiring connectors . They are not very clear in the pic below but I have circled them in the relevant colours where they attach. I believe these are the only two connectors (I didn't need to remove the speedo completely so left them attached).

________________________________________


Posted 17th Apr 2006 at 16:48
kip76

Seasoned Pro

Location: back in the driving seat :devil

Registered: 26 Sep 2005

Posts: 1,483

Status: Offline

Post #5
Step 4 - Decide whether you need to remove the speedo or (better) whether you can reach what you need to without completely removing it.

If you need to remove it move the steering wheel to its bottom setting and wriggle the thing out like your life depends on it. Its really tricky to squeeze past a P2/3 wheel so fumbling around behind/using your sense of touch Dry is best if you just need to replace/change a bulb.


________________________________________


Posted 17th Apr 2006 at 16:10
kip76

Seasoned Pro

Location: back in the driving seat :devil

Registered: 26 Sep 2005

Posts: 1,483

Status: Offline

Post #6
Not Step 5 - How to get to different bits

The first set of clips is for the speedo glass (marked Front)

The second set of clips is to access the dial faces (eg. you want to put in silver dial faces Dry ) (marked Back)


The bulbs go in from the back of the unit and are a twist fit (bayonet). They're tiny too so don't drop them down the back.

________________________________________


Posted 17th Apr 2006 at 16:52
kip76

Seasoned Pro

Location: back in the driving seat :devil

Registered: 26 Sep 2005

Posts: 1,483

Status: Offline

Post #7
Refitting and how long it takes

That's it. Refitting is a reversal of removal.

Doing this for the first time without instructions took me about an hour and a half including removing two bulbs for redundant warning lights. Allow yourself an hour with the instructions (or twice that if comletely removing the speedo) and you should be fine.

Even the mechanically inept should be able to do this.

And now for the "legal" bit...Don't blame me if you lose your temper or break something, it worked for me. Thumbs up

________________________________________


Posted 17th Apr 2006 at 16:07
kip76

Seasoned Pro

Location: back in the driving seat :devil

Registered: 26 Sep 2005

Posts: 1,483

Status: Offline

Post #8
If any of the picture links aren't working for whatever reason they can be found on my fotopic site along with other handy mechanical pictures:

Clicky for my mechanical pictures

The End

PLEASE DON'T POST ANYTHING ELSE ON HERE SO THAT THIS CAN BE FAQ'ED

________________________________________


Posted 17th Apr 2006 at 17:23
jimmy_boy

Senior User

Location: Christchurch

Registered: 09 Jun 2003

Posts: 14,751

Status: Offline

Post #9
Very nicely done!

FAQ'ed Thumbs up

________________________________________

GTI-6 & Rallye

Rallye gets sideways in the wet at Snetterton Ninja
Posted 17th Apr 2006 at 17:36

This thread has been locked

All times are GMT. The time is now 00:21

The Peugeot GTi-6 & Rallye Owners Club - ©2024 all rights reserved.

Please Note: The views and opinions found herein are those of individuals, and not of The Peugeot 306 GTi-6 & Rallye Owners Club or any individuals involved.
No responsibility is taken or assumed for any comments or statements made on, or in relation to, this website. Please see our updated privacy policy.