
Post #1
As changing an exhaust is often the first mod people make, many people don't know where to start. This guide is meant to make you familiar with the process and give you the confidence to have a go yourself.Also, some good tips on stopping leaks
 so read on...
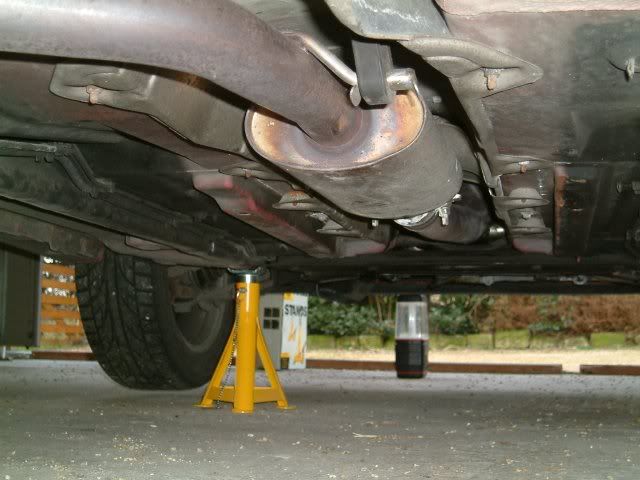
There's 4 parts to the exhaust on the 306:
1. Backbox
2. Centre Silencer
3. Cat/Decat
4. Exhaust Manifold
The Backbox and Centre silencer are dead easy to replace, Cat/Decat a little fiddly and exhaust manifold is not to be attempted by the faint hearted!
Tools You'll Need:
A good socket set, and a good set of spanners. If your exhaust has never been removed before, make sure you have a junior saw handy as well.
The clamps for the exhaust joins use 13mm nuts, the Cat/Decat -> Manifold join uses 10mm nuts. The Lambda Sensor needs a 22mm spanner.
Bits you'll need
(Possibly) 2 x Gaskets (for backbox->centre silencer and centre silencer-> Cat/Decat)
2 x Clamps (as above)
1 x Fitting Kit for Cat (get from Pug, about Ł17)
WD40
Holts exhaust paste/exhaust repair paste
A good torch!
You may also need some different rubber hangers to position your exhaust to sit in the right place, places like motormania sell millions of different sorts
I would strongly recommend having a mate there to help you
Jacking the car up
You need to jack the rear of the car up to do the exhaust, and the front of the car to do the Cat. Jacking point is a small flap of metal just below the skirt between the wheels.
Always use axle stands
use the Loops of the car on the front, and the main beam at the back. Or you could use the bottom of the suspension, like this: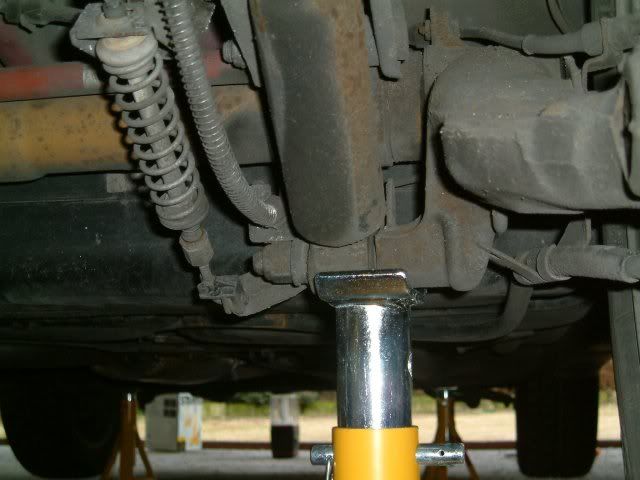
Its a good idea to put both the front and the back of the car on axle stands, but you have to be very careful. Don't take the wheels off if you're gonna do that and be really steady with the jack as you could really damage your car if you rush it.
Removing the old exhaust
HINT: You're gonna get loads of rust and crap into your eyes. Either wear goggles or try and be careful. Its unavoidable, really

If your exhaust is as old as the car chances are the nuts and bolts will be rusty as shite and a right pain to take off.
Take the backbox off first. Get a spanner on the top nut and a socket to the bottom nut, and try and turn it. Use WD40 if its causing a problem, and the hacksaw if its really welded on.
Don't worry about breaking anything, its coming off anyway, you can be brutal! Remember this is the hardest part
Removing the Cat
You need to first remove the Lamda sensor. Get yer 22mm spanner out and give it a tug. If it really won't budge (mine wouldn't) you can unplug it at the back of the engine bay, just behind the heatshield at the back of the battery. There's a red bit on it, push this in and it disconnects. You may break the attatchment to the car, don't worry about it. You can remove the lamda sensor when the cat is off the car with the aid of a big hammer
 Give it a good clean before you put it back on the car though.
The Cat/Manifold join is very easy to get to, but you may find it difficult to get a socket to the bottom bolt. (see picture below for bolt assembly) You can either squeeze a spanner in there or use a very long socket extension and bring it up next to the Cat
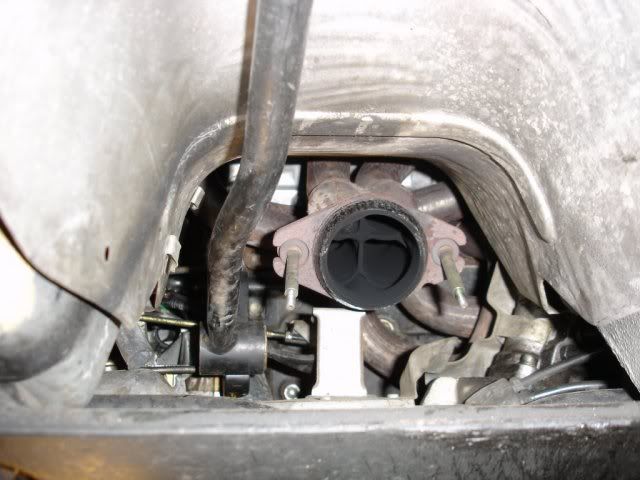
The top of the bolt has a clever pad on it so that the bolt shouldn't turn as your doing it up/loosening it. However you may need to get a spanner to the top. You can get there, but you need to have a play. Its really fiddly and you have to go all around the place to get there.
Attatching the Decat
This is very important - look at the bolt assembly:

The spring should be on the bottom, touching the Cat Join, the two metal washers sit on the top. Make sure you have BOTH metal washers. The top one alone is very fragile and if you don't use the metal one also the Decat will work loose.
Fitting the Decat is quite fiddly also. Stick the gasket on (NO EXHAUST PASTE HERE!) and use one of the bolts provided. You should have 3 different length bolts in the kit you bought. I used the original bolts and it was a right bugger to get on because the springs appear too long. I had to do up one side, then get my mate to pull the Cat over to the other side to get the other on. I would also use some locktite on the nut as I've had them work loose on me before.
You should tighten the springs up so that they're almost completely compressed, but not all the way. The decat has to have a little give as the engine moves on its mounts.
Attatching the exhaust
Put the centre section on next. Attatch the rubber hanger in the middle then line up the Cat and Centre Section join.
The following is very important if you don't want leaks! Put the exhaust paste quite liberally on either side of the exhaust, put the gasket on (if you have/need one) and get your mate to apply pressure on the centre silencer so that the join is tight. Put the clamp on, make sure its lined up well, and tighten it up TIGHT, making sure its even both sides. Don't go too tight though, as you'll bust the bolt:
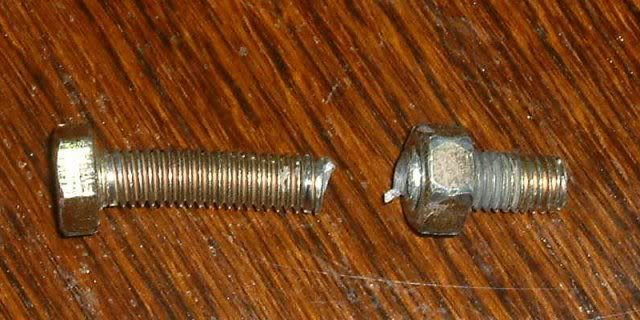
Watch your eyes! They really fly off if they snap.
I've had countless problems with these exhaust joins and my recommendation now would be to get a Magnex or Mongoose exhaust as the joins are much better. Scorpions sound lovely but their build quality is questionable and their joins are shit.
Fitting the backbox is exactly the same, except you want your mate standing at the back of the car. Hang the backbox up, and get your mate to line up the exhaust exactly in the middle, while you go about attatching the clamp etc. You may want to remove the heatshield above the backbox, this is the time to do it.
Do an ECU reset, and let the car idle for a good 15 minutes or so to let the exhaust get nice and hot and let all the joints harden. DON'T go revving the car until everything has settled.
Take it out for a gentle spin, and remember it'll take a few days for it all to sort itself out. In particular new exhausts may seem a little quiet until they've had chance to bed in.
Good luck!
________________________________________
always in stock, just PM me to order
 Never broken one yet