displaying posts 1 to 25 of 51

Pages (3): [1] 2 3

Author Subject: Road Rallye Project
marksorrento205

Seasoned Pro

Location: Airborne in the lanes

Registered: 26 Aug 2008

Posts: 2,220

Status: Offline

Post #1
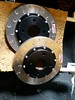
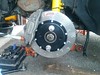
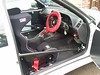
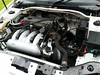
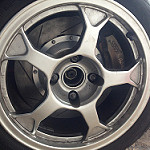
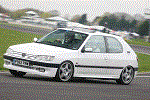
A quick introduction into this thread. Being into road rallying I had my 205 which started as a 1.6 GTi. This got prepped and I used it for a few years competing in the Lancashire and Derbyshire lanes. For those of you that are not familiar with road rallying it is basically 100+ miles of fast flowing narrow lanes with a few miles of rough farm tracks, fords and unsealed surfaces where you have to navigate your way around in the dead of night whilst following the correct route and trying to stay on time. Sounds easy but there is more to it than that. The 205 had a GTI6 up front with a 205 1.6 box fitted with a 4.4 CWP and a Gripper diff. It also had a set of 106 cup car AP front brakes and a Satchshift.


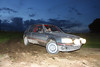
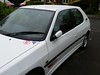
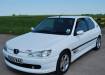
I had not used it for 6 months and fancied building a race car to compete in the Tin Tops or similar. So randomly someone offered to buy it minus the box and Aps so I flogged it. Bloody regret it now but hey ho. Now one thing to remember throughout all this is - the aim is to go out and have fun and a laugh! I always fancied doing a 306 next and I soon spied a potential shell which had the cage I wanted. So take one abandoned project

Midlifes Rallye Build Thread

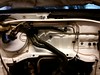
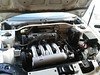
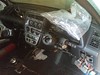
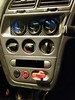
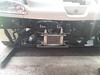
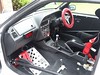
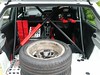
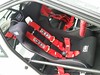
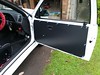
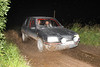
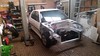
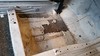
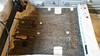
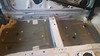
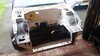
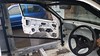
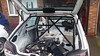
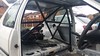
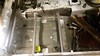
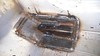
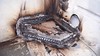
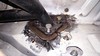
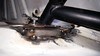
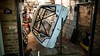
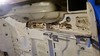
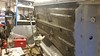
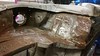
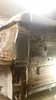
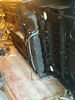
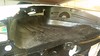
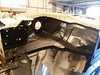
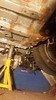
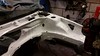
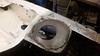
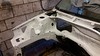
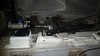
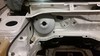
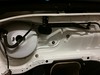
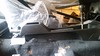
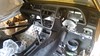
It took some time to get hold of Wayne and once I did things went quiet. However once he realised and accepted his baby was going we arranged to meet up so I could take a look around it. The car had been off the road some time and stored in a damp barn. It was basically a shell with panels and a cage. I loaded the car up with a rear beam, front suspension and a set of wheels and headed over to meet Wayne. Given I was only going to view it I think it came as a surprise when I turned up with all the gear to get the car rolling. I had a good look around and it became apparent the damp conditions had not helped and most of the underside and rubbed back engine bay and arches had suffered. A deal was struck, collection arranged for the following Saturday and we set about bolting up all the bits to get the car rolling.


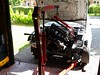
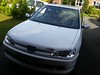
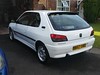
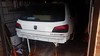
The following Saturday I met Wayne up at the farm and we loaded the car up with loads of bits and got it off the ramp and pushed it outside. Al soon turned up with his transporter and we soon had it loaded up and set off to make the hour journey back to my gaff. The other Rallye is my road car with 208k on the clock.


________________________________________

How to do a clicky: [url =http://www.306gti6.com]click here[/url] remove the space between [url & =
Posted 18th Jul 2017 at 20:52
marksorrento205

Seasoned Pro

Location: Airborne in the lanes

Registered: 26 Aug 2008

Posts: 2,220

Status: Offline

Post #2
Once back at mine (Jan 2016) I started with the most important job of the build, getting rid of the rear lights. These got a great reception during Wayne’s build thread. Some kind soul took them off my hands via ebay and a replacement set was found at the local scrappy.


I then proceeded to empty the car and had the joys of finding a home for all the removed parts. These became a pain in the arse for the next 18 months with tripping over them, having to empty the shed every time I wanted to get anything from it and the Mrs constantly moaning about the front and rear bumpers not making a good garden feature!
Once the car was stripped back to nothing I set about removing the remaining sound deadening from inside the car and the under seal from underneath. It was at this point work slowed down for various reasons. One being the cage installation. For some reason it bugged me. Nothing against the job that had been done, but I was not happy with it. The cage came out and I set about digging further into it. I also looked into some of the previous rust treatment that had not worked that well. A good nine months passed…


________________________________________

How to do a clicky: [url =http://www.306gti6.com]click here[/url] remove the space between [url & =
Posted 19th Jul 2017 at 09:48
marksorrento205

Seasoned Pro

Location: Airborne in the lanes

Registered: 26 Aug 2008

Posts: 2,220

Status: Offline

Post #3
I spoke with a cracking bloke call Alan at Alan Crossley Motorsport Engineering. He is local to me and works on all sorts of race cars including some of the clios that support the BTCC. Whilst watching the racing at Oulton Park a mate put me onto him. Alan popped round one evening to look at the car. In his dead laid back style he was willing to take the job on of reinstalling the cage, fitting a pair of seat rails and added the harness points. Alan is a busy chap so it was a waiting game for a slot to become available. Once I had the nod Mike collected the car and took it over. At this point I had been marshalling on a few road rallies and the urge to be back out competing had returned. I had already chopped out the inner skin from the tunnel on the driver’s side to allow the seat to be positioned more central. I plated this up ready for the seat rails.


The cage that is fitted is a Safety Devices 17 point bolt in cage. The cage benefited from having a tunnel brace, cross diagonal, harness bars, lower back stays and the front legs had the attachment points for the strut triangulation points although they were not present. A quick call to Safety Devices confirmed these were still available and I soon had them on order Via Tweeks. Alan soon had the mounts all cut out and replaced with sound material which conformed to the MSA blur book. He also added an additional two mounting points that were not already fitted. The car was collected and back within a week.


________________________________________

How to do a clicky: [url =http://www.306gti6.com]click here[/url] remove the space between [url & =
Posted 20th Jul 2017 at 12:52
marksorrento205

Seasoned Pro

Location: Airborne in the lanes

Registered: 26 Aug 2008

Posts: 2,220

Status: Offline

Post #4
At this point I was fed up with lying on the floor in the winter and I had both front floor cross members to repair due to the common rot. So I dug out the spit I bought a couple of years back for a bargain £52 on ebay. I knocked up a couple of mounts and cracked on lifting the car to mount it. It was daunting the first time it got spun over but the points seemed to be in the right place as the car could be handled by one person and rotated. It would not go fully over to the left due to the front towing eye but it was ample for what I wanted. The floor pan was cleaned back, treated and protected. The arches and engine bay received the same treatment. I have to say that was the best £52 I have ever spent! At this point the rallying bug had really bitten so racing the car was long in the past. The dash had been cut right back to make it as light as possible for the track and the heater box was missing so I set about finding some replacements. After taking trusted advice from people who had used various aftermarket heater solutions in the bid to save weight it soon became apparent to fit the original heater box. There is nothing worse rallying in the middle of the night when it is p**sing it down and having the windows steamed up. No matter how much weight you save you won’t be any quicker if you can’t see!


________________________________________

How to do a clicky: [url =http://www.306gti6.com]click here[/url] remove the space between [url & =
Posted 19th Jul 2017 at 12:33
marksorrento205

Seasoned Pro

Location: Airborne in the lanes

Registered: 26 Aug 2008

Posts: 2,220

Status: Offline

Post #5
For road rallying the regulations state you have to have the major trim fitted inside the car. This includes the carpet, headliner, rear seats etc. With it being a Rallye I wanted the correct parts to be fitted. Iain (RallyeRed) was stripping his red Rallye and he was only 30 mins down the road. I popped over one Sunday and spent a couple of hours removing the dash, heater, carpet, headliner and internal trim. More s**te to find a home for! At the same time a guy called Sean was selling a set of Rallye rear seats and after a quick chat he mentioned he was heading over to where I work and would bring them along. Things were staring to come together now and the job of putting the car back together was looming…

With all the prep work completed I knocked up a template for a pair of fuel tank guards and the car came off the spit and I set about fitting the mount for the hydraulic handbrake master cylinder. Nick (Castorkid) kindly knocked up a cad drawing for some top mount plates that I sent off to have laser cut from 5mm steel. These were fitted and then I painting the inside of the car and the engine bay. Remember this is a rally car not a show queen and a clean protected finish was the requirement!


Fortunately the painters at work are a tad quieter during the summer so I take random brackets etc in. I blast them in the blast cabinet and then let them give them a coat or two of black.

________________________________________

How to do a clicky: [url =http://www.306gti6.com]click here[/url] remove the space between [url & =
Posted 18th Jul 2017 at 20:23
marksorrento205

Seasoned Pro

Location: Airborne in the lanes

Registered: 26 Aug 2008

Posts: 2,220

Status: Offline

Post #6
I now had the joys of refitting the cage, what a c$nt of a job as it is such a tight fit and everything seems miles out of alignment. However once you start tightening things up I is amazing how it all comes together and lines up. With this you have the joys of trying not to scratch the new paint and trimming and fitting the internal trim to miss the cage. The carpet went in and I trimmed that around the cage and I am pleased with how it fits. One thing that annoyed me with my 205 is the lack of adjustment on the navigators foot rest. I found a pair of aluminium bars that were threaded every 25mm. These bolted to the floor nicely and the foot rest bolts to these allowing adjustment of the foot rest. They also allow the footrest to clear the carpet which makes fitting easier. The carpet was the take back out so I could fit the fuel lines. So a large order from Torques (which made my eyes water) arrived and I cracked on installing them. I decided to retain the standard fuel tank and pump set up so I ordered some 5/16” quick release fittings for the PTFE lined AN-6 pipes. This allowed me to connect it up to the standard pipes that come from the pump to the filter and then start the nw pipes through the car and into the engine bay. Allan Allan kindly sorted my fuel rail out by welding on a pair of 9/16” fittings. It annoys me that all I could find is steel weld on fittings that have no flats to allow the use of a spanner whilst fitting / removing the pipes – don’t like the idea of twisting the existing fuel rail pipes. So I found a solution and ended up with what I wanted for a fraction of the price.
The brake pipes were also made up and installed ready for the carpet to be refitted.


Although the car is going to be used for road rallying I plan to get it log booked by the MSA so it can be used on stage rallies. There is a good selection of rallies that have a road rally class. This will also help as the engine has to retain the standard injection system for road rallying. I plan on running a standard engine for the time being so this helps keep the costs down and means I don’t get put in a class with escorts with £20k+ engines. The aim of the game here is to go out and have some fun!

________________________________________

How to do a clicky: [url =http://www.306gti6.com]click here[/url] remove the space between [url & =
Posted 19th Jul 2017 at 12:36
RallyeRed

Regular

Location: Northwich

Registered: 03 May 2016

Posts: 353

Status: Offline

Post #7
Great to see you starting a thread on this Mark.
Looks like you've made great progress!
Posted 18th Jul 2017 at 21:17
robthe6

Senior User

Location: northamptonshire

Registered: 06 Jun 2008

Posts: 667

Status: Offline

Post #8
Lovely work buddy!

________________________________________

1997 ph1 bianca GTI6 - The looker
1996 ph1 Sigma GTI6 - Dead Sad
1999 Red Rallye - The Daily
2005 Nissan Navara D40 - Family car
1968 Mustang Coupe - The dirty little secret
Put ya foot down, put ya foot down we'll loose em easy!
Posted 19th Jul 2017 at 11:47
Day666

Seasoned Pro

Location: Bristol

Registered: 20 Apr 2013

Posts: 5,209

Status: Offline

Post #9
Great work Mark ...keep the updates coming Thumbs up
Posted 19th Jul 2017 at 12:18
mik

Seasoned Pro

Location: Kent

Registered: 17 Feb 2011

Posts: 2,100

Status: Offline

Post #10
Is this your post-photobucket solution? If so let me know what it is so I can replace pics in my project thread.

________________________________________

Cherry Rallye SOLD

Posted 21st Jul 2017 at 22:00
marksorrento205

Seasoned Pro

Location: Airborne in the lanes

Registered: 26 Aug 2008

Posts: 2,220

Status: Offline

Post #11
Cheers all.

I was lucky to start this post post the photobucket scam. Seems to work ok and I have chosen to use the smaller pics. Hopefully less to clog up this place, but then again every little helps on here at the moment Laugh my ass off I used Flickr

________________________________________

How to do a clicky: [url =http://www.306gti6.com]click here[/url] remove the space between [url & =
Posted 23rd Jul 2017 at 21:23
marksorrento205

Seasoned Pro

Location: Airborne in the lanes

Registered: 26 Aug 2008

Posts: 2,220

Status: Offline

Post #12
The rear beam has been apart and rebuilt with new genuine bearings and seals. A new pair of trailing arm shafts were also pressed in and the beam located on the car with a set of solid mounts. Whilst it was apart a set of VTS 21mm torsion bars found their way on. The beam has been set slightly above the standard ride height to give clearance on some of the rough Lancashire and Derbyshire tracks. A pair of 306 Group A tarmac Billies were also installed. The hubs will be converted to studs further on in the build along with a set of standard GTI6 brakes.


As said before the engine is going to remain standard for the time being. It has received a cam belt, water pump and a set of plugs along with a new clutch. The inlet manifold was treated to a session in the blast cabinet along with the fuel rail. Both had a quick lick of paint. Various sensors / senders have been fitted to the engine for the additional Stack gauges. The gearbox was fitted which houses a 4.4 CWP and Gripper diff. Having ripped apart my garage and shed during the week I came to conclusion I had lost the RH engine mount that bolts to the rubber mount on the inner wing. Fortunately Anthony from the 205 forum has come to the rescue and it landed on my doorstep last Friday morning ready for fitting the engine on the Saturday morning. Stew Baker at BBM has kindly sorted me out with a set of uprated engine mounts to keep this firmly in place.


Whilst the dash was out the loom ended up having a good trim removing many wires, relays and plugs that will not be used. Additional wires for the shift light were added to the rev counter feed and a wire for the spot lights added to the back of the indicator stalk. This will then be run through a switch so the spots can be isolated from the main beam as per the regs. Fitting the loom was a nightmare due to the cage front strut triangulation bars which made it very tight to fit the dash loom to engine bay loom connector. It managed to fit though without having to re locate the hole in the bulkhead. I stole a cracking idea from Mile’s to use the hole for the lighter to stash the T pull for the fire extinguisher and I also trimmed out where the standard clock sits to allow the fitment of a few switches including the battery cut off switch. This weekend I had power back on for the first time in years and started connecting the additional switches and gauges up. Ryan (Pug_306) has also been a legend in supplying loads of missing parts. Some bit bits and also loads of niff naff and s**te – top bloke cheers!! The OMP wheel has been fitted with a quick release Lifeline boss.


The fuel tank straps were blasted and had a quick lick of paint. I came across some heavy duty heat shrink so decided to cover each strap for added protection. Getting rally specific parts for the 306 is a bit of a pain in the arse. For 205s bits are everywhere. I struggled to find a suitable sump guard until I came across a virtually new Nova one on Facebook. A short drive to Chester had it held in position confirming it would do the job. A few mounts have been added to the subframe and front cross member and it fits a treat. Last Monday the car was also treated to a make over. I guy came round and spent the day removing all the years of s**te from being stored in a barn and all the grinding particles that had found there way on to the paintwork.


________________________________________

How to do a clicky: [url =http://www.306gti6.com]click here[/url] remove the space between [url & =
Posted 14th Aug 2017 at 11:24
welshpug!

Capt Pedantic

Location: Bigend, Wales.

Registered: 27 Mar 2007

Posts: 25,817

Status: Offline

Post #13
lovely work Mark, certainly shows from all the detail that you've been around competition cars and built a few by now!

Looks much tidier than many stage cars I've seen that have been developed over a number of years.

May I ask what you found to weld to the fuel rail? I've got some torques fittings but as you said they haven't any spanner flats, there's enough meat on them to add some though.

________________________________________

need a part number? get on here - http://public.servicebox.peugeot.com

Bring on the Trumpets.

Posted 14th Aug 2017 at 13:46
marksorrento205

Seasoned Pro

Location: Airborne in the lanes

Registered: 26 Aug 2008

Posts: 2,220

Status: Offline

Post #14
It has been a very busy few weeks after I set a deadline of this Tuesday to have the car mot’d. It has been rather stressful to say the least what with wondering if parts are going to turn up on time and if there is enough hours in the day.

First beauties were the new discs from Godspeed. These suit the non 106 Cup Car hubs which allow me to use the AP 4 pots.


Next up was to fit the oil cooler from Radtec. Now I buggered up here and ordered one which is slightly to small but I will see how I get on with it.


Then there were the Aero catches. These were a bit of a twat to fit but more to the point to get right. I started by back drilling from under the slam panel through the inner bonnet skin before going through the outer skin. I used a 90 degree windy drill here with a drill block to ensure the pin would sit square to the slam panel. I then marked round the catch before chain drilling the outer skin, filing it to the correct size and shape and drilling off the holes. II trimmed the inner skin to suit. They were installed with a smidge of black RTV.


Brackets for the Cibies were made and fitted before the lights were installed.


A few pics of the car completed ready for the MOT and the passenger seat to be installed.


Door cards ready to be fixed on


But on Tuesday after an eventful MOT where the ECU shat itself mid MOT it passed Smile

________________________________________

How to do a clicky: [url =http://www.306gti6.com]click here[/url] remove the space between [url & =
Posted 7th Sep 2017 at 21:15
marksorrento205

Seasoned Pro

Location: Airborne in the lanes

Registered: 26 Aug 2008

Posts: 2,220

Status: Offline

Post #15
quote:
[quote="welshpug!"]lovely work Mark, certainly shows from all the detail that you've been around competition cars and built a few by now!

Looks much tidier than many stage cars I've seen that have been developed over a number of years.


Cheers Thumbs up

________________________________________

How to do a clicky: [url =http://www.306gti6.com]click here[/url] remove the space between [url & =
Posted 7th Sep 2017 at 21:18
Day666

Seasoned Pro

Location: Bristol

Registered: 20 Apr 2013

Posts: 5,209

Status: Offline

Post #16
Looking Great a credit to you Thumbs up
Keep the posts coming Mark
Posted 30th Sep 2017 at 23:44
marksorrento205

Seasoned Pro

Location: Airborne in the lanes

Registered: 26 Aug 2008

Posts: 2,220

Status: Offline

Post #17
Cheers Damo!

Hopefully the next update will it having completed its first road rally in a couple of weeks Smile

________________________________________

How to do a clicky: [url =http://www.306gti6.com]click here[/url] remove the space between [url & =
Posted 9th Sep 2017 at 18:50
marksorrento205

Seasoned Pro

Location: Airborne in the lanes

Registered: 26 Aug 2008

Posts: 2,220

Status: Offline

Post #18
By the way, the gear knob is temporary! Satchshift will be fitted soon but I had to prioritise Sad

________________________________________

How to do a clicky: [url =http://www.306gti6.com]click here[/url] remove the space between [url & =
Posted 9th Sep 2017 at 18:52
jorg

Senior User

Location: Wallasey

Registered: 10 Jun 2007

Posts: 816

Status: Offline

Post #19
nice work Mark Thumbs up

did you manage to get a fuel tank guard sorted?

________________________________________

306 2.1 S16 Tarmac Rally Car
Project thread: http://www.306gti6.com/forum/showthread.php?id=143956
Posted 9th Sep 2017 at 19:10
marksorrento205

Seasoned Pro

Location: Airborne in the lanes

Registered: 26 Aug 2008

Posts: 2,220

Status: Offline

Post #20
Thanks!

Not yet. I am going to look into using a standard tank and chopping the bottom of a second one. A w**k load of tiger seal and space out the braces to accommodate. I spoke with a few people at the prom stages who had done this.

________________________________________

How to do a clicky: [url =http://www.306gti6.com]click here[/url] remove the space between [url & =
Posted 9th Sep 2017 at 19:26
jorg

Senior User

Location: Wallasey

Registered: 10 Jun 2007

Posts: 816

Status: Offline

Post #21
that was one of my plans a while back, think i even started cutting the tank but gave up for some reason. will certainly look again into it if other people have got it to work Yes

was working all last weekend so never got to see anything of the prom stages Sad did see a few 306's were on the entry list!

________________________________________

306 2.1 S16 Tarmac Rally Car
Project thread: http://www.306gti6.com/forum/showthread.php?id=143956
Posted 9th Sep 2017 at 19:43
marksorrento205

Seasoned Pro

Location: Airborne in the lanes

Registered: 26 Aug 2008

Posts: 2,220

Status: Offline

Post #22
Prom stages was a good do. Yeah a few 306s out which did ok. I was in the silly seat in a type r which was a right laugh

________________________________________

How to do a clicky: [url =http://www.306gti6.com]click here[/url] remove the space between [url & =
Posted 9th Sep 2017 at 20:47
marksorrento205

Seasoned Pro

Location: Airborne in the lanes

Registered: 26 Aug 2008

Posts: 2,220

Status: Offline

Post #23
Well last Saturday it ventured out on the Clitheronian road rally. 144 miles of some of Lancashire's and Cumbria's finest lanes. The car was faultless, easy to drive and took the bumps a treat. This was only meant to be a test outing for the car to make sure all was ok. The first third of the rally I got used to the car and went steady. But something clicked and with Allanallan's 'kick it's f**king head in' text ringing in my ears I set to work Smile

Started 37th and finished 18th and 1st in class so happy with that!

________________________________________

How to do a clicky: [url =http://www.306gti6.com]click here[/url] remove the space between [url & =
Posted 30th Sep 2017 at 18:20
Day666

Seasoned Pro

Location: Bristol

Registered: 20 Apr 2013

Posts: 5,209

Status: Offline

Post #24
Really well done Mark Thumbs up
Posted 30th Sep 2017 at 23:43
marksorrento205

Seasoned Pro

Location: Airborne in the lanes

Registered: 26 Aug 2008

Posts: 2,220

Status: Offline

Post #25
Nice one cheers Thumbs up

________________________________________

How to do a clicky: [url =http://www.306gti6.com]click here[/url] remove the space between [url & =
Posted 1st Oct 2017 at 20:19

Pages (3): [1] 2 3

All times are GMT. The time is now 15:01

The Peugeot GTi-6 & Rallye Owners Club - ©2024 all rights reserved.

Please Note: The views and opinions found herein are those of individuals, and not of The Peugeot 306 GTi-6 & Rallye Owners Club or any individuals involved.
No responsibility is taken or assumed for any comments or statements made on, or in relation to, this website. Please see our updated privacy policy.