displaying posts 1 to 25 of 254

Pages (11): [1] 2 3 .. last

Author Subject: 306 Maxi project
RallyeRed

Regular

Location: Northwich

Registered: 03 May 2016

Posts: 353

Status: Offline

Post #1
Dec '17 edit; after the great photo bucket tragedy I've done my best to update the thread with the (hopefully!) same photos via Flickr, so all photos should be present throughout the build.

Hi All,
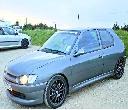
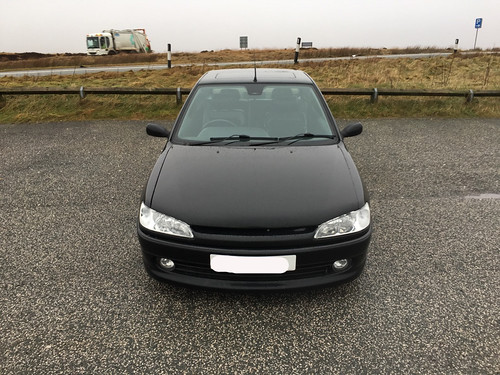
Thought it was high time I offered up a thread of my car.
My previous red rallye went to a new owner, who came to buy the engine as I was breaking it but took the whole car and is doing a great job of bringing it back to life.

I had been gathering parts with a throttle bodied maxi build in mind on the Rallye, when a week or two after discovering the heater matrix was leaking, was presented with a good deal on a GTI6 that had already had considerable work done, with a folder full of receipts and evidence. So I bought that one for the base of my project.

What am I aiming for? Well, a cup/trophy style road going car I can use for sprints and fast road, whilst retaining some creature comforts and not going balls out for roll cages, losing carpet and sound deadening etc. I'm thinking if Peugeot had to sell a maxi road car to homologate it (like they did in the group B days) this is roughly where they might have ended up.

In brief it's had an engine rebuild with forged rods and pistons, a PT82 cam, head work, Jenveys on Satchell style inlet but retaining original fuel rail. Running an Omex 600, and lots of receipts for mapping etc. Running a decat and maniflow mid section back. Along with lots of other bits and bobs (uprated bushes etc etc) convinced me this was a good place to start.


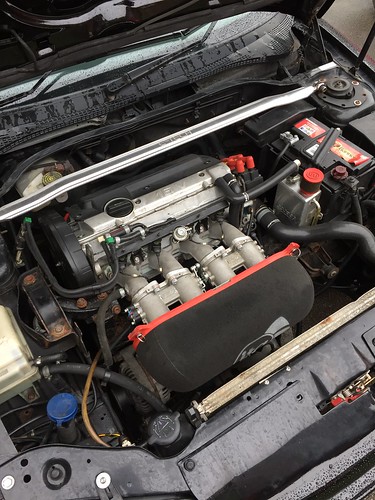
First port of call was to see Chris at EFI parts in Runcorn. He's an ace mapper I have used in the past and a thoroughly good bloke to boot. I asked him to focus on cold start and idle which needed sorting, and left it with him for the week. I was as surprised as you like when he reported power and torque gains everywhere, plus the cold start and idle fully sorted. Only charged £200 too. He reported that the map looked great; lots of detail and care and attention, but didn't actually appear to match the engine.. Far be it for me to suggest that the original mapper used another map from a different build.. ahem.. Anyway, rich low revs, and lean high revs sorted, and an extra 10bhp left me 205bhp. Nice.

So I shan't bore you with all the little details on my ever expanding collection of car parts. I've been building up a nice parts haul ready to lift into position when the time is right, so I can expand on those further down the line.

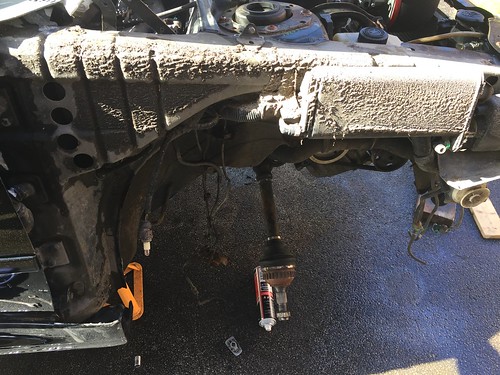
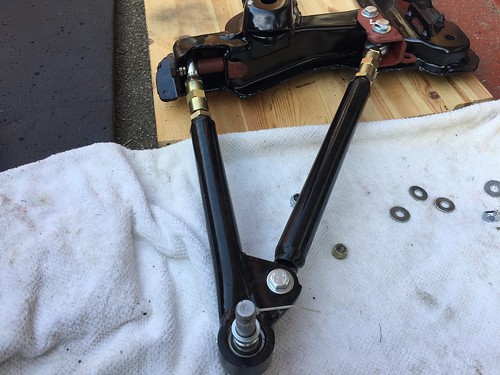
One of the big things with a maxi build is sorting out the front end, and the wishbones in particular. I came across an old school hot rod builder called Alan in the wilds of Norfolk doing his thing with tubular wishbones and reckoned that was just what I needed, and he looked good value too.

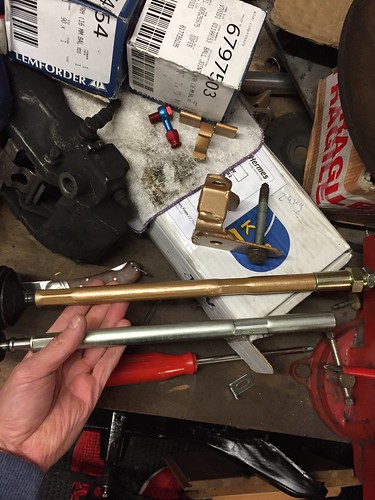
A quick chat later and a new wishbone and ball joint was on it's way to him, along with Ryan taking up a decent subframe for Alan to jig up. I'm not joking within a week he'd sent me mock up pics of the arms, and in less than another week they were in my hands looking amazing.

Now all you T45 and Aurora rose joint freaks can look away now. I don't doubt the quality of stuff like that, but Alan has a proven track record in hot rod chassis for decades, and knows what he's doing, and is exceptional value. I've said all along this stuff shouldn't be costing a small fortune, so hopefully this shows what can be done. Rose joints can be replaced at any time, and you know what, if you were unlucky enough to bend an arm, you'd have a replacement within a couple of weeks max and it would cost very little. As I helped Alan with parts to get him jigging up etc I got a great deal, but these are already on the bay at £380 a set.

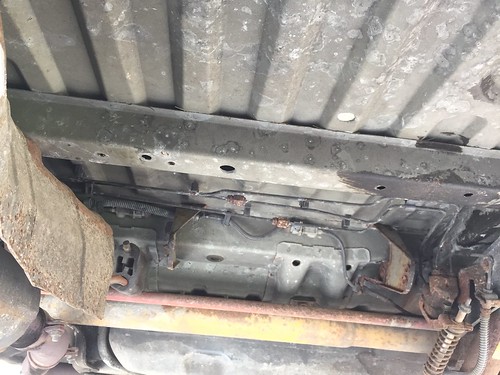
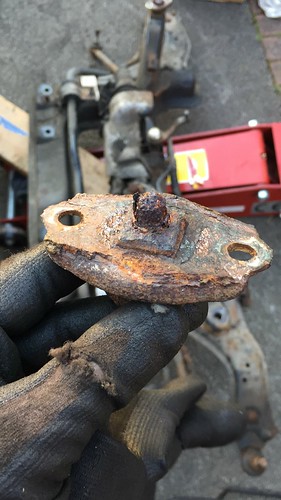
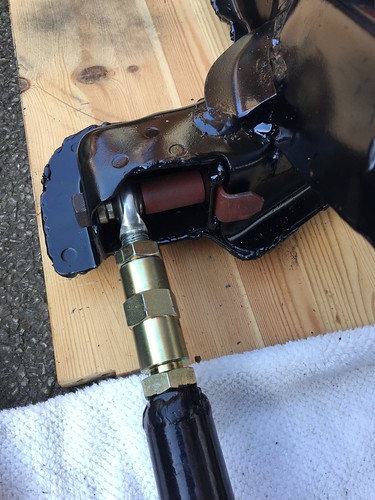
I seam welded the subframe (messy joCool 
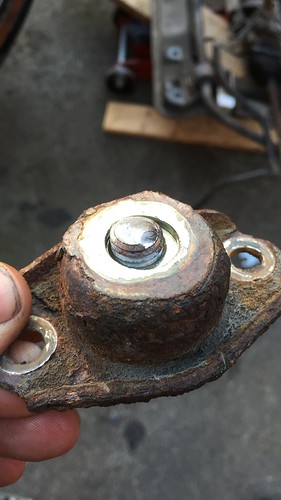
and zinc primered and painted it. I have mocked up in a matter of moments the wishbones just because I was curious, and they look fantastic to my eyes.


The proof will be in the pudding of course, so time will tell. I also need to sort front ARB drop link mounts so still have that to consider. I'll feedback to Alan in due course so he can incorporate the solution in future.

Driveshafts are away next week to be assessed for lengthening. Alan's also doing to Track rod arm extensions, and I'll choose between poem TRE's or rose joints to fit to those.

Allan at Bridgecraft will do my rear trailing arm spacers as soon as I can get my TB's to part company with the beam so I can pull it apart (what fun).

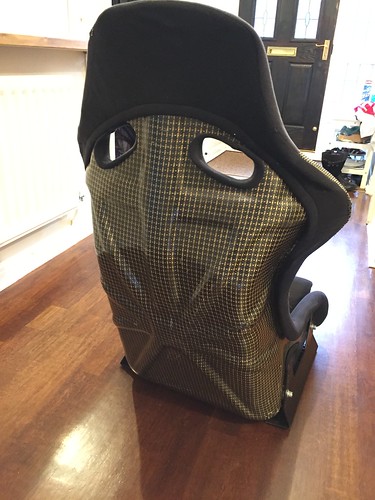
Kevlar seat and steering wheel is already in.


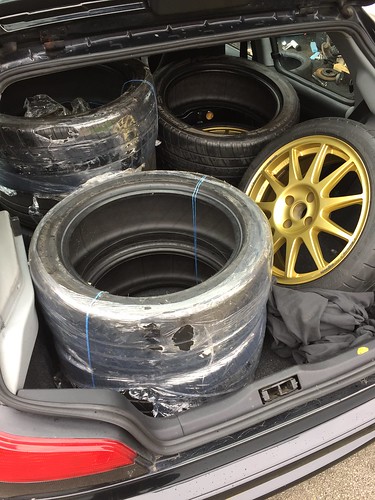
My wheel and tire collection is rapidly expanding.


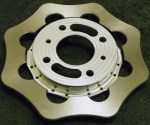
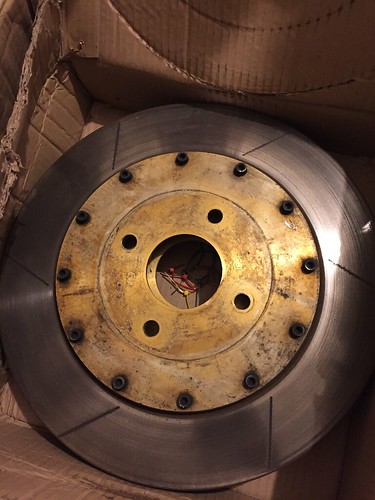
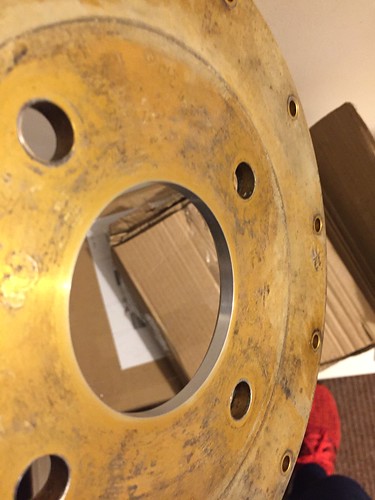
Oh and on the front brakes I have some Megane Brembo's, and Cossie 4x4 330x28mm bells and rotors and my brother is sorting adapters for me. He's already done the centre bore of the bells to 65.1, but I discovered the hubs are a bit shouldery if that's a word, so need to bore the bells out a bit more to get them sitting well.


So once, driveshafts are back, I have this idea that I can get the car up on axle stands, swap the current subframe and rack out and stick the new one (and xsara rack I have) straight in and Bob's your uncle. Time will tell.

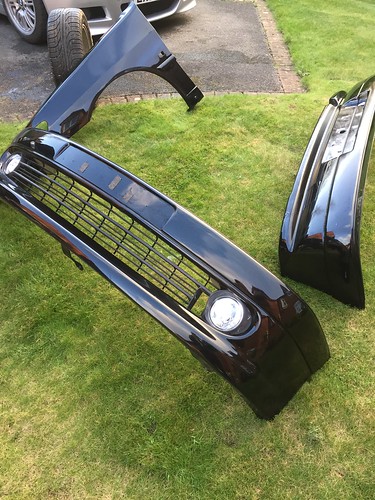
Bodywork is all in hand, so hopefully in the next month or two I can report more progress. You'll know when I get cracking because I'll be trying to sell of my oem wings, bumpers, wheels, brakes etc etc!

Cheers for now
Iain
Posted 23rd Dec 2017 at 20:14
gnrlee Forum Admin

Location: Leeds

Registered: 20 Aug 2005

Posts: 8,878

Status: Offline

Post #2
This is another great thread seeing another Maxi build come to life!
Top work! Thumbs up

________________________________________

Proud Member of the ASTOR Owners Club
Posted 17th Mar 2017 at 18:24
pugheaven

Seasoned Pro

Location: Fareham

Registered: 17 Dec 2006

Posts: 4,602

Status: Offline

Post #3
Looking good!!! Just a quick question though, what's the need for the plated extension pieces that the rose joints/ Spherical bearings screw into?

I'm.not doubting the strength of these but surely they would be stronger with the rose joints threading directly into the tubular wishbones and could still be adjusted rather than introducing an extra joint into them?

As said above they do look awesome and very cheap which is a bonus.

Is the kit available with different length pins and spacers for roll centre purposes?
Posted 17th Mar 2017 at 19:19
99rallye

Regular

Location: Hitchin

Registered: 26 Aug 2009

Posts: 348

Status: Offline

Post #4
This looks like a great project and I love the ethos. I look forward to seeing how it goes!
Posted 17th Mar 2017 at 20:33
RallyeRed

Regular

Location: Northwich

Registered: 03 May 2016

Posts: 353

Status: Offline

Post #5
pugheaven wrote:
Looking good!!! Just a quick question though, what's the need for the plated extension pieces that the rose joints/ Spherical bearings screw into?

I'm.not doubting the strength of these but surely they would be stronger with the rose joints threading directly into the tubular wishbones and could still be adjusted rather than introducing an extra joint into them?

As said above they do look awesome and very cheap which is a bonus.

Is the kit available with different length pins and spacers for roll centre purposes?


I purposely asked for them to be made that way. It means they can be adjusted in situ. Given Alan asked me which way I wanted to go before he made them I guess he could do them without this. Having spent many hours under my last car fiddling with camber and castor you quickly appreciate how useful that is. The majority of race/rally oriented arms are made in that way so it's standard practice.

I've yet to offer them up so currently no idea how the roll centre will turn out. I think with some suitably machined spacers or a different length pin (or both) you could tune it to your hearts content. Would be a cheap an easy way of playing with it over time. Alan's a good bloke, and he works in a methodical fashion. He said he literally adds each order to the bottom of a list and just works his way through it one by one in order. If you placed an order the best thing to do would be to ask for some different lengths up front so you immediately have options.

I think you're looking to go a lot lower than I am so I'll start by building them up and see where I'm at first and take it from there. First up though will be sorting the ARB drop link solution. Prism Guy's tubular wishbones are currently influencing my train of thought in that regard.

Cheers
Iain
Posted 17th Mar 2017 at 21:28
marksorrento205

Seasoned Pro

Location: Airborne in the lanes

Registered: 26 Aug 2008

Posts: 2,220

Status: Offline

Post #6
Iain,

After you telling me about this project I am looking forward to the regular updates Thumbs up

________________________________________

How to do a clicky: [url =http://www.306gti6.com]click here[/url] remove the space between [url & =
Posted 18th Mar 2017 at 07:07
RallyeRed

Regular

Location: Northwich

Registered: 03 May 2016

Posts: 353

Status: Offline

Post #7
Thanks Mark.

Hope all is going well with your rd rally car?

My first post hides a lot of leg work that goes on when trying to attempt something like this, so I thought if others are interested it might help by showing the way I'm tackling it - good or bad! I'm already a fair bit down the line on several fronts, but I can reveal more as I work my way through pulling it all together.

I'm doing much the same in Impreza world with my WRC type R build (what is it about rally derived wide arched cars?!)

I can't tell you how many hours have been put in researching aspects of the build.
Some elements like the Bridgecraft rear trailling arm hub spacers are now well documented and understood as the best way. The front end stuff is less well documented outside £1000 for Dimma stuff, or £2k for Satchell stuff.

Because I sunk 10's of thousands in to a 480bhp gp A Sierra track day car over 9yrs, the Impreza was supposed to be a more manageable and budget friendly project. That's took a bit of a beating especially on timeline, and I only bought the Rallye to have something wallet friendly and fun to drive whilst I was doing the Impreza.. Does anyone see a pattern emerging?

But I'm determined to stay cost neutral on this build through a buy/sell/make it yourself/good mates sort of a format. If I need something, I need to sell something to fund it!

More updates this weekend as I get a bit of garage time. I think it's nearly strip down time on the car..

Cheers
Iain
Posted 18th Mar 2017 at 10:29
Day666

Seasoned Pro

Location: Bristol

Registered: 20 Apr 2013

Posts: 5,209

Status: Offline

Post #8
Great thread Iain
Totally understand about money ...I'm still trying to get myself straight from overspending on buying the race car I stripped last year ...just for the engine Thumbs up
I hope it goes well m8 ...

Posted 18th Mar 2017 at 11:42
demondriverdan

Seasoned Pro

Location: Londinium

Registered: 29 Nov 2010

Posts: 2,665

Status: Offline

Post #9
This looks great! Loads of Maxi's coming around recently, more people need to make shiny parts for standard width cars so I can get some as well Big grin

________________________________________

Rallye Race Car
Posted 18th Mar 2017 at 18:19
pugheaven

Seasoned Pro

Location: Fareham

Registered: 17 Dec 2006

Posts: 4,602

Status: Offline

Post #10
Just a heads up... the eBay add might attract more buyers if peugeot is spelt correctly. I'm not one to comment on grammar and spelling so this isn't a dig just a heads up so more people will find them on eBay Thumbs up
Posted 18th Mar 2017 at 19:56
RallyeRed

Regular

Location: Northwich

Registered: 03 May 2016

Posts: 353

Status: Offline

Post #11
Have let him know thx mate
Posted 18th Mar 2017 at 21:59
gnrlee Forum Admin

Location: Leeds

Registered: 20 Aug 2005

Posts: 8,878

Status: Offline

Post #12
demondriverdan wrote:
Loads of Maxi's coming around recently,
Shifty LOL

________________________________________

Proud Member of the ASTOR Owners Club
Posted 18th Mar 2017 at 22:17
RallyeRed

Regular

Location: Northwich

Registered: 03 May 2016

Posts: 353

Status: Offline

Post #13
demondriverdan wrote:
This looks great! Loads of Maxi's coming around recently, more people need to make shiny parts for standard width cars so I can get some as well Big grin


Alan will do these with shorter arms for standard width cars if you need?
Posted 18th Mar 2017 at 22:42
RallyeRed

Regular

Location: Northwich

Registered: 03 May 2016

Posts: 353

Status: Offline

Post #14
Well my car is now up on axle stands and no going back now!

Wheels are off and advertised for sale, as are front brake callipers and discs. Everything came apart well, and I'm pleased/relieved I haven't found any rust under the inner arches and chassis rails.

I've been tidying up the sharp edges and painted up my brackets for the tubular wishbones.

I'll give those plenty of time to dry and let the paint harden then I'll build them up again. I'm turning my attention to my VTS rack next. It needs a tidy up and my rack extenders are on their way from Alan for a ridiculously good price including zinc plating and postage, so it'll be good if I can get the rack ready mount on the subframe in the next week or so.

Any ideas on replacing the ragged plastic boot on the steering ram? (I'll finally get some right hand lock now I'm going widetrack - I can keep the VTS one!) Can I get away with unbolting it and sliding some bicycle inner tube along the ram and secure with zip ties?

Cheers
Iain
Posted 18th Mar 2017 at 22:52
Twangy

Senior User

Location: heswall

Registered: 27 Jun 2014

Posts: 623

Status: Offline

Post #15
nice to see youve finally started a project thread iain , really looks good mate

________________________________________

wayne mcardle
Posted 19th Mar 2017 at 20:34
prism7guy

Seasoned Pro

Location: DoncastAAAAARGH

Registered: 13 Jan 2008

Posts: 4,637

Status: Offline

Post #16
I used a cut up rubble sack as the ram protector on mine Laugh my ass off

Nice project by the way, looking forward to more updates Thumbs up

________________________________________

Goldie the track car.
Posted 19th Mar 2017 at 21:34
RallyeRed

Regular

Location: Northwich

Registered: 03 May 2016

Posts: 353

Status: Offline

Post #17
prism7guy wrote:
I used a cut up rubble sack as the ram protector on mine Laugh my ass off

Nice project by the way, looking forward to more updates Thumbs up


Cheers mate - I recall you said you used a rubble sack! Thought I'd go up market with a inner tube LOL

Got a Q for you actually - did you end up running your front ARB below your compression strut so it's out of the way of the track rod arm? Or did you run it above?

Cheers
Iain
Posted 19th Mar 2017 at 21:47
RallyeRed

Regular

Location: Northwich

Registered: 03 May 2016

Posts: 353

Status: Offline

Post #18
Twangy wrote:
nice to see youve finally started a project thread iain , really looks good mate


Cheers Wayne Thumbs up
If I can get mine even half way to your standard I'll be happy Smile
Posted 19th Mar 2017 at 21:48
prism7guy

Seasoned Pro

Location: DoncastAAAAARGH

Registered: 13 Jan 2008

Posts: 4,637

Status: Offline

Post #19
My front arb runs below the track rod arm and links to the rear part of the wishbone via a dodgy angled drop link. Not ideal really but it means I still have the arb in use. The arb does sit considerably lower than standard though but ive not heard it hit anything, even those annoying trapezium speed bumps that run along my street.

________________________________________

Goldie the track car.
Posted 19th Mar 2017 at 22:52
RallyeRed

Regular

Location: Northwich

Registered: 03 May 2016

Posts: 353

Status: Offline

Post #20
Thanks for that mate; I went back over your thread and managed to spot some pics where I could see it sitting under the wishbone. You've already answered my next thought on clearance! Thing is I plan on running a sump guard which I think may scupper that.

I need to offer up my new subframe and arms up and see what clearance is on offer. At the moment I'm considering whether I should go Cossie group A style fitment by running it off the underside of the chassis rails at the front, and have it pointing backwards and connecting it to the TCA via a drop link..

Time will tell. Cheers for now
Posted 20th Mar 2017 at 11:42
Cjwatson27

Seasoned Pro

Location: Oxford

Registered: 17 Sep 2013

Posts: 1,968

Status: Offline

Post #21
Hi do you have the link ?, nice to see a different approach and good luck

________________________________________

Old pugs don't die they just get faster
Posted 20th Mar 2017 at 19:57
RallyeRed

Regular

Location: Northwich

Registered: 03 May 2016

Posts: 353

Status: Offline

Post #22
mate if you google cosworth group A ARB you'll see dozens!


If I'm lucky it be possible to use the original ARB, and fab some towers for it to sit on. Dunno yet! Need to have a poke around need what works. They'll be a million ARB's out there that might work..
Posted 23rd Dec 2017 at 20:15
phillipm

Seasoned Pro

Location: Rotherham

Registered: 15 Oct 2006

Posts: 20,607

Status: Offline

Post #23
I can make custom bent arb's if need be Smile

________________________________________

- Bespoke rollcages/additions/adjustments. Half cages right up to complete custom spaceframes - MSA/FIA spec, CDS, ROPT, T45, etc - PM me
Email me!
Custom-made polybushes available - need an odd size or fitment? - anything from batch work to one-off pieces.
Posted 20th Mar 2017 at 23:21
RallyeRed

Regular

Location: Northwich

Registered: 03 May 2016

Posts: 353

Status: Offline

Post #24
That's good to know, thanks Phil Smile
Posted 21st Mar 2017 at 13:46
RallyeRed

Regular

Location: Northwich

Registered: 03 May 2016

Posts: 353

Status: Offline

Post #25
Had a little more time on the car today, so have been mostly stripping and inspecting. Started off in the rain, and finished in fantastic sun shine, which was nice..

Today I took off the front and rear bumper, and both front wings. If you know anyone that wants some black body panels put them on to me!


Was relieved to see the underside wasn't too bad. Original primer here I think, but in reasonable nick. I'm planning on sorting a few little crusty bits, getting rid of all the brake compensator business and associated pipework, then doing some priming and painting here.


Everything came apart reasonably well save the odd rusty fixing. Then I gave the arches and inner wings a decent clean to get rid of 20yrs of muck that had accumulated! Thankfully nothing too nasty under here either, but will still strip, zinc prime, stone chip and paint. At least no-one can criticise me for doing the inner arches black (at least for now until i paint the car after!)..


Only build related part I got my hands on this week were the rack extenders from Alan. In the process I discovered the VTS track rod arms are a little shorter than GTI6 ones, so something to be aware of. I think it's in region of 10-20mm in total width. I have plenty in hand for getting the right track width though.


I'm after a pair of these little fellows - they're the front subframe cups and retained nut. Mine have rusted to hell. My local motor factor can't order them. Do they still exist in Peugeot land?


That's all from me for now. Got a mad busy spell at work coming up, but have some time off booked mid-April so hopefully can make some more headway then.

Cheers
Iain
Posted 23rd Dec 2017 at 18:55

Pages (11): [1] 2 3 .. last

All times are GMT. The time is now 00:09

The Peugeot GTi-6 & Rallye Owners Club - ©2024 all rights reserved.

Please Note: The views and opinions found herein are those of individuals, and not of The Peugeot 306 GTi-6 & Rallye Owners Club or any individuals involved.
No responsibility is taken or assumed for any comments or statements made on, or in relation to, this website. Please see our updated privacy policy.