displaying posts 51 to 75 of 80

Pages (4): first .. 2 [3] 4

Author Subject: binned it :(
sageman

Regular

Location: Norwich

Registered: 23 Jan 2016

Posts: 114

Status: Offline

Post #51
bit of an update

front end is 'almost' sorted (more on that in a muinite)

i have a good rear beam ready to go on hopefully saturday

anyway my question where can i get a new driveshaft oilseal (driver side) i deffinatly damadged the old one on ebay there only apperes to be two would rarther only buy the one for a cheaper price if i can

________________________________________

1976 Reliant Kitten
1985 Reliant Fox Tandy campervan
1998 GTI-6
1993 Citroen XM sei V6 (barn find)
Posted 23rd Mar 2017 at 22:35
stan_306gti6 Forum Admin

Location: Kent

Registered: 18 Jan 2004

Posts: 21,768

Status: Offline

Post #52
Pug is the best place, they aren't that dear in the grand scheme of things.

________________________________________

"Supercharged - 454.1bhp/317.5lb/ft"
Peugeot 306 GTi-6
2000 (X), Moonstone Love
Posted 24th Mar 2017 at 12:08
jimbok_b16

Newbie

Location: Norwich

Registered: 30 May 2016

Posts: 48

Status: Offline

Post #53
hi sageman. i see you're another norwich member. if i woudve seen this earlier i had a spare set of front shocks you couldve had. if you need any parts in the future ryan in thetford holds tonnes of spares for these cars.
Posted 25th Mar 2017 at 00:27
sageman

Regular

Location: Norwich

Registered: 23 Jan 2016

Posts: 114

Status: Offline

Post #54
damm hoped this wouldnt happen (rounded off)


had to cut the other side completely

what a prat i am Sad


is this what i need
http://www.ebay.co.uk/itm/Brake-Pipe-Repair-Kit-Pipe-End-Flarer-Cutter-Bender-/271691732826?hash=item3f4216d75a:g:x0MAAOSwWxNYtY-C

________________________________________

1976 Reliant Kitten
1985 Reliant Fox Tandy campervan
1998 GTI-6
1993 Citroen XM sei V6 (barn find)
Posted 25th Mar 2017 at 20:11
gnrlee Forum Admin

Location: Leeds

Registered: 20 Aug 2005

Posts: 8,878

Status: Offline

Post #55
Ive done exactly the same as you! Befote, it was at this point I learned to bleed breaks

The piston will just push back in and will probably need help from a piston tool!
Those kits are s**te from what i read ill list everything you need ill do this tonight for you Wink

________________________________________

Proud Member of the ASTOR Owners Club
Posted 25th Mar 2017 at 20:31
sageman

Regular

Location: Norwich

Registered: 23 Jan 2016

Posts: 114

Status: Offline

Post #56
Piston came right out this is after pushing it in won't budge now in or out (only used fingers didn't fancy forceing it with tools)

________________________________________

1976 Reliant Kitten
1985 Reliant Fox Tandy campervan
1998 GTI-6
1993 Citroen XM sei V6 (barn find)
Posted 25th Mar 2017 at 20:44
gnrlee Forum Admin

Location: Leeds

Registered: 20 Aug 2005

Posts: 8,878

Status: Offline

Post #57
ok 1st then,..
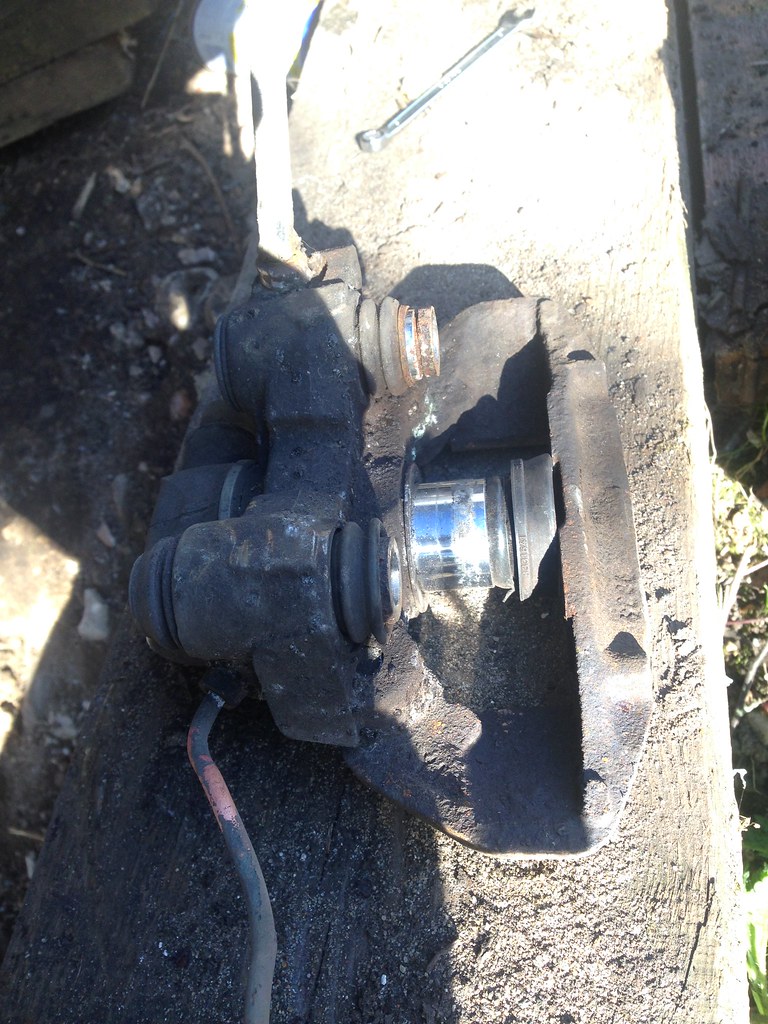
get that piston back in use one of these,..

Piston Tool this is what I use the only down side is that the head is much smaller than our hollow piston so use an old brake pad etc to put between the piston and the head
(reseat the rubber seals in the caliper if needed!)

next the parts you'll need for the brake lines

you'll need a 2 way female connector plus 2 male connectors

this is in conjunction with MOT regulations!
so cut the brake line back far enough to incorporate this
you'll need another male nut to screw into the caliper
these are pennies from any motor factor and not a specialist part!

3/16th Copper brake line!
Copper Brake line
this is the cheapest on ebay just 1m but for such a small job you wont need much!

Pipe cutter
this'll do the trick Sealey so shouldn't be a problem

Brake line flaring tool
I use a Sealey SPT11

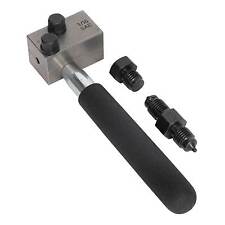
which after lots of research found to be the best one to suit the needs of brake flaring whilst on the car
and giving a good flair on steel lines!
but when I bought mine I got it for about £50 now their between £70-£110 Dry
I've found you this one which looks identical and can't see why this wouldn't work just as well just try to make sure you keep the part of the line thats being gripped free from brake fluid or it wont grip to be able to flair and will just push it backwards

I wouldnt bother with a pipe bending tool the tightest radius on those tools isnt enough just gently massage the pipe into shape being careful not to put any harsh kinks in it!

then once you'd sorted all that you need a Brake Bleeding kit you'll also just need a tire with no more than 20psi in this way pushes air into the bottle which forces the brake fluid into the tank and down the lines pushing out any air in the system!

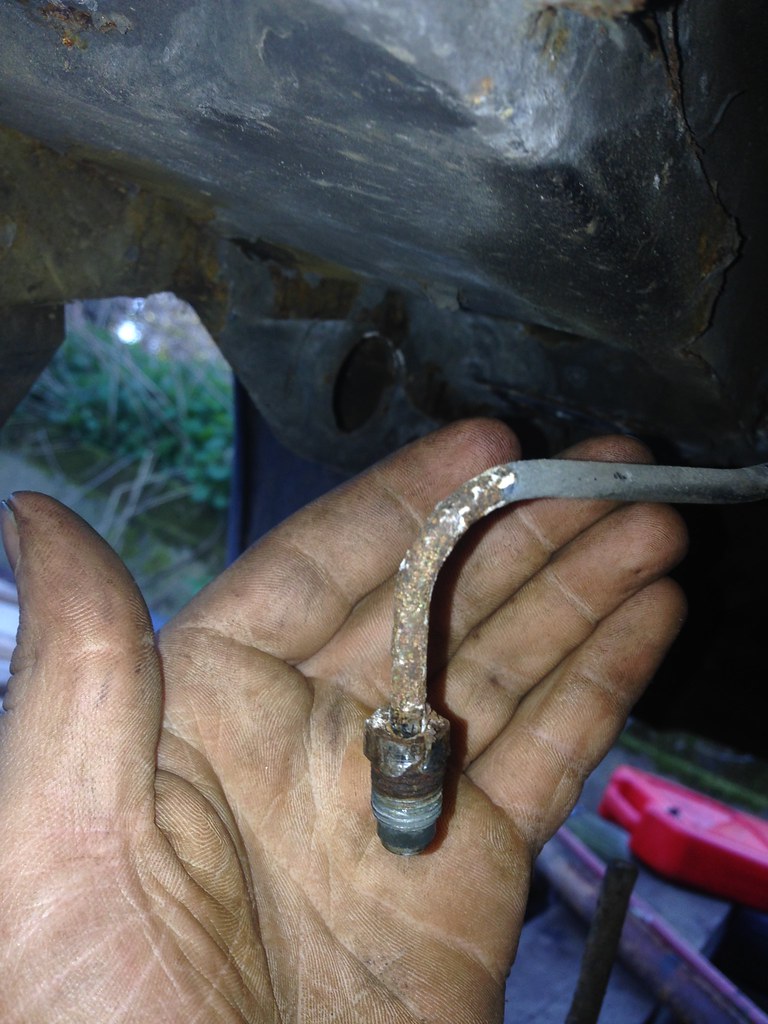
make sure you have an 11mm ring spanner for the front bleed nipples and 8mm for the rears
don't use a normal spanner that will only grip 2 sides of the bleed nipples these are hollow and chances are they'll split and snap a ring spanner will pull on all sides!
might be worth spraying some penetrating fluid/wd40 on them to help free them up!
trust me you don't want these to snap off!!

you'll have to bleed all the brakes starting with the caliper furthest away from the expansion tank!!!

I hope this is everything but feel free to message me!
it's a shame your not closer i'd have popped over with my things and helped you out! Sad


________________________________________

Proud Member of the ASTOR Owners Club
Posted 25th Mar 2017 at 21:46
barrym

Senior User

Location: Westcliff-on-sea

Registered: 26 Jun 2014

Posts: 502

Status: Offline

Post #58
All good advice there. I have one of those Gunson brake bleeders and was happy to use it with DOT5.1 fluid. However now I have changed to DOT4 Motul RBF660 I wasn't overly confident abiut using it as there is a chance of spraying brake fluid over the paintwork.

So I got a vacuum bleeder instead. Similar to this one:


http://www.ebay.co.uk/itm/Hand-Vacuum-Pump-Held-Brake-Bleeder-Tester-Set-Bleed-Car-Motorbike-Bleeding-Kit-/191762840431?hash=item2ca5f4bb6f:g:2noAAOSwHPlWdOSy

________________________________________

China D Turbo HDi daily charger
Black Rallye occassional toy
Posted 26th Mar 2017 at 11:17
gnrlee Forum Admin

Location: Leeds

Registered: 20 Aug 2005

Posts: 8,878

Status: Offline

Post #59
sounds like you half know what your doing then! LOL get it all ordered and get to it! LOL

________________________________________

Proud Member of the ASTOR Owners Club
Posted 26th Mar 2017 at 13:06
welshpug!

Capt Pedantic

Location: Bigend, Wales.

Registered: 27 Mar 2007

Posts: 25,817

Status: Offline

Post #60
what a load of tosh typed up there.

those tools don't work with a bendix caliper, the pad carrier is directly opposite the centre of the caliper bore.

all you need is a bit of square bar or a screwdriver in the groove across the face of the piston and wind it back in, no need to push them.

as for the brake line, its a waste of time adding a joiner in such a short line, adding three pointless unions and two extra places for leaks, where all you need is 3 foot of pipe and two unions, pop to a local garage and they'll make one up for you for a few quid, save buying tools.

________________________________________

need a part number? get on here - http://public.servicebox.peugeot.com

Bring on the Trumpets.

Posted 26th Mar 2017 at 14:46
gnrlee Forum Admin

Location: Leeds

Registered: 20 Aug 2005

Posts: 8,878

Status: Offline

Post #61
welshpug! wrote:
what a load of tosh typed


Alright wind your neck back in!

didnt realise i was looking at the rear caliper,... Doh
Didnt studdy the pic LOL yeah the rears just wind in!
You can easily fabricate your own piece of line for the rear caliper though no need to have someone make it for you!
A pipe wrench will grip those nuts it'll make a mess of it but will grip the other end to free it because im doubtfull an 11mm flaired spanner will undo it!

________________________________________

Proud Member of the ASTOR Owners Club
Posted 26th Mar 2017 at 15:06
stan_306gti6 Forum Admin

Location: Kent

Registered: 18 Jan 2004

Posts: 21,768

Status: Offline

Post #62
A brake pipe spanner will make the job easier too.

________________________________________

"Supercharged - 454.1bhp/317.5lb/ft"
Peugeot 306 GTi-6
2000 (X), Moonstone Love
Posted 28th Mar 2017 at 17:26
sageman

Regular

Location: Norwich

Registered: 23 Jan 2016

Posts: 114

Status: Offline

Post #63
right so ive found someone who can make me some pipes up he sugested to just take both front to back pipes off what im asking is is that a good idea or will i ruin the connectors on the passenger bulkhead doing that

________________________________________

1976 Reliant Kitten
1985 Reliant Fox Tandy campervan
1998 GTI-6
1993 Citroen XM sei V6 (barn find)
Posted 1st Apr 2017 at 17:26
welshpug!

Capt Pedantic

Location: Bigend, Wales.

Registered: 27 Mar 2007

Posts: 25,817

Status: Offline

Post #64
you don't need to do that, its only the line down the trailing arm you have damaged isn't it?

________________________________________

need a part number? get on here - http://public.servicebox.peugeot.com

Bring on the Trumpets.

Posted 1st Apr 2017 at 17:29
sageman

Regular

Location: Norwich

Registered: 23 Jan 2016

Posts: 114

Status: Offline

Post #65
no i had to cut one side as the nut toatally rounded off before the flexi and the other side the nut is all but rounded off

________________________________________

1976 Reliant Kitten
1985 Reliant Fox Tandy campervan
1998 GTI-6
1993 Citroen XM sei V6 (barn find)
Posted 1st Apr 2017 at 18:04
welshpug!

Capt Pedantic

Location: Bigend, Wales.

Registered: 27 Mar 2007

Posts: 25,817

Status: Offline

Post #66
those still aren't the lines front to back, those are only a few feet long and go to the load compensator.

________________________________________

need a part number? get on here - http://public.servicebox.peugeot.com

Bring on the Trumpets.

Posted 1st Apr 2017 at 18:16
sageman

Regular

Location: Norwich

Registered: 23 Jan 2016

Posts: 114

Status: Offline

Post #67
I have no load compensater

________________________________________

1976 Reliant Kitten
1985 Reliant Fox Tandy campervan
1998 GTI-6
1993 Citroen XM sei V6 (barn find)
Posted 1st Apr 2017 at 20:10
welshpug!

Capt Pedantic

Location: Bigend, Wales.

Registered: 27 Mar 2007

Posts: 25,817

Status: Offline

Post #68
ah so a phase3, there will be joiners on the boot floor somewhere before they connect to the long lines forwards.

________________________________________

need a part number? get on here - http://public.servicebox.peugeot.com

Bring on the Trumpets.

Posted 1st Apr 2017 at 20:49
sageman

Regular

Location: Norwich

Registered: 23 Jan 2016

Posts: 114

Status: Offline

Post #69
On mine I had the lines from calipers to the flexi there is a steel plate type thing between the solid and the flexi then again between the flexi and the pipe running all the way to the front these plate type things were attached to the rear beam

________________________________________

1976 Reliant Kitten
1985 Reliant Fox Tandy campervan
1998 GTI-6
1993 Citroen XM sei V6 (barn find)
Posted 1st Apr 2017 at 21:21
stan_306gti6 Forum Admin

Location: Kent

Registered: 18 Jan 2004

Posts: 21,768

Status: Offline

Post #70
The lines should disconnect at the steel plates you speak of.

________________________________________

"Supercharged - 454.1bhp/317.5lb/ft"
Peugeot 306 GTi-6
2000 (X), Moonstone Love
Posted 2nd Apr 2017 at 11:06
sageman

Regular

Location: Norwich

Registered: 23 Jan 2016

Posts: 114

Status: Offline

Post #71
Only way I could see was by unscrewing hence I've got these problems

So the connectors at the front below the battery at the bulkhead are they differant/stronger than the others can i take these off without damage

________________________________________

1976 Reliant Kitten
1985 Reliant Fox Tandy campervan
1998 GTI-6
1993 Citroen XM sei V6 (barn find)
Posted 3rd Apr 2017 at 10:01
sageman

Regular

Location: Norwich

Registered: 23 Jan 2016

Posts: 114

Status: Offline

Post #72
well another update should (would) be done by the end of today however in the accident the droplink popped out of the balljoint (damper side) and the balljoint refuses to unbolt

whats my best option here do you think

________________________________________

1976 Reliant Kitten
1985 Reliant Fox Tandy campervan
1998 GTI-6
1993 Citroen XM sei V6 (barn find)
Posted 12th Apr 2017 at 15:16
welshpug!

Capt Pedantic

Location: Bigend, Wales.

Registered: 27 Mar 2007

Posts: 25,817

Status: Offline

Post #73

________________________________________

need a part number? get on here - http://public.servicebox.peugeot.com

Bring on the Trumpets.

Posted 12th Apr 2017 at 15:17
sageman

Regular

Location: Norwich

Registered: 23 Jan 2016

Posts: 114

Status: Offline

Post #74
not sure how i would get it back on the new damper after grinding it off

________________________________________

1976 Reliant Kitten
1985 Reliant Fox Tandy campervan
1998 GTI-6
1993 Citroen XM sei V6 (barn find)
Posted 12th Apr 2017 at 15:22
miki4

Regular

Location: Cologne

Registered: 09 Nov 2015

Posts: 389

Status: Offline

Post #75
You mean you cannot undo the nut that fixes the droplink to the damper? Just grind the nut off, not the whole mount on the damper. Smile

BTW looks like he's cutting a sixth finger off in the picture
Posted 12th Apr 2017 at 19:29

Pages (4): first .. 2 [3] 4

All times are GMT. The time is now 00:34

The Peugeot GTi-6 & Rallye Owners Club - ©2024 all rights reserved.

Please Note: The views and opinions found herein are those of individuals, and not of The Peugeot 306 GTi-6 & Rallye Owners Club or any individuals involved.
No responsibility is taken or assumed for any comments or statements made on, or in relation to, this website. Please see our updated privacy policy.