displaying posts 26 to 50 of 71

Pages (3): 1 [2] 3

Author Subject: T427KJU- Saving a diablo 6
chiefton

Seasoned Pro

Location: cranleigh

Registered: 09 Dec 2012

Posts: 1,195

Status: Offline

Post #26
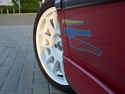
Thats not many stonechips.....you should see my bonnett,now thats stonechipped lol

My bumper was in a terrible state,luckily im on good terms with local body shop cost me 80 to get mine sprayed.
Good effort tho Thumbs up

________________________________________

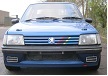
cherry rallye daily (the money pit)
Posted 24th Mar 2015 at 08:57
kezzer30

Junior User

Location: keighley

Registered: 05 Mar 2015

Posts: 59

Status: Offline

Post #27
So let's update with today's work , job one was to finish prepping the bumper and to remove the splitter and central grill


I sanded down the splitter as it's actually been painted and was so badly damaged it was unclean able so needed a coat of black which I just rattled canned , as I could not bring myself to waste good paint on something that will be battered on the first drive out


Next up it was time for primer so here are a few pics


Here is a pic of the pug as she stands


Back to it then , as the morrettes where going a different colour to the bumper and grill they needed doing first so here they are , just need a light flat and buff on the face and will look spot on


After it was time to colour and then lacquer the grill slam panel and bonnet and I will leave you all with them drying for the night


Posted 24th Mar 2015 at 23:03
3rd time lucky

Seasoned Pro

Location: maidstone

Registered: 23 Apr 2007

Posts: 1,878

Status: Offline

Post #28
Top effort there mate. Well done Thumbs up

________________________________________

DIABLO GTI-6 - Legend - NILE GTI-6 - Sold
CHERRY GTI-6 P1 SUPERCHARGED - Broken up
BLACK RALLYE - Sold
205 Dturbo xud9 work horse - Dead
CHERRY RALLYE - new toy
Posted 25th Mar 2015 at 00:11
kezzer30

Junior User

Location: keighley

Registered: 05 Mar 2015

Posts: 59

Status: Offline

Post #29
Cheers bud hopefully get it all back together tonight
Posted 25th Mar 2015 at 10:25
jimmyrallye

Seasoned Pro

Location: portsmouth

Registered: 19 Apr 2008

Posts: 3,144

Status: Offline

Post #30
Looks great have you done this in your shed or are you a pro painter as it looks awesome

________________________________________


"Police arrested two kids yesterday, one was drinking battery acid, the other was eating fireworks. They charged one and let the other one off."
Posted 25th Mar 2015 at 12:16
RetroPug

Seasoned Pro

Location: Leicestershire

Registered: 15 Jan 2013

Posts: 2,473

Status: Offline

Post #31
I'll be interested to see the diablo slam panel fitted as I did consider painting mine diablo.

________________________________________

61k miles Ph.1 Diablo '6 Project Thread
Posted 25th Mar 2015 at 12:25
kezzer30

Junior User

Location: keighley

Registered: 05 Mar 2015

Posts: 59

Status: Offline

Post #32
I taugh myself to paint buddy and it's my big shed/workshop inbuilt so I would always have a place to spray panels , it's not 100% suffers from dust a bit I've got an extractor but it can only do so much etc .
And cheers mate pretty happy with them tbh I'm not to bad at it .

P's the slam panel wouldn't come off the bumper as the bolts just spin so in thought screw it may aswel freshen it up
Posted 25th Mar 2015 at 12:29
RetroPug

Seasoned Pro

Location: Leicestershire

Registered: 15 Jan 2013

Posts: 2,473

Status: Offline

Post #33
The thumbs up in the reflection is a nice touch. Laugh my ass off

________________________________________

61k miles Ph.1 Diablo '6 Project Thread
Posted 25th Mar 2015 at 12:38
kezzer30

Junior User

Location: keighley

Registered: 05 Mar 2015

Posts: 59

Status: Offline

Post #34
So literally have not stopped over last few days and only just had enough time to hit some snaps of the car this morning was hoping for some sun but these will have to do for now etc


Posted 26th Mar 2015 at 09:50
kezzer30

Junior User

Location: keighley

Registered: 05 Mar 2015

Posts: 59

Status: Offline

Post #35
Got a bit of sun so snapped a couple of pics

Posted 27th Mar 2015 at 09:44
kezzer30

Junior User

Location: keighley

Registered: 05 Mar 2015

Posts: 59

Status: Offline

Post #36
Ok so a small update I recently purchased an omp strut brace , I turned up the other day , as you can see its certainly had it day.


So what to do with it , give it a 5 minute sand down and hit it with some rattle can back and bolt it on?
Nah , instead I'm going to sand the entire thing down so it's even and the polish the whole thing and lacquer it Smile
Unfortunatly my supplies have ran low so I didn't make a huge amount of progress tonight as the rust is pretty bad and deep but I did do a small teaser on what to expect

Posted 28th Mar 2015 at 21:38
RetroPug

Seasoned Pro

Location: Leicestershire

Registered: 15 Jan 2013

Posts: 2,473

Status: Offline

Post #37
I was thinking of polishing mine as well. It is already stripped to bare metal.
That, along with strut tops, rocker covers and the manifold.

It will be interesting to see how this looks as I'm torn between that and painting them all.

________________________________________

61k miles Ph.1 Diablo '6 Project Thread
Posted 29th Mar 2015 at 10:02
kezzer30

Junior User

Location: keighley

Registered: 05 Mar 2015

Posts: 59

Status: Offline

Post #38
Got a spare inlet coming in the post which I will be polishing also already got 4 custom covers for bits in the bay all polished stainless
Posted 29th Mar 2015 at 10:21
kezzer30

Junior User

Location: keighley

Registered: 05 Mar 2015

Posts: 59

Status: Offline

Post #39
So spent a tad more time after work of the small side of the brace , needs abit more but certainly looking a lot better
Posted 29th Mar 2015 at 23:30
kezzer30

Junior User

Location: keighley

Registered: 05 Mar 2015

Posts: 59

Status: Offline

Post #40
So today I cracked on with the brace and got it to a decent standard .


Also my new custom , brake fluid , power steering fluid , fuse box and ecu cover came today , so got them all on and first pic of coded slam panel


And this turned up and I will be making a start
Posted 31st Mar 2015 at 19:24
kezzer30

Junior User

Location: keighley

Registered: 05 Mar 2015

Posts: 59

Status: Offline

Post #41
Managed to get a bit of time on the inlet so here is a bit of early stage
Posted 31st Mar 2015 at 22:36
7057sam

Seasoned Pro

Location: Stowmarket,Suffolk

Registered: 18 Apr 2009

Posts: 2,080

Status: Offline

Post #42
Looking good mate

Wat else you going to polish up?

You use autosol after ?

________________________________________

Rallye build: 11 November 1998 - a Wednesday
Team rallye,built for track
----Click this if you like rallyes

Rallye dead Sad
Secret Team Astor...
Posted 31st Mar 2015 at 22:39
kezzer30

Junior User

Location: keighley

Registered: 05 Mar 2015

Posts: 59

Status: Offline

Post #43
Il get one or two more covers made and il polish the rocker covers and no I have metal compound polishing bars
Posted 31st Mar 2015 at 22:50
kezzer30

Junior User

Location: keighley

Registered: 05 Mar 2015

Posts: 59

Status: Offline

Post #44
So yesterday while I was shopping for a new drill I decided to see if b&q had anything I could make a intake pipe for My morrettes , I had an old intake cup to start with but it was big and would look a bit crap on its own , so I found some sink pipe kit for £7 and then had a great idea with a spot light surrounding which was £2 , I took the item home and got to work
I drilled and few holes in the old intake cup and attached the sink pipe


I then had a test fit with the spot light surrounding and I knew I would be good as it has 2 springs that hold it into the cup


Then sprayed it yellow and put on the car I made a small insertion into the standard air intake pipe so I have not messed with its original intake system


Posted 2nd Apr 2015 at 10:22
jimmyrallye

Seasoned Pro

Location: portsmouth

Registered: 19 Apr 2008

Posts: 3,144

Status: Offline

Post #45
Nice Smile

________________________________________


"Police arrested two kids yesterday, one was drinking battery acid, the other was eating fireworks. They charged one and let the other one off."
Posted 2nd Apr 2015 at 11:33
kezzer30

Junior User

Location: keighley

Registered: 05 Mar 2015

Posts: 59

Status: Offline

Post #46
Some more late night antics
Posted 3rd Apr 2015 at 01:16
kezzer30

Junior User

Location: keighley

Registered: 05 Mar 2015

Posts: 59

Status: Offline

Post #47
Popped the badge on this morning
Posted 3rd Apr 2015 at 10:55
kezzer30

Junior User

Location: keighley

Registered: 05 Mar 2015

Posts: 59

Status: Offline

Post #48
Completely changed my mind yellow out serious look in
Posted 6th Apr 2015 at 21:31
pug_306

Seasoned Pro

Location: Great Hockham

Registered: 28 May 2013

Posts: 1,593

Status: Offline

Post #49
Much better, looking good :-)

________________________________________

1998 Supercharged White Rallye
1992 205 GTi6
205 Turbo 340bhp
Posted 6th Apr 2015 at 22:20
99rallye

Regular

Location: Hitchin

Registered: 26 Aug 2009

Posts: 348

Status: Offline

Post #50
I agree, looks better without the yellow-good call. Where do you route the new air intake jnto the orignal airbox?
Posted 7th Apr 2015 at 07:02

Pages (3): 1 [2] 3

All times are GMT. The time is now 15:24

The Peugeot GTi-6 & Rallye Owners Club - ©2024 all rights reserved.

Please Note: The views and opinions found herein are those of individuals, and not of The Peugeot 306 GTi-6 & Rallye Owners Club or any individuals involved.
No responsibility is taken or assumed for any comments or statements made on, or in relation to, this website. Please see our updated privacy policy.