Post #1
this FAQ is to resolve the problems when your indicators become 'clicky' and the relay seems to be getting power without even touching the stalk whatsoever.(to remove the indicator stalk, simply remove the steering column surround and the 2 torx screws at the front of the indicator unit)
what happens over time (through the constant use of the lights and indicator switch), is that the contacts which run inside the tracks wear and impregnate into the grease, and the small metal filings become conductive, thus causing random shorts which triggers the relay. sometimes it will only do it once in a week, sometimes it'll do it (like mine was) every second the car is running. there have also been reports of smoke and hot electrics relating to this problem so you are best off fixing it rather than leaving it - you don't want burning electrics or a fire if you can help it
it's a pretty easy fix. for this you'll need some contact cleaner (WD40 was what i used) and a small flat head screwdriver.
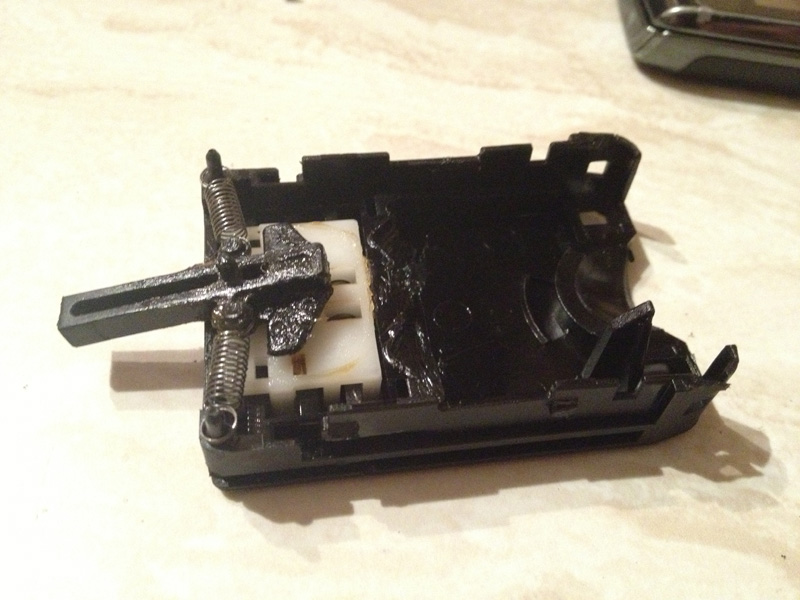
prize the top off the indicator stalk by pushing the 6 tabs (3 on each side, as pictured) inwards and upwards. this will release the top cover and indicator switch-off mechanism:
this is the mechanism on the top. the grease might have metal filings in it, so clean it up.
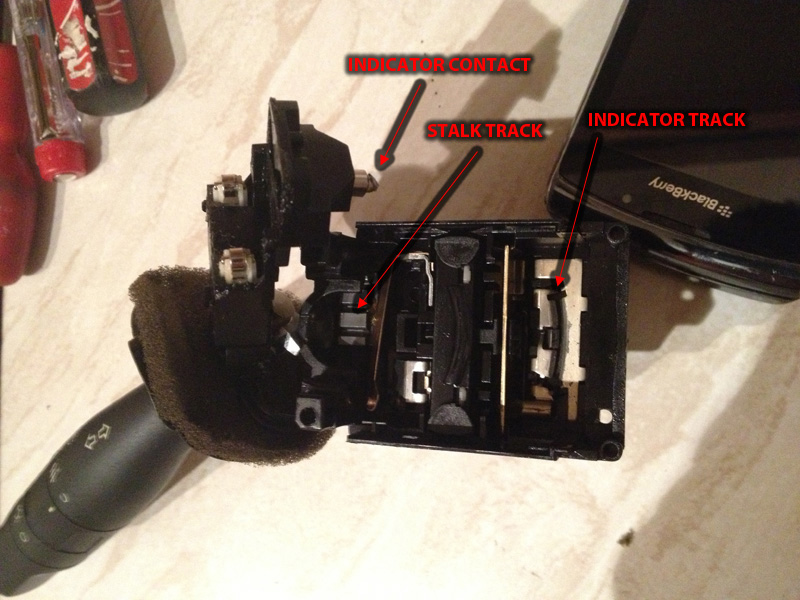
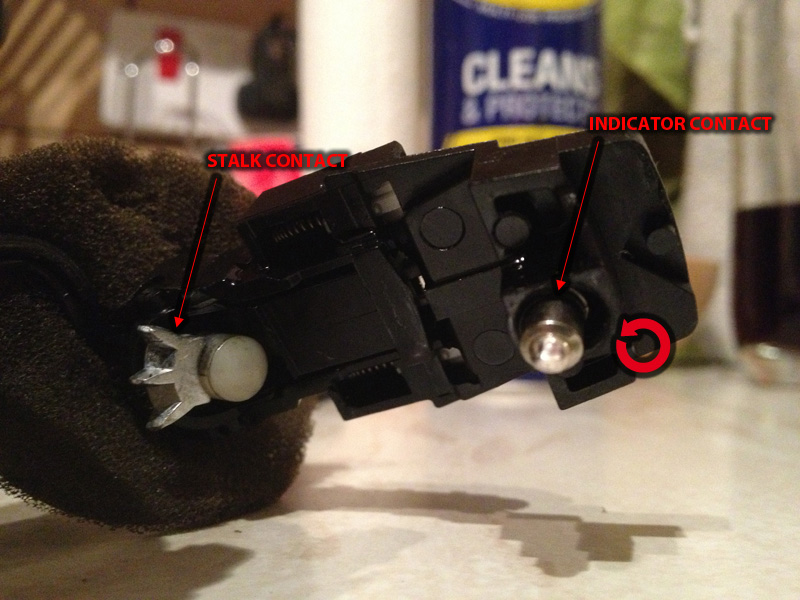
this is the basics of the insides of the switch mechanism. you have a cog (contact) for the twist function on the stalk (lights, fog lights) which runs inside a grey plastic track, and also a spring-loaded circular contact for the indicator, and again a track for it to run in - but this one is metal. as the contact is continuously grinding along the track, it gradually wears the contact out, leaving metal filings and particles on the track. due to the way the contact wears in the track, you will notice the contact is flat at 2 of the edges where it's worn. rotate it around 90 degrees so that the contact starts running in the track using unworn edges of it.
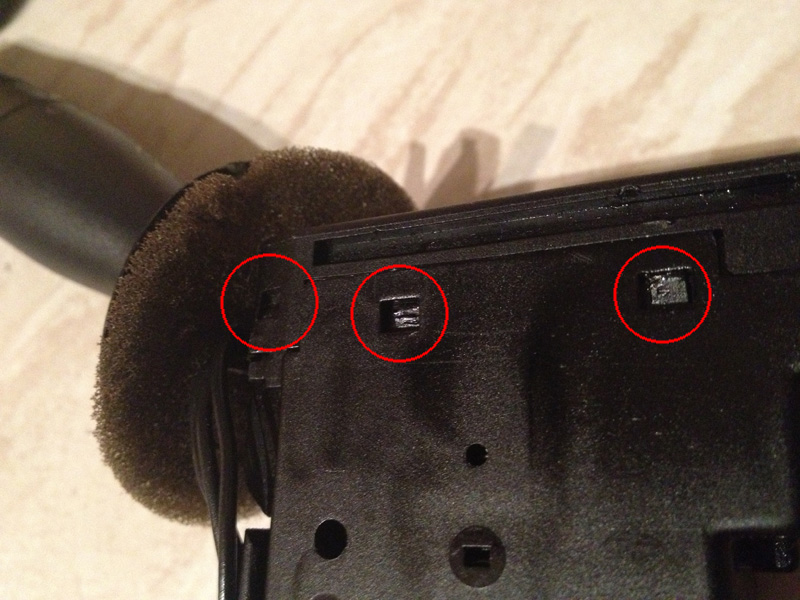
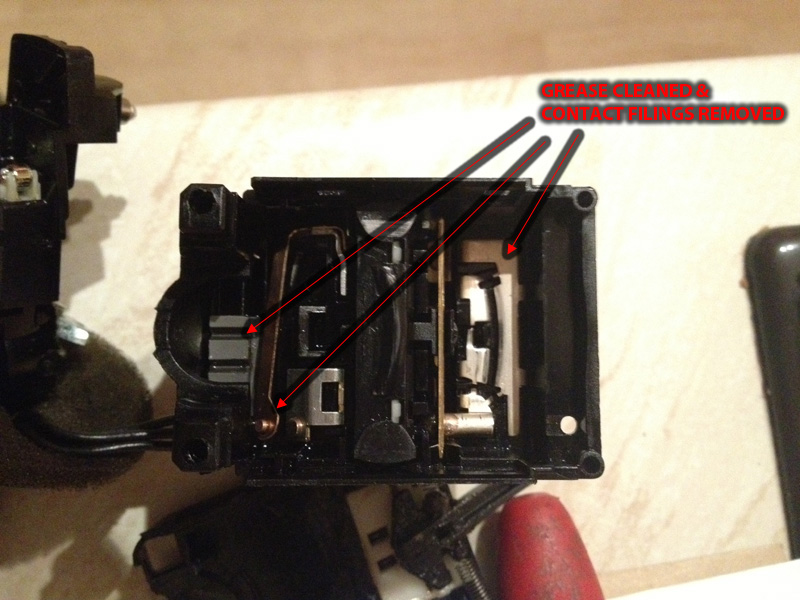
also clean thoroughly all areas of the insides, removing any visible filings and grease. i have arrowed where i cleaned, and it has been fine since.
when reassembling, i found it easier to apply the top part you removed (2nd photo) onto the indicator stalk mechanism upside down, then press the whole lot onto the main indicator base. this is because the plastic tab which cancels your indicators has a plastic lug poking up off it to secure it into the mechanism.
obviously if the main indicator contact has worn so much in a way where rotating it isn't likely to make a difference, it'll be new stalk time (or, 2nd hand stalk time, and attempt the above).
that's all folks.
________________________________________
306 rallye reproduction decals (full sets/individual decals) | 306 b-pillar textured vinyl weatherstrips306 slam panel esso stickers | 306 yellow / orange / pension fund red side door badges
gti6 inlet manifold badges | 306 rear boot badges (p2/p3)
winner of Extraction of toys from prams with outstanding vigour award 2009 [source: gti6 owners club]