


Post #1
***PLEASE DO NOT POST IN THIS THREAD***Hi fellas, here’s my much anticipated guide to fitting and adjusting your rose jointed drop links. A lot of it is taken from Phil’s guide with the gaps filled in by me. Phil couldn't be arsed updating his so i've done my best to pick up the slack. This basically follows the FAQ on the droplinks anyway, but it will cover the differences with the rose jointed droplinks, the principles between Phil’s style and my style are still the same.
Step one is to jack your car up. You need to be on level ground because we're going to set your arb bar up after, so find somewhere flat! As usual, make sure the car is supported on axle stands and you have clear access to the ARB and strut, best place to pop the axle stands is probably under the tie down loops on the chassis.
Now, while the car is in the air, it's always a good time to check everything else over, making sure all the nuts and bolts are tight and to see if any parts are worn. I found my n/s forward wishbone bolt had come ½ turn loose so I whipped it out and threadlocked it in for good effect.
If your car’s anything like my car, it eats droplinks for breakfast, especially non-OE ones, so your old ones with look shite:


Not for long though, so lets get them off!
16mm socket as always - but, of course, the joint starts spinning, no put the grinder down - STEP AWAY FROM THE POWER TOOLS – you have a few options here. If you’re lucky, your drop links will have either a socket on the end for an allen/torx key, or a spanner flat on the balljoint side of the fitting. If they aren’t present, whack a jack under the drop link and jack it up to put some weight on the joint to stop it spinning.

Incidentally, you’re never going to have this problem again, which must be nice?
Once you have the old drop links off, take a look at the new ones.
Phil's design:

Mine:
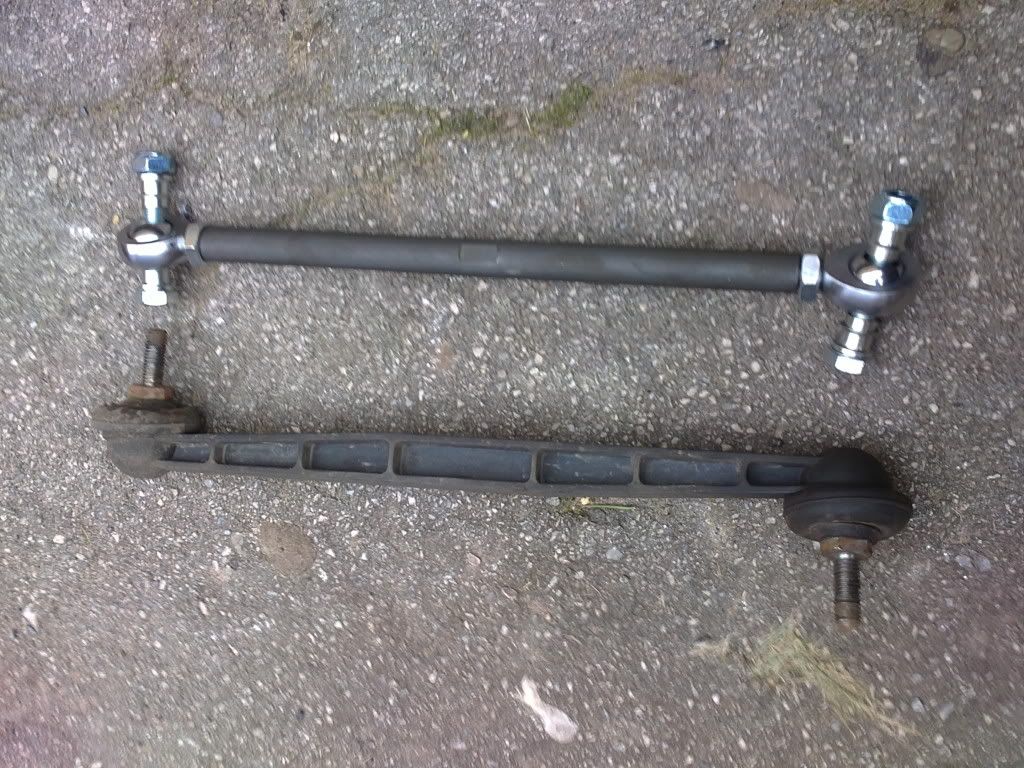
Only some slight differences between the two, for instance Phil's use a series of washers (or spacers on the later style) whereas mine use misalignment spacers. Both do the same job though of allowing clearance for the joint to move its full range.
With the ones I sent in particular, they’ll have come partially built up. In your parcel you’ll have the following:
Turnbuckles x2 with spanner flats
LH rod ends x2
RH rod ends x2
Each rod end having:
One locking half nut
Rubber boot
Spacer either side of the joint
M10x60mm bolt
Nyloc nut
Screw on LH and one RH rod end into the turnbuckle and hey presto, drop links. Make sure everything’s there, if any of those bits are missing they won’t do their job properly! I checked all the sets I sent out but just double check in case i’ve been a spaz!
Once you’ve assembled the drop links it’s time to pop them on the car. The design means you can adjust the length while both ends are fitted to the car by turning the body of the turnbuckle one way or t’other to add or remove length as you desire, then just nip up the half nuts on the rod ends. More of that later though.
For now, with the wheels off and the car up in the air, fit the top end of the drop links to the shock absorbers as per normal but leave the other end hanging. Also make sure the half nuts are loose so you can adjust the length. Now, wheels back on and lower the car to the ground, making sure the drop links don’t catch on the wishbones as you lower it.
Once the car’s back down, rock it backwards and forwards a few times to allow the suspension to settle. Then head over to your preferred side of choice, I started with the N/S.
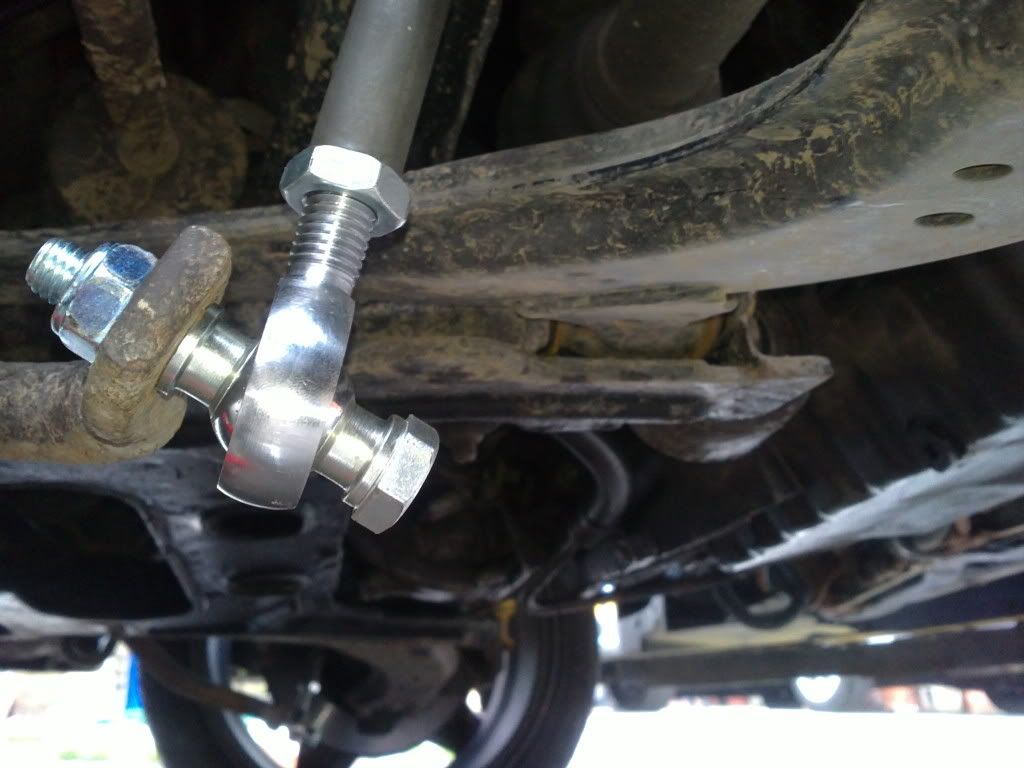
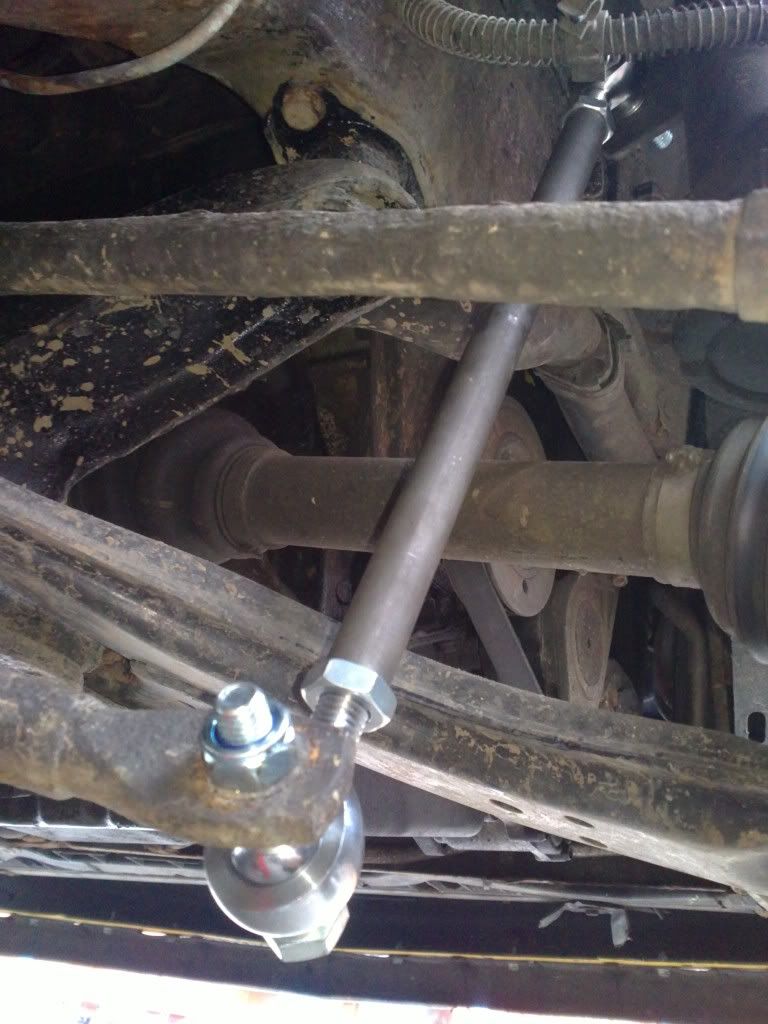
Getting in behind the wheel, adjust the drop link by turning the turnbuckle until it’s roughly half way extended, and fit it to the ARB. Don’t worry if it doesn’t slide straight in, move the ARB slightly if you have to, we’ll adjust that later. This just sets the ARB so you can get the lengths of the drop links sorted.
Now move to the other side. Lengthen/shorten the drop link until the joint lines up nicely with the ARB and bolt it up. If there’s not enough length available, head back to the other side and shorten the drop link, again by twisting the turnbuckle, until you can safely fit the drop link on the other side. Get the joints all torqued up and then we’ll worry about locking up the turnbuckles.
Here’s where having a pit comes in handy. If you have one, get underneath the car and get those half nuts tightened up on the drop links. If you don’t have access to a pit, you’ll have to jack the car back up and take the wheels off again. As long as the ends of the drop links are tight they’ll stay at the desired length, you just need to get access to the (iirc) 19mm half nuts to tighten them up, using the spanner flats on the turnbuckles to stop them from spinning.
Do the same for the other side and job done.
You’ll notice the rubber boots don’t sit perfectly tight over the spacers, don’t worry. They’re just covers to keep the crap off the joints, as they’re dry lubricated you don’t need sealed rubber boots to pass an MOT or anything, they’re just there to offer more protection than leaving them open.
As for preload, the aim of the drop links is to reset the ARB to its absolutely neutral position. Over time, the chassis flexes and twists and with a driver in the car there is always a minor amount of body roll just from the weight of the driver not being central to the car. You’ll notice after fitting that the drop links will almost certainly be different lengths. This is because , over time, a torsional load has been applied to the ARB which means the distance between shock mounting points and ARB is different either side. Hence the reason your car feels like it turns one way easier than the other. There are also manufacturing differences between cars and other external influences that mean not every car is identical. By fitting drop links of different lengths you are applying preload to one end of the ARB to counteract this natural “twisting” which means, in effect, the ARB is now set in the absolute neutral position, eliminating the “understeer/oversteer” feeling between left and right turning. The end result being that the car should now turn either way with the same characteristics. It’s worked on mine and it should on yours too. One of my drop links is nearly 20mm longer than the other!
Once you have it set centrally you can then add/remove preload as you desire, but that's something to talk to PhillipM about as tbh I have no need to adjust it. Can be handy on track cars though!
Coming soon.. rose jointed track rod ends. So yeah.
Any questions/anything needs clearing up, feel free to drop me a PM

________________________________________
Bye bye Sundance Kid
