Post #1
Hi guys,As I put this info in my other thread, thought it would be good in case anyone else needed to do similar in the future, so here it is....
Below you will find how to replace your standard speakers with 6x9's and also aftermarket 165mm speakers.
First up, 6x9's, Have fun...
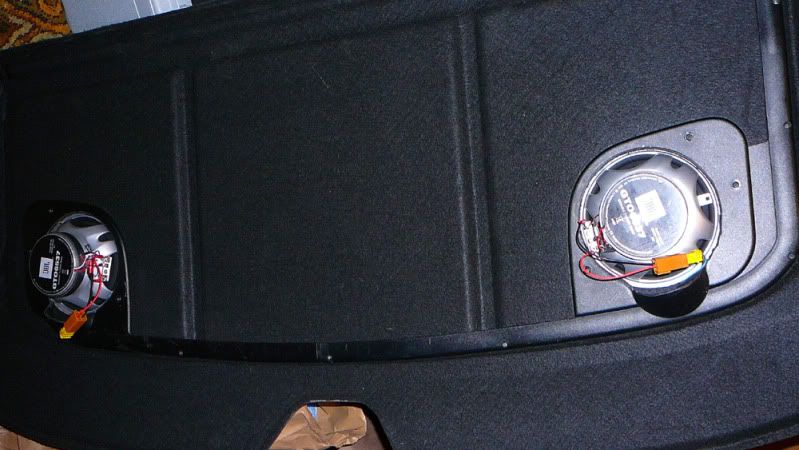
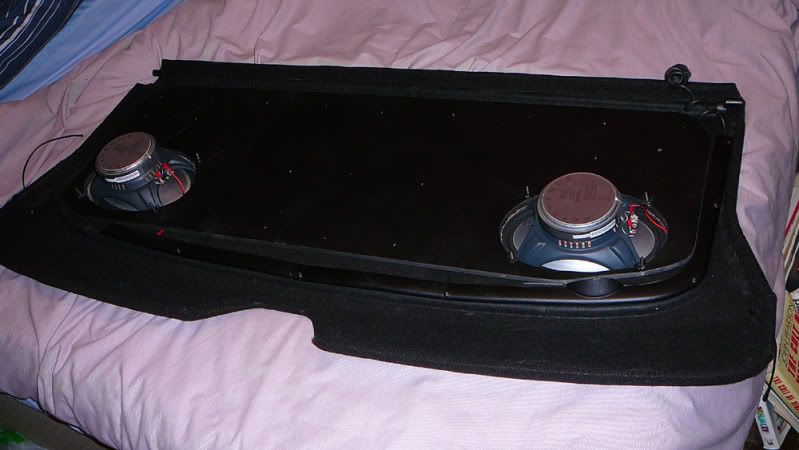
Start off with a standard shelf, remove speakers and grilles, then mark up and cut out the holes for yours new speakers.I cut round the existing holes so there were no gaps in the shelf.
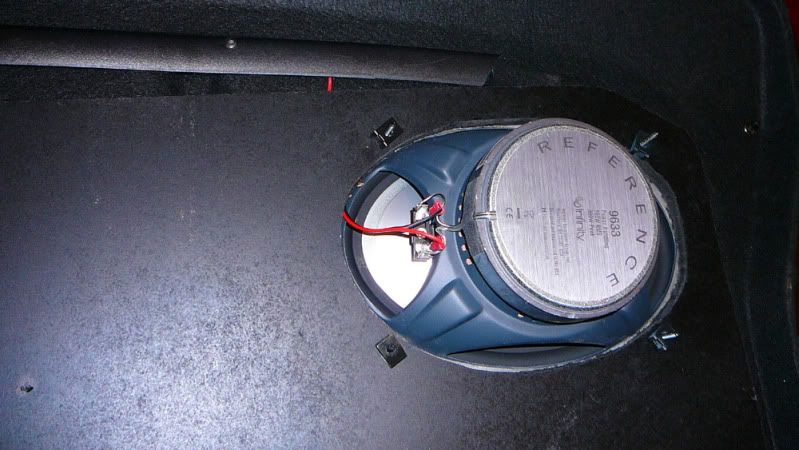
I also cut off the shelf speaker baskets so I could keep the wire channeling to keep the wiring tidy.
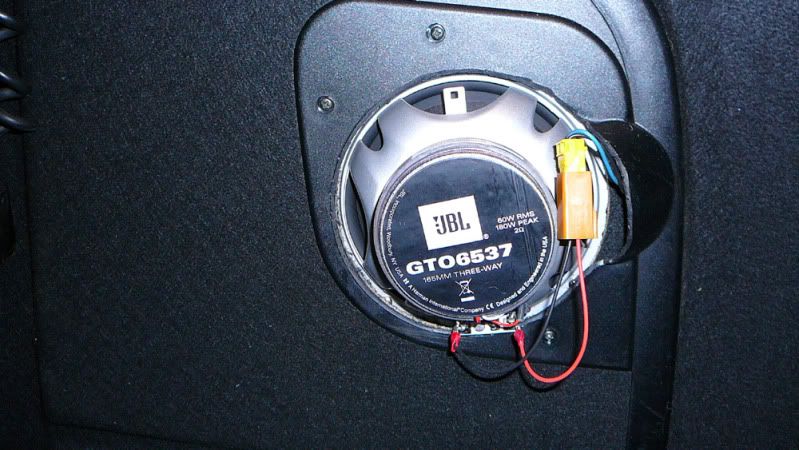
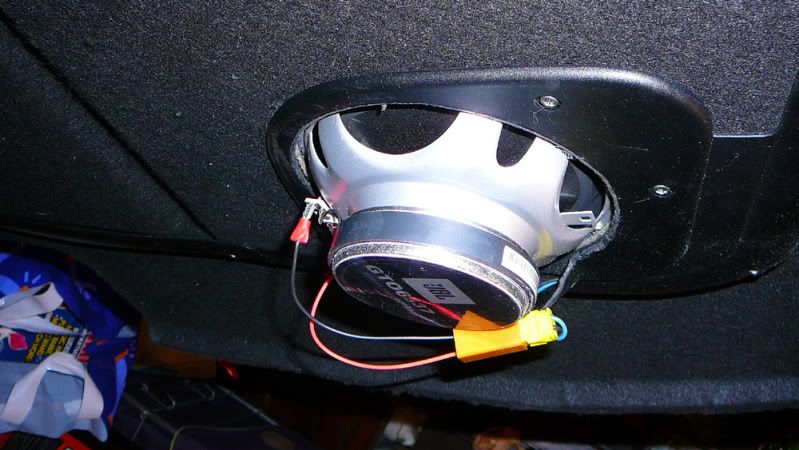
Then I cut off the yellow blocks and crimped some female terminals to the wires. Connecting the speakers this way means the wiring still goes through the round connector in the boot and makes removal nice and easy.
If you prefer, you can buy a connector that connects from the yellow plugs on the shelf into standard crimp connectors for about �3 off fleabay to make it easier to revert back to standard speakers if you really wanted to

The rear speaker wire colours are as follows...
Drivers Side Rear Speaker Wire Colours
Black -
Black & White +
Passenger Side Rear Speaker Wire Colours
Black -
Blue +
Some models have different colour wires, so these would be...
Drivers Side Rear Speaker Wire Colours
Red -
Beige +
Passenger Side Rear Speaker Wire Colours
White -
Yellow +
I may as well just mention the front speaker wire colours while I'm at it, which are...
Drivers Side Front Speaker Wire Colours
Red -
Yellow +
Passenger Side Front Speaker Wire Colours
Beige -
Yellow +
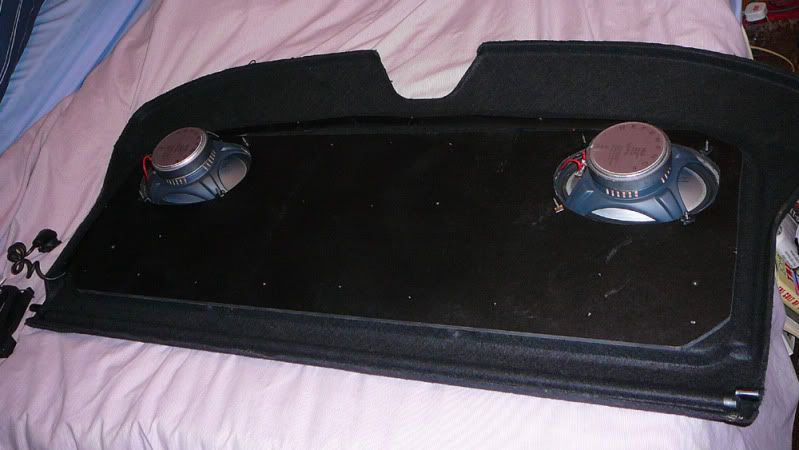
So I trial fitted the shelf and all was well and seemed pretty sturdy with the 6x9's on there but I fancied something to do so thought I would plonk a bit of MDF on the underside to make sure..
I used a 10mm sheet of MDF, roughly cut to shape needed, then marked up the speaker holes and cut them out as well.
Then just mark out where the bolts/screws need to go.
MDF is a bit out of place against a grey/black background and I had a bit of black paint left in a can, so I sprayed the underside to blend it all in...
Wiring routed between the shelf and MDF to keep it reasonably tidy...
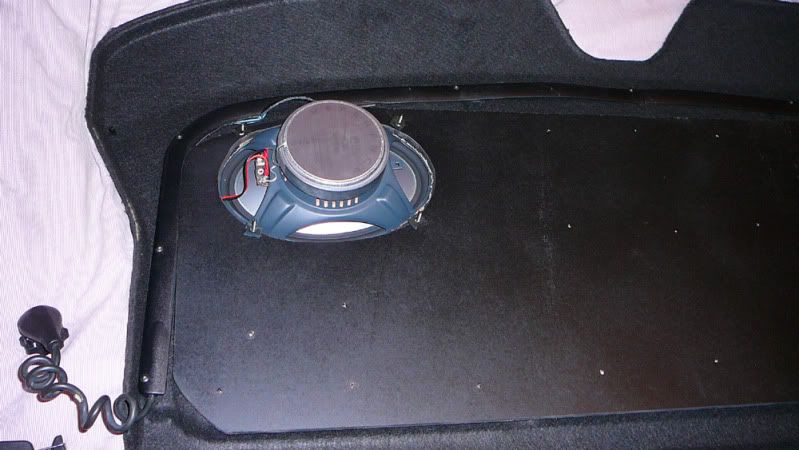
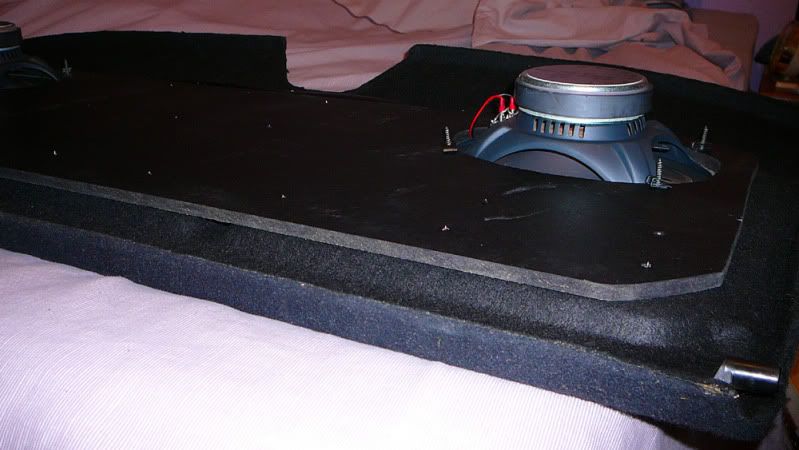
I also used some 15mm self tapping screws to hold everything secure which you can see in the first picture.
The little strips on the top side are just cardboard stuck down.
The reason for this is that the inner ridges of the shelf are shallower than the outer edges.
The tweeter on the 6x9's would have left a bump in the accoustic material instead of being flat so I did this to keep it all even. More on that in a bit

The other easy option is to mount the speakers to the bottom of the shelf, but I prefer to have the shelf holding the speakers instead of having 4 screws pulling on an already wafer thin shelf.
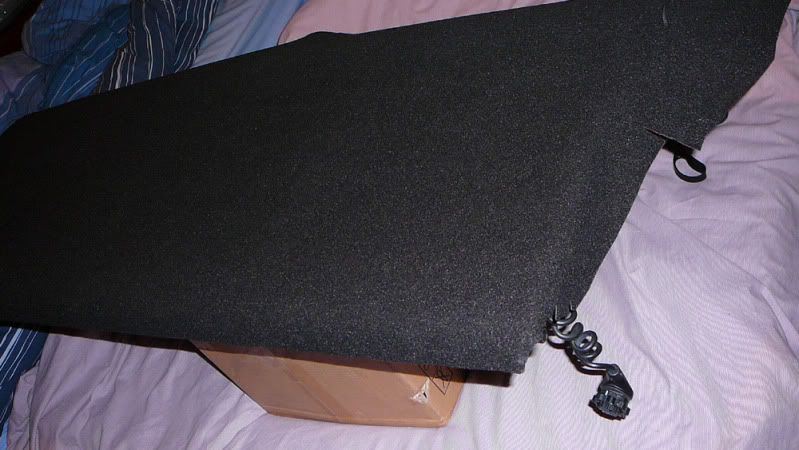
So we had a fairly solid rear shelf plus speakers, next was hiding the Infinity's from all those rotten shlaaaaags!

I got some good quality Accoustic cloth and a can of spray glue off egay for around �15.
This measured 2x1 Metres.
The shelf is wider than 1 metre so this size is ideal.
So spread out the cloth, place shelf on top and cut roughly to size leaving plenty around the edges for tucking and gluing down...
When you get to the tailgate strings, feel where they will go through, then pierce a small hole in the material and feed the string through...
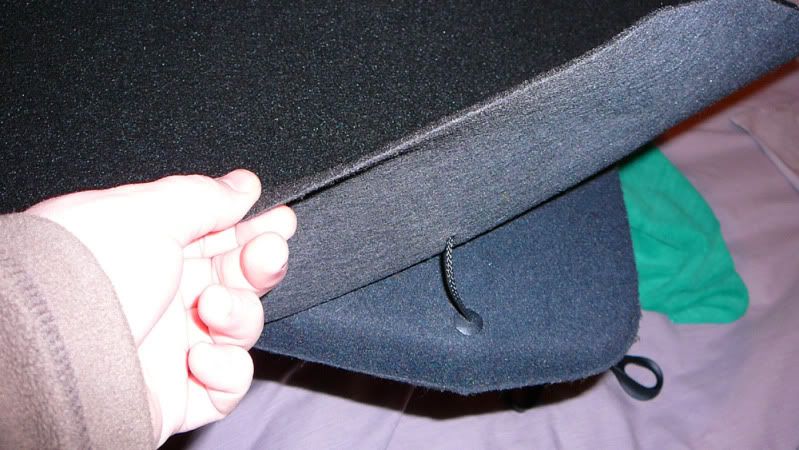
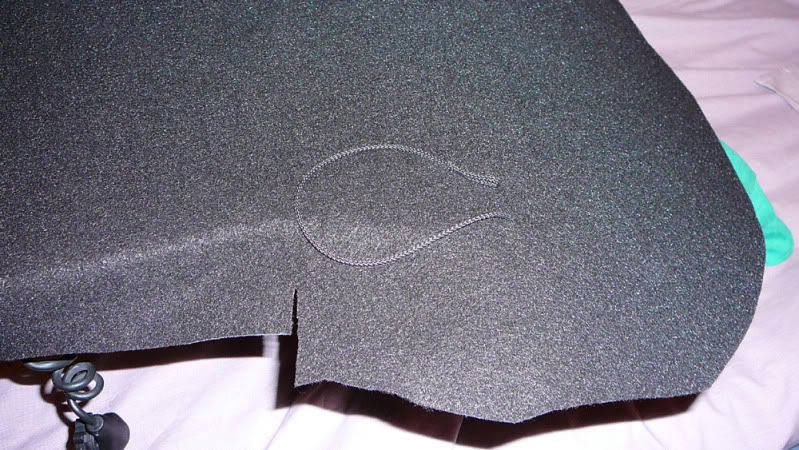
I started at the flat edge side and sprayed the glue directly onto the shelf then applied and positioned the material, then simply worked my way round, cutting and positioning as I went...
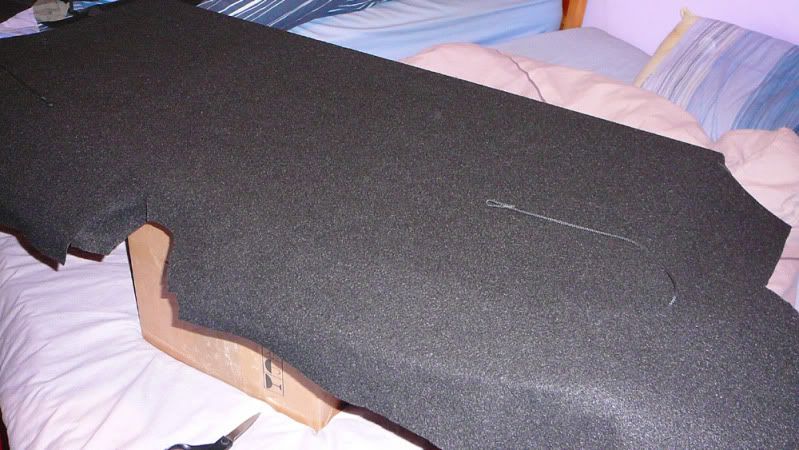
When you come to corners or bends, you will have to make a cut in the cloth to allow it to mould to the shape better. Just don't go too far otherwise it will leave a little gap and show the shelf underneath.
Also bear in mind that if you are using spray glue and the speakers are already fitted, then cover them with a cloth or something if you are spraying glue near them!
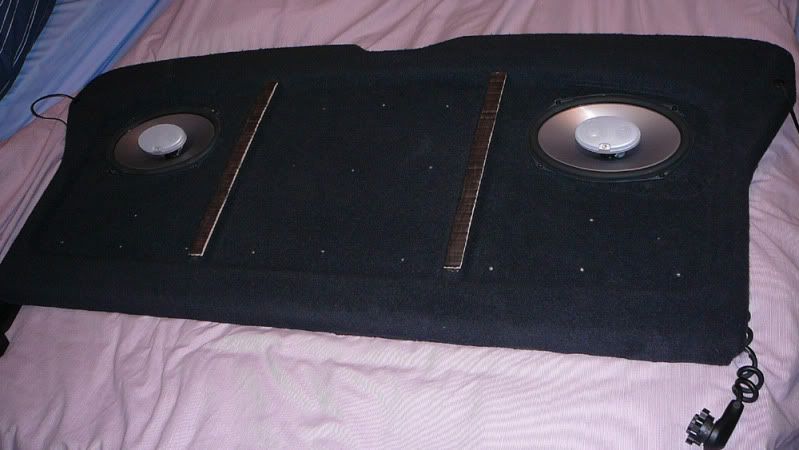
And finally finished!
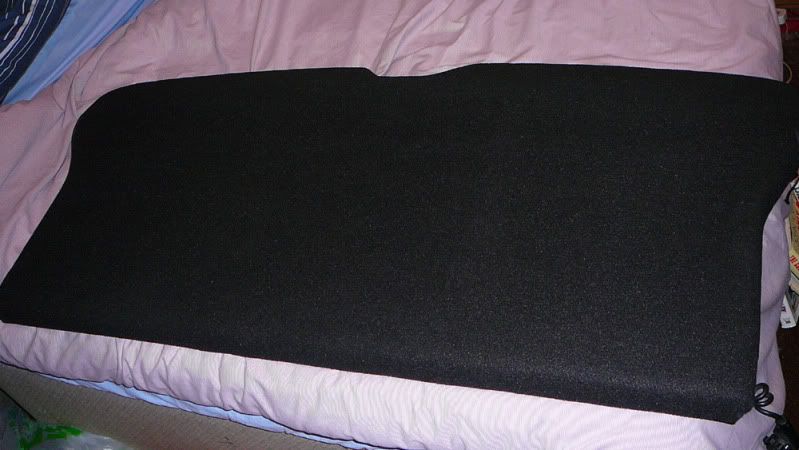
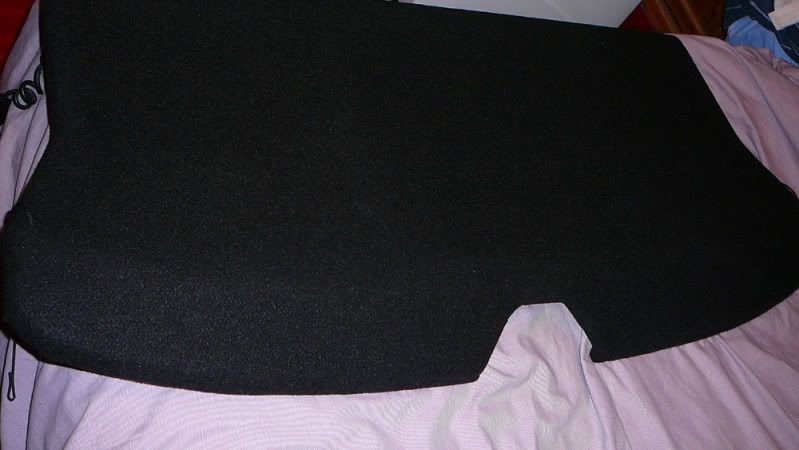
Put it in the car today and I am really happy with it and the speakers sound pretty good too

Next up, standard fit aftermarket 165mm/16.5 speakers into the rear shelf
________________________________________
My Pugrun 2007/2009 video clipsTake a look
Pugrun 2007...Lose yourself

Xbox Live ID: Marksixysix (Forza 3, Forza 4 PES 2010, COD 6/MW2, WRC 2010).
PSN ID: MarkSixysix ( DiRT 3 GT5, NFS:Hot pursuit).
P1 Diablo red 6 gone but not forgotten