Post #126
OOooh, this is close to you. Visa me up________________________________________
You didn't see anything. Right?


|
| Author | Subject: Track Cars for Dummies |
|
Seasoned Pro  Location: Bedford Registered: 27 Apr 2004 Posts: 9,890 Status: Offline |
Post #126
OOooh, this is close to you. Visa me up________________________________________ You didn't see anything. Right? |
|
|
|
|
Seasoned Pro 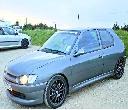 Location: Fareham Registered: 17 Dec 2006 Posts: 4,602 Status: Offline |
Post #127
Hope it doesnt matter to you but that flocked dash i sold you was a non air con one! I did make that clear! How come you havent fitted it? |
|
|
|
|
Junior User  Location: Australia Registered: 16 Sep 2009 Posts: 68 Status: Offline |
Post #128
Hey are those KW V1's? Whats your impression of them ie how do they ride, how low does it go etc I'm thinking of getting a pair. Thanks. |
|
|
|
|
Seasoned Pro  Location: Essex Registered: 20 May 2009 Posts: 9,185 Status: Offline |
Post #129
Dave - thanks you bastid, don't have the money for that, even though it's perfect and just down the road  Olly - my car's non-air con, so no worries. Only haven't fitted it yet as I had a track day coming up and has to prioritise things like the suspension and brakes - I've put in the door handles, dash will hopefully be going in shortly. Tez - they're V2's, and they're brilliant. I had them set roughly half way which I assume is more or less where the V1's are set by default - this would be fine for most fast road use but once I get the rears fitted and lowered I'll probably want to play around with the settings a little on track. In saying that they're the only suspension I've tried on the 306, but I know many people with track cars and most have ended up with KW. If you're just using it on road the V1's will be fine, if you're on track you'll probably want to go for the V2's if you can. I think they said they lower the car by 40-70mm, and I've currently got them at 40mm, which is about spot on for road use. Bear in mind the rears are no longer adjustable, only the fronts. But yes, I've been very impressed by them. O. ________________________________________ Membership expiring soon, get in contact on our new little forum project. |
|
|
|
|
Seasoned Pro  Location: The Nam Registered: 24 Jan 2006 Posts: 12,828 Status: Offline |
Post #130
berger wrote: Did the throttle cable make much difference? The throttle on mine seems to occasionally stick, the revs slightly increase when pootling around in traffic when you lift off the throttle for a split second before dying down. Figured its worth a change if they are only cheap? Berger: thats probably your throttle position sensor instead of the cable. Owain: Get a load of clean oil down the cable and see if it helps. Made a massive difference to mine - didn't need to change the cable then  Tez: Look at AST Sportline 1s as well - same kind of price, but probably better with completely personal settings if you want them. No idea if there is a dealer in Oz though. ________________________________________ Nothing to see here |
|
|
|
|
Seasoned Pro  Location: Bathurst Registered: 26 Oct 2008 Posts: 1,068 Status: Offline |
Post #131
adam b wrote: berger wrote: Did the throttle cable make much difference? The throttle on mine seems to occasionally stick, the revs slightly increase when pootling around in traffic when you lift off the throttle for a split second before dying down. Figured its worth a change if they are only cheap? Berger: thats probably your throttle position sensor instead of the cable. Brilliant thanks, searched and the other problem (revving up to 2k when starting) is a symptom of it too. Its currently plugged in, so is it safe to assume its dead!? Time for lubing up at the dealers then when I order a master cylinder at the same time!   ________________________________________ Bang'in 7 gram rocks!I have one gear, GO! |
|
|
|
|
Junior User Location: Australia Registered: 16 Sep 2009 Posts: 68 Status: Offline |
Post #132
owain wrote: Tez - they're V2's, and they're brilliant. I had them set roughly half way which I assume is more or less where the V1's are set by default - this would be fine for most fast road use but once I get the rears fitted and lowered I'll probably want to play around with the settings a little on track. In saying that they're the only suspension I've tried on the 306, but I know many people with track cars and most have ended up with KW. If you're just using it on road the V1's will be fine, if you're on track you'll probably want to go for the V2's if you can. I think they said they lower the car by 40-70mm, and I've currently got them at 40mm, which is about spot on for road use. Bear in mind the rears are no longer adjustable, only the fronts. But yes, I've been very impressed by them. O. Righto cheers. Would you happen to know what spring rate you are currently running? What do you mean the rears are no longer available - as in when you buy the set it doesn't come with the rear shocks anymore? |
|
|
|
|
Seasoned Pro Location: Essex Registered: 20 May 2009 Posts: 9,185 Status: Offline |
Post #133
No idea on the spring rate I'm afraid, but I do know you were clearly drunk when you read my reply "the rears are no longer adjustable" - yes they come with the kit, they're just fixed damping ________________________________________ Membership expiring soon, get in contact on our new little forum project. |
|
|
|
|
Seasoned Pro  Location: Brighton Registered: 21 May 2003 Posts: 7,211 Status: Offline |
Post #134
Front V2 springs are approx 350lb.________________________________________ Clio 182 FF |
|
|
|
|
Seasoned Pro Location: Essex Registered: 20 May 2009 Posts: 9,185 Status: Offline |
Post #135
Yeah, what he said ________________________________________ Membership expiring soon, get in contact on our new little forum project. |
|
|
|
|
Seasoned Pro Location: Essex Registered: 20 May 2009 Posts: 9,185 Status: Offline |
Post #136
Oh hi there, good to see you again. Thought you'd forgotten about this thread?Na, just haven't had much time to play cars lately. Oh yeah, what you been up to? Just sorting the garden and stuff, you know - summer stuff. Yeah, I know how it is. How's it going? Yeah not too bad, getting there. Probably got to do something with the shed though. Shut the fcuk up North, no-one cares about your life. Do something to the car. So, my rear end has been an issue for some time now. It's big, flappy and not as balanced as I'd like. I tried getting the rear torsion beams out in a previous post, but that really wasn't happening. So I started scouting around for a new rear beam, but they were either too dear or too far away. Luckily, I spotted this thread where one was up for sale just down the road to where I work. Therefore all things going to plan, a skankload of us Essex cru are going over to pull bits off Ben's car, whether he likes it or not. I'll be stealing the entire ream beam while he's not looking, with the intention of refurbing it and swapping it with mine. A job's not worth doing if you're not planning on making a decent improvement, so I intend to uprate everything I can while I'm there. New washers and seals are on order from Pug, should be picking those up tomorrow. I've already got my KW rear shocks to go on, collecting a hybrid ARB from Ash this week and I've got some solid mounts coming too. I'd already gotten hold of some 21mm Xsara torsion bars some weeks ago, which as of yet I hadn't done anything with. Time to have a play with those methinks. It had been pointed out that these bars I had were in a pretty bad way and yes, as you can see there's more than an element of corrosion:  However, the great thing about corrosion is that it's one of those issues you can just paint over and pretend it's not there - so that is exactly what I intend to do. First up, get some coarse grit sandpaper on an orbital sander and just go crazy. You'll find this job takes infinitely longer if this guy decides he wants to play fetch:  It takes up a lot of time, but you just can't say no to a face like that. Eventually, they'll come up nice and shiny:  Although that's gotten rid of the vast majority of the rust, I decided to coat it in rust remover anyway, just to get rid of as much of the corrosion as possible. I chose to lean them against some wheels from a 2003 Hyundai Coupe, but any spare set of wheels you have kicking around will do.  Too corroded to use? I don't think so.  Now at this point it's up to you what you do - I decided to show them to my girlfriend as I was so pleased with how nice they'd come up. It was a risk, and not one that paid off. I got that deeply disappointed look the does, then she just went back to watching The Hills. Mask up the ends as they're a bugger enough to fit without having a layer of paint on them as well, then primer them up with some acidic goodness. By the way if anyone's reading this in some kind of linear howto fashion, you're screwed. You forgot to mark which ends had the single and double markings on. Luckily, I remembered to mark them, I just forgot to write it on here. I had a look around to see what spray paints I had kicking around, and decided to go for a silver/blue combo. Quick flash of blue, mask it up, then all over with the silver. Couple of layers of lacquer and POW, there you have it. Good as new and still (I did check) 21mm in diameter. It had crossed my mind that I may have sanded off the extra millimetre but no, it was just surface corrosion on the paint.  Next job will be to get this beam at the weekend then spend next week sorting that out, ready for Woodbridge on the 7th. Bit keen? Oh yes. ________________________________________ Membership expiring soon, get in contact on our new little forum project. |
|
|
|
|
Seasoned Pro  Location: London Registered: 23 Jul 2003 Posts: 14,990 Status: Offline |
Post #137
Nice  Love the approach you have to it, real can do attitude  ________________________________________ Just Drive It |
|
|
|
|
Seasoned Pro Location: Essex Registered: 20 May 2009 Posts: 9,185 Status: Offline |
Post #138
I dunno about "can do", it's more "find out if can do" Cheers matey. ________________________________________ Membership expiring soon, get in contact on our new little forum project. |
|
|
|
|
Regular  Location: Suffolk Registered: 31 Dec 2004 Posts: 232 Status: Offline |
Post #139
See you at Woodbridge on the 7th. My girlfriend and I work for Javelin so we'll be watching everyone belt about and having fun. Top effort on the build so far! |
|
|
|
|
Seasoned Pro Location: Essex Registered: 20 May 2009 Posts: 9,185 Status: Offline |
Post #140
Ah cool stuff, what car will you be in? Come over and say hi if you see the me about. ________________________________________ Membership expiring soon, get in contact on our new little forum project. |
|
|
|
|
Regular Location: Suffolk Registered: 31 Dec 2004 Posts: 232 Status: Offline |
Post #141
We'll be in a red 5-door 306 diesel. You can't miss us, as I'll be the Chinese bloke wandering around in bright orange overalls waving flags and Sarah is the start marshal. |
|
|
|
|
Seasoned Pro Location: Essex Registered: 20 May 2009 Posts: 9,185 Status: Offline |
Post #142
Ah, they're subtle those suits! Is Sarah the one who always marshalls the start? If so then I know of her, yes. I'll keep an eye out for you, assuming I don't destroy the car replacing the beam!O. ________________________________________ Membership expiring soon, get in contact on our new little forum project. |
|
|
|
|
Regular Location: Suffolk Registered: 31 Dec 2004 Posts: 232 Status: Offline |
Post #143
Yeah, that's her. |
|
|
|
|
Seasoned Pro Location: Essex Registered: 20 May 2009 Posts: 9,185 Status: Offline |
Post #144
Well it's Wednesday, my internet's down so I can't do any work and for no apparent reason my thumb is causing me a lot of pain; I could understand it feeling like this if I had have, say, smacked it with a club hammer - that would be fine. However I didn't, I just went to bed then woke up at 2am in agony. I'm therefore limited in what I can do right now, so blog update it is. Okay, imagine it's two days ago and you're going to Southend to do what people from Essex do best - steal parts off other people's cars. The victim in question on this occasion was a nice lad called Ben (6waysforward) who was breaking his '6 for parts - I went over to collect the rear beam which I intend to strip, rebuild and then swap with my current one. For the sake of �60 having a second unit to work on while keeping the car on the road was a bit of a no-brainer really, especially if you consider quite how likely I am to screw itup. With the help of Chris (Farmer) we got the old beam off without too much damage to ourselves or the beam. Gotta say it's a hell of a lot heavier than I'd expected - the two of us could just about carry it between us. Taking that into account, imagine my joy when I got it home and realised I'd have to get it out of the van myself, ready to return said van to its owner the next morning. Straight back, bend with the knees... As it came, it looked like so:  For the next wee while, it's all about taking a million pictures of how it all looks, then just unbolting stuff until it's all off. Firstly, I removed the ARB. The ARB is inside the main beam, with two teardrop-shaped end caps. By far the easiest way to remove these is to remove the cap screws from the end and insert an M12(?) bolt - in this case a spare head bolt Ash kindly gave me for this exact purpose. The ARB doesn't have a thread in the end, so as you tighten it the ends will be pushed off.  The disc protectors are almost always in a pretty bad state, but hey ho. Asthetics are for girls.  It will all be pretty much this clean:  Nice. Remove the brake lines CAREFULLY - spray the connectors with plenty of WD40 then grip the line as best you can with a plumber's wrench or similar to keep it from rotating and gently work the connectors loose with a proper 11mm brake spanner. It's worth taking a picture of the compensator before you remove it - due to the nature of what it does there's a lot of slack in its fitting, so unless you know exactly where it's going back on you'll be done for.  The brass studs in the end of the torsion beams were pretty knackered anyway, so I'd already decided to order up some new ones. New ones on order, and you're safe to sacrifice the old ones in the name of speed of removal. Screw them in clockwise as best you can, then just go mad with something heavy. As an aside I'm not planning on keeping these torsion bars as I've got the 21mm ones - if you're keeping yours you may want to figure a better way of doing this than risk destroying the threads. This should push the torsion bar out:  Which should have the handy effect of pushing off the trailing arm assembly at the other end:  You should then end up with one trailing arm free, possibly still with the ARB still attached, depending on which end you did earlier.  If, like me, you happen to be unusually fortunate the shafts will be in good nick. If they're rusted and horrible you're looking at a couple of hundred quid for a new pair plus having to try and remove the old ones, which doesn't look like fun. In order to remove the other torsion beam, just use some brute force. Make sure you're trying to move it in the right direction then get imaginative with a hammer. For mine, I put the trailing arm face down supported on some bricks, then hammered the other end of the torsion beam until it fell through. You could equally hold it as I have above and hammer the trailing arm down, but I'd rather hammer at my old beam than the arm I'm keeping. Believe it or not, this is how the end thingyjiggery should look, if it wasn't for Ben's offroading activities:  I had to cut the old ones off, they're a bugger but will come off eventually. The trailing arm shafts will have the once silver cups still on them, you'll need to work these loose but eventually they'll slide off the shafts. Forgot to get a picture of that, sorry. Second fortunate moment of the day, the missus has just turned up with a curry. Down tools. ________________________________________ Membership expiring soon, get in contact on our new little forum project. |
|
|
|
|
Seasoned Pro Location: Essex Registered: 20 May 2009 Posts: 9,185 Status: Offline |
Post #145
Now pretend it's yesterday.Most parts stripped, it's time to start the rubbish bit - cleaning and prepping for paint. I bought a selection of tools for this, a handy set of wire brushes for a power drill, but most usefully some preparation wheels, which aren't cheap but are worth their weight in gold. Only thing is they go down quicker than you'd expect, I got through three just doing the beam and two end brackets. Give the bits a good scrub, and leave them over the sink for just long enough for the girlfriend to get a bit annoyed.  Once dry, it's time to try and get the paint off. One handy hint - if you're going to lean the beam against something while you're doing this, make sure it doesn't fall over onto your bin. Your refuse-containing friend will not come off well.  I used the drill brushes for anything not flat, and the prep wheels on anything that was. After half an hour's hard graft then a couple of hours in some rust remover, you'll end up with something like this:  Repeat for all other parts you want to put on - I did the beam, trailing arms, brackets, ARB ends, new solid beam mounts, a couple of random brackets and the disc protectors. The protectors are in a bad state of corrosion, but we all know how to paint over rust and hope for the best. Can't really see them once they're on the car anyway. Prime it up with some acid etch:  Get a good few coats on there, then leave to dry properly overnight. I've got some yellow spray paint turning up from Screwfix later on today, which according to its description "will not yellow". For once, I sure hope it does... ________________________________________ Membership expiring soon, get in contact on our new little forum project. |
|
|
|
|
Seasoned Pro  Location: Durham Registered: 20 Oct 2008 Posts: 8,716 Status: Offline |
Post #146
liking the look of the rear axle. going to make a start on mine next month i think. should have kept one of my old 6  ________________________________________ Clicky: [url =http://www.306gti6.com]click here[/url] remove the space between [url & = |
|
|
|
|
Seasoned Pro Location: Essex Registered: 20 May 2009 Posts: 9,185 Status: Offline |
Post #147
Yeah you should, they're not a car that should be gotten rid of ________________________________________ Membership expiring soon, get in contact on our new little forum project. |
|
|
|
|
Seasoned Pro Location: Essex Registered: 20 May 2009 Posts: 9,185 Status: Offline |
Post #148
Wednesday was Painting Day. Nothing particularly exciting to show here, but I've got a pic so might as well post it up. I've fortunately managed to accumilate a few different half-finished cans of spray paint by now, so pick something suitably garish and just go mad. I found some nice Peugeot Seville Orange which'll do for the mounts, the aforementioned yellow for the beam and some gloss black for the leftovers. Luckily I was working from home on this day which made things far easier - geek geek geek paint, geek paint, geek geek geek paint, geek paint - for about eight to nine hours until everything's the right colour. By the end of the day, you should have a selection similar to this:  Leave it to dry off properly overnight, ready for a rebuild tomorrow. On course for Woodbridge on Sat? We'll see. ________________________________________ Membership expiring soon, get in contact on our new little forum project. |
|
|
|
|
Seasoned Pro Location: Essex Registered: 20 May 2009 Posts: 9,185 Status: Offline |
Post #149
Right, rebuild time - this is going to be make or break time for Woodbridge. Essentially, get everything you took apart and put it back together, with plenty of lube on anything that you'll either want to move or remove. New seals for the ARB ends:  Ash gave me a very good tip here which I would've gone insane without - the ARB has a different number of splines on each end. Therefore you need to trial and error getting the ARB ends to be in parallel with each other. I did this by loose-fitting one end with the bar lying on the floor, then trying to position the other end so that both sat flat on the floor. This took about 20 minutes of swearing as the ends aren't exactly a loose fit, so it's pretty hard to find a balance between the ends falling off and them being too tight to remove. Once I'd found the position that fitted, I set about trying to put the ends on properly. Now, I'm not saying this was a pain in the ass or anything but the ARB actually went through a paving slab and into the ground before the end went on properly.  Still eventually it'll go on, so get all the basic parts stuck back together. The inner bearings you'll have to poke down into the beam, the outers I had to use a block of wood and a hammer to get in. Still, went in eventually with new seals:  At this point I've only loose-fitted the torsion bars ready to set the height later, but at least it looks pretty.  Refit the brakes, dampers and compensators, and generally tidy it all up. Starting to look a bit more like a rear beam now.  It's also important that by this point you've done a decent job of scraping as much of the new paint off as possible, just to make sure the job's been just that little bit less worthwhile. Whilst it's fun constantly slamming fingers under heavy things, dropping bits on your feet and generally causing yourself pain, you'll probably want to accost some kind of mate to help you get the beam onto the car. I think we'll leave that until tomorrow. ________________________________________ Membership expiring soon, get in contact on our new little forum project. |
|
|
|
|
Seasoned Pro Location: Essex Registered: 20 May 2009 Posts: 9,185 Status: Offline |
Post #150
By this time I've got real doubts about getting this beam on in time, so I booked the Friday afternoon off work to get cracking. I'd already roped my mate Rich into helping me, but thought it best to ruin his life just that little bit more by texting him at midnight the night before to ask if he could come here straight from work as we were probably going to need every last minute. I did not know how right I was. Still, promise him some beer and pizza and he dutifully agrees. One thing concerns me about refitting this beam - the brake lines. I'm fairly sure everything should line up, but I know I've also twisted a fair few of the brake lines trying to remove them from the calipers. So, what to do? I don't know how to make up my own brake lines, and I sure as hell won't be able to get them from Pug. Let's buy a flaring kit and a length of 3/8 copper brake pipe. Sure, I have no idea how to use it but hell, that's what the instructions are for. I also bought a couple of pots of unions (50 in each, one male one female) from Unipart, for about �11+vat each. Get that home, have a bit of a practise and I gotta say I was surprised at how simple this was to do. As long as you're sensible and patient, I had male to female ends matching up perfectly in about three to four tries - you just cannot argue with that. Although it might seem a little ridiculous to now go fitting my own brake pipes to my car like I'm some kind of professional, I fancy my chances against my own work more than I do against the twisted old rusty ones that are currently on there - lesser of two evils, if you will. Plus I intend to give them a good old test before just blasting out onto the A12 tomorrow morning. I removed all the ancilliaries from under the car; calipers, discs, sensors and bits (leaving the calipers attached as I couldn't figure out how the handbrake cable came off) and then watched a bit of Top Gear and waited for Rich to finish work. "I wonder", thought I. "I wonder if I can get the old beam off by myself...". Oh yes you can my friend. As long as you have a nice stack of bricks and a spare wheel, there's no reason you can't get the rear beam off by yourself - because that's what I did. It wasn't what I'd call fun, but it saved a few valuable minutes. I'd never taken the exhaust off before but that took all of two minutes, I did pick up a replacement rubber mount from Halfords as one of them was torn to pieces. Next job was the heat shield - nice and simple, as all three of the bolts just sheared straight off. That won't be going back on any time soon then. Loosen off the nuts in side the car, drop the beam onto the bricks, job done - beam off. Aah. I don't remember seeing that 180 degree bend in the main brake line feed on my new beam. That could be interesting. Especially as they're a completely different sized union, I don't have any, Unipart would only offer me a pot of 50 for �25 with no chance of a refund if I didn't use them. Oh well, we'll figure something out. Ah good, Rich is here. Now, Rich doesn't know anything about fitting rear beams to cars - he's a cyclist who works for an Investment Company. Still, I'm a fat bastid who works for a Hosting Company, so he's very much in the same boat as I am. I entitle this next section "Blind leading the Blind". We managed to get the beam roughly positioned underneath, propped up on some bricks. Ideally you'd then need three people for this bit, two to lift the beam from either end then another on the inside to stick the nuts on. Sadly, Rich plus I = 2 people, so we'll have to improvise. This "improvisation" roughly involved me under the car covering my face in crap and bench-pressing the beam against the car whilst Rich got the nuts on. Bit of wiggling and pain required, but then when isn't it. We then started bolting bits and pieces back on - disc protectors etc. I made up new brake lines to the calipers due to the aforementioned twisted pipes. Irritatingly one of the threads for connecting the brake line to one of the calipers was busted somehow, so I replaced the caliper with one of the ones from the new beam. That caused untold pain later on, but we'll come back to that.  Bearing in mind it's August, the lack of light in these pictures will give you an impression of quite how long this has taken so far. Queue lots of drunk people stumbling past wondering what the hell the two idiots are doing under a car working by floodlight on a Friday night. Fair question.  So, that 180 degree bend. Yes indeed, there's a design difference between the two. On the phase 2 is seems they decided to loop a pipe back on itself for no particular reason, so it seems we'll have to rectify that. Irritatingly I'll need the unions from my old beam - these can't come off without butchering the old brake lines, which I was hoping to keep intact. Oh well. So this, my friends, was my elegant solution to the little problem:  It ain't pretty, but it works. It's a complex system for cooling the brake lines, it's definitely not a massive dirty fudge. It's close to midnight, and something evil's lurking in the dark. All we have to do it get the discs and wheels back on and we're golden. But no, that just wouldn't be the way. For some reason, the caliper pulls the disc off-centre when the carrier is done up tightly and locks up the wheel - it's as if the main caliper body is too far in, and so the carrier doesn't come out far enough to fit around the disc neatly? Tried a different carrier, tried thinner pads - nothing. Eventually I'd had enough and just threadlocked the carrier bolts in. They're not hanging off or anything, they're just not as tight as I'd like. If anyone has any ideas what is causing this, please do let me know. So anyway it's late, Papa Johns has shut but I did luckily remember just in time and nip down to One Stop for some cold beers. So we take the car for a quick test-drive, and of course - there's a knocking noise coming from the back. What a substantial pain in the ass. Rich is going to punch me if I suggest fixing it now, so I'll leave it and take a look in the morning. We'll jump in the Astra and take a cruise down to Kebab Alley just off the high street to grab outselves some midnight munchies. Home, beer, bed. Not together, Rich cycled home. ________________________________________ Membership expiring soon, get in contact on our new little forum project. |
|
|
|
The Peugeot GTi-6 & Rallye Owners Club - ©2024 all rights reserved.

Please Note: The views and opinions found herein are those of individuals, and not of The Peugeot 306 GTi-6 & Rallye Owners Club or any individuals involved.
No responsibility is taken or assumed for any comments or statements made on, or in relation to, this website. Please see our updated privacy policy.