displaying posts 76 to 100 of 775

Pages (31): first .. 3 [4] 5 .. last

Author Subject: Track Cars for Dummies
cwspellowe

Seasoned Pro

Location: Calderbank

Registered: 19 Jul 2009

Posts: 6,496

Status: Offline

Post #76
I ended up twatting the hub where the pipe-holding bracket thing was, really f*cking hard with a BFH, eventually popped off. The wishbone should drop just enough to allow the hub to fall off the strut with a bit of jiggling.

________________________________________

Bye bye Sundance Kid Sad
Posted 4th Jun 2010 at 03:47
prism7guy

Seasoned Pro

Location: DoncastAAAAARGH

Registered: 13 Jan 2008

Posts: 4,639

Status: Offline

Post #77
I recently fitted bilstein dampers with standard length pug springs, my hub wouldnt go down far enough without using spring compressors either. It was strange as im sure i didnt use compressors when i put the new springs on a couple of years ago.

I fitted Eibach springs on bilstein dampers on rwgti's car a few months ago, didnt need to compress anything then, didnt even need to compress the spring to get it on the damper and get the top mount on LOL

________________________________________

Goldie the track car.
Posted 4th Jun 2010 at 04:11
owain

Seasoned Pro

Location: Essex

Registered: 20 May 2009

Posts: 9,185

Status: Offline

Post #78
OKAY. My face is covered in black crap, my arms are cut up and the pot of swarfega has gone down considerably - this can only mean I've been dicking around with that bloomin car again.

Let's start with Thursday shall we. TOYS!!!


Yes the Parcel Force delivery guy now hates me, but I'm keeping them in business. For now I'm planning on slapping on the steering wheel as they'll either be perfect or completely the wrong fitment. I'll then have a bash at the front suspension, which should be a hoot.

The first toy I played with were my nice shiny ratchety axel stands. Their first instruction: "Never raise more than two wheels from the car at once". So, you know what to do:


Next the steering wheel - this was pretty much as expected. The Momo boss I got from Demon Tweeks fitted perfectly, and the RMD steering wheel went straight onto that. Right, let's get this suspension under way.

Now, writing this retrospectively I'll tell you this now - what a frickin ballache this is about to be. You will get angry soon. I'll tell you first up what I did, then what it later transpired I should have done.

Let's start with the pinch bolts, another sweetly named item. Oh, how nice, they just give the suspension a cheeky pinch which holds it all in. Yeah... they pinch in a similar way to, say, lying on top of a tank and having another tank dropped on top would "pinch".
Penetrating oil and a hammer are needed here, lightly garnished with some light to mild swearing; eventually the bolt will come out. You can see its progress by keeping an eye on the head of the bolt which is recessed into the casting - you'll see what I mean if you ever have the misfortune of doing this job. By the way when it does come out, don't get too excited as you're nowhere near done.

As soon as I spotted the plastic droplink between the anti-roll bar and the strut, I knew I wouldn't be finishing the job today. Nearly every MOT I've ever had has involved replacing a droplink and I pretty much every time I know they've been ground off in order to shift them. Oh well, let's set about destroying those then.

The droplinks are attached with a nut on a thread, however you can only get to one end. When new, these are put on my putting an appropriately sized hex bolt into the end of the rod and tightening the nut with a ring spanner. As you'd expect after thousands of miles of motorway crud, they're not quite so easy to remove. I ended up destroying the rubber gaiter and just putting some mole grips on the other side whilst I undid the nut. Do the same at the other end on the anti-roll bar.

The brake caliper will come off with the two bolts on the back, again WD40 and a breaker bar should leave you positively laughing. Unclip the brake line by bending this weird little thing out the way:


This wire here is definitely sheared off at the factory when they're new, so I wouldn't concern yourself too much with that.


It looks like it goes to some kind of pad wear sensors, but as mine clearly haven't worked in some time that's not something to lose sleep over.

So, I then whip out my trusty spring compressors, not truly realising the pain about to be bestowed upon me. The thing with spring compressors, right, is that they're a fixed length - the shaft on which they run can't ever get shorter even when the two clampy bits move. Therefore although I got three of them onto the spring, the assembly was still exactly the same length. This was my first issue I had not been expecting.

It was then a case of generally twatting around with hammers, trying to knock the hub down away from the strut, that didn't work so tried undoing the strut at the top then wobbling it about. Still nothing for about two hours. By this point I'd gotten to a point where I had three spring compressors all wedged inside the inside of the wing, nothing moving and the car sure as hell not going anywhere any time soon. This was annoying. I'd also removed the top mount for some reason, thinking this was a good idea. Again, ring spanner and hex bit jobby:


At this point, I gave up for the night and ordered myself a pizza. I spent some hours reading through threads on here for help, and it looks as if different people have had completely different experiences of the same job, so don't take my advice on this job any more than anyone else's! However I did pick up the tip of undoing the hub bolt and removing the hub. Pain in the ass maybe, but undoubtably would allow me to remove the strut.

Next day, pick up a socket - I needed a 35mm but alas those don't seem to exist except on the internet, but on this kind of scale a 36mm isn't going to be an issue. £12 lighter, back to that car with a 50cm breaker bar. There's a little spring clip in the end of the driveshaft which looks like it's going to ping off and get you in the eye when you remove it - don't worry it won't, for once. That off, remove the little metal cover. You'll need to somehow stop the driveshaft from turning. Luckily, there's a handy little hole in the hub, so I wedged a screwdriver through one of the wheel nut holes into that. It girled out.


The old linkage from the gearbox is also not strong enough:


Beefier screwdriver methinks. Nope:


By this point I'm starting to wonder whether the hub nut has been overtightened a little by an over-zealous spannermonkey in the past. Okay, last resort - nice big old Stanley job. Na.


Okay, so that's really not happening, I'm bending my breaker bar a silly amount, quite clearly this nut is not coming off. Abort.

I've really had enough by this point, and it's only when under this kind of pressure that the mind thinks up some of the more ingenious and clever in-depth plans to get around logistical problems. I won't share too many details of the way I solved the problem, but here's a clue:


Twang. And the spring is off. I could then lift the strut from the hub, job's a goodun.

So I never have to go through all this again, it's a good plan to lube everything up nicely for next time. I go for the special "Ladies Man" grease Castrol kindly make for me.


The top mounts and bearing are being reused in this case as they all seem to be fine. So I lubed everything up and assembled the new strut on the car without the bearing.

I then removed the assembly from the car, put the bearing in and put it back on the car.

For future reference, I put it all together again like this:


Which seemed to all be happy enough, so let's assume that's correct.

New pinch bolts from Mr Swampy go in very nicely, also new strut bolts in the top so the new strut is hanging down. Jack underneath the hub to push it all up as far as it'll go, and tighten up the pinch bolt.

Because of where everything was I couldn't get the new droplink to meet up with the antiroll bar, but jack under the ARB did the job nicely.


Change brake pads for new DS2500's and replace discs with new Brembo ones from GSF. Reassemble brakes, move over to other side to hopefully not make the same mistakes again.

This time I'm going to try a trick I read on here somewhere: put a jack under the hub and jack it up as much as you can, before the car starts to lift. Then put your spring compressors onto the spring with the spare thread pointing down, like so:


You won't be able to get to the wrench end but that's fine, they only need to go on hand tight. You can then undo the strut bolts, pinch bolt and droplinks. Drop the hub on the jack and generally wiggle everything about a bit until the strut comes out. This was infinitely easier than the first one, breath a sigh of relief. Luckily it's about 26 degrees outside today, so by this point I was about as moist and attractive as I'm sure you can imagine.

Still, you've not arf got some banging suspension now:


While under the nearside arch I thought I'd try fitting my short shifty thingy from Griffiths Engineering. Very simple yet impressive bit of kit it is, unfortunately didn't have anyone around to help so lots of adjusting under the car then running around to see how the gearstick had moved. Basically, however, it goes on the main selector into the gearbox onto the end of the long gear linkage rod:


The "rotation", if you will, changes where your neutral point on the gearstick sits. I changes mine slightly so the stick is at nearly my arms reach when in the odd gears. Moving the thingy up the selector increases throw, moving it down decreases it - as you can see I've gone for pretty much the shortest throw I can. All done, make sure this is really tight as quite clearly you'll have no gears if it comes off. This, in conjunction with Miles' linkages, makes a massive difference to the gearchange and I really cannot recommend it enough.

Not a difficult one either, on the Ballache Scale it's a 2 for cost, 2 for Difficulty and 1 for Time, giving it an overall BS of 4. Very reasonable indeed.

So put everything back together. I bled the brakes whilst I was there, and replaced all the bleed nipples while I was at it; I've heard one too many stories on here about them snapping so be careful! There'd be nothing worse than snapping a screw whilst trying to remove it in order for it not to snap, so I fully expected this to happen. Happily with lots of penetrating oil and a wire brush they did not.

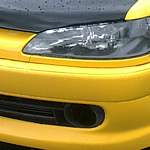
So that's the fronts done, I'll take it for a quick (if anything breaks, long if it doesn't) drive to check everything's good. Wheels back on, and nothing to show except a cheeky bit of colour:


Cost 7, Difficulty 6 and Time probably 7. That's a BS of 294 for the initial job, bear in mind however that if you ever do it again now everything's off and you know what you're doing it'll be a breeze.
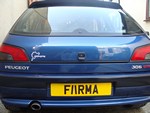
Broom broom.

Gotta say, massive massive improvement to the car. I tried it first on full soft which was fine, then changed it to full hard which was quite frankly frightening. Every bump you'd lose traction, every corner you'd expect to spin and braking quite frankly induced a particularly tight anus. Still, luckily these things aren't binary, so somewhere in between was really impressive. Gear shift is also much better and braking (once I'd bedded in the pads) really is eyeballs-on-the-dashboard good, although there's still too much travel and sponge in them for my liking. Maybe I'll get keen and buy some braided lines, who knows. Unfortunately I have no idea whatsoever how to change brake lines but hey, that hasn't stopped us so far.

Yes your garage is full of crap so you can't get a car in there any more but this isn't about that, you've gotten yourself a good little track car you're proud of, you've got a job well done and yes in the back of your mind you know you haven't done the rears yet but hey-ho, that's one for another day. Not sure I'm quite done yet anyway...

A big thanks goes out to everyone who's offered advice so far, or whose threads have provided me with many an idea or good tip.

________________________________________

Membership expiring soon, get in contact on our new little forum project.
Posted 6th Jun 2010 at 02:45
musclebeach

Seasoned Pro

Location: Yorkshire

Registered: 13 Aug 2006

Posts: 7,763

Status: Offline

Post #79
I've got to commend you on what a fun thread this is, also very helpful for people undertaking these sorts of job for the first time, and i thought all Computer Programmers were boring geeks that whacked off in dark rooms to anime' , you sir have widen that view! Thumbs up

________________________________________

VW Golf GT TDI 115, 100k nooooooooooooooooooooo!

Posted 6th Jun 2010 at 02:28
owain

Seasoned Pro

Location: Essex

Registered: 20 May 2009

Posts: 9,185

Status: Offline

Post #80
Ha, cheers I think!

That was kinda the idea really, I've always found the internet full of useful info and guides, but I've always struggled with the terminology and suchlike and so have been put off doing these things myself.

Getting this car was my first chance to tear apart a car where there's really not that much to lose, and touch wood so far it seems to be going fairly well. Hopefully people can see that if I can do it then anyone can, then three days later they'll be on a trackday in their nice new car Wink

________________________________________

Membership expiring soon, get in contact on our new little forum project.
Posted 6th Jun 2010 at 02:41
binkagti

Seasoned Pro

Location: canterbury

Registered: 14 Oct 2006

Posts: 2,411

Status: Offline

Post #81
Fair play mate could never do this myself without reading your guide,

________________________________________

TEAM Supercharged Rallye


Posted 6th Jun 2010 at 02:48
owain

Seasoned Pro

Location: Essex

Registered: 20 May 2009

Posts: 9,185

Status: Offline

Post #82
Course you could, you just might not think you could Wink

________________________________________

Membership expiring soon, get in contact on our new little forum project.
Posted 6th Jun 2010 at 02:54
musclebeach

Seasoned Pro

Location: Yorkshire

Registered: 13 Aug 2006

Posts: 7,763

Status: Offline

Post #83
I know i could, but things like brakes, i like my brother (who's a time served vehicle technician) to do it as he can do alot of things in his sleep......if for any reason i missed something or did something wrong i can't begin to think of the consequences!

________________________________________

VW Golf GT TDI 115, 100k nooooooooooooooooooooo!

Posted 6th Jun 2010 at 03:34
farmer

Seasoned Pro

Location: Southend On Sea

Registered: 20 Aug 2005

Posts: 2,245

Status: Offline

Post #84
Brake lines are an easy one to do Owain.

On the fronts, do the chassis end first. There will be a little top hat sort of clip over the union on the solid line, remove that and then just undo the union while holding the flexi line in place (if the union is quite seized you may also have to hold the solid line too.

Once thats off, the other end just unscrews from the caliper.

Fitting new ones is the reverse.

You will get covered in brake fluid doin this unfortunatly. I usually get a thick plastic bag over the resevoir filler and then put the lid back on again to form a vacuum of sorts to slow down the leakage.

As for the brakes just being too spongy atm, try bleeding them again. After I have been titting about with my brakes or flushing fluid I usually find they are crap after the first attempt, but after a few miles of use and several medium brake applications then another bleed will remove a few stray air pockets.

While your messing about with the front suspension, have you checked on the condition of the wishbone bushes and the ARB bushes?


And as for undoing hub nuts, if you should need to get them off, I have a 35mm socket here your more then welcome to use if you need it (seeing as your not far away from me)
Its best done with 2 people ideally; 1 to apply the brakes while the other moron yanks at the breaker bar.

Alternativly, fit the steel spare after removing the 'R' clip, and put the car back on the ground. That way you can get the socket through the wheel to undo the nut, and the wheel cant spin!

________________________________________

Long live the Sigma 6 Big grin
Team Phase 1 supercharged

XBL ID: farmer uk1
Posted 6th Jun 2010 at 17:37
owain

Seasoned Pro

Location: Essex

Registered: 20 May 2009

Posts: 9,185

Status: Offline

Post #85
Cheers for that buddy, although I have a feeling you've just convinced me to get some braided lines! How dare you. Still, sounds easy enough so we'll give that a go. For now I've only got in crappy Halfords fluid in there, I've got some decent stuff I'll be putting in next week so I'll have another flush through then.

I didn't check wishbone or arb bushes no, what do I need to look out for? Just general movement? In which case are they the kind of thing I can replace, or do they need pullers and presses?

The spare wheel job isn't a bad shout, I just wonder whether it's going to need a decent impact wrench to get them off. Surely as they have the clip in as well there's no need for them to be on that tight? Seems a little excessive bending breaker bars.

________________________________________

Membership expiring soon, get in contact on our new little forum project.
Posted 6th Jun 2010 at 18:41
rikky 🦔

Location: cheshire

Registered: 28 Feb 2004

Posts: 26,793

Status: Offline

Post #86
referring to the last page, i had similar arseache getting the driver side hubnut off and in the end after snapping everything i used a battery powered like impact ratchet that my mate uses to remove coach wheel bolts.. it has a massive weight in it, which it spins it anticlockwise in short bursts which eventually undoes the nut, as it's practically hammering it but in proper fashion. worked a treat!

________________________________________

306 rallye reproduction decals (full sets/individual decals) | 306 b-pillar textured vinyl weatherstrips
306 slam panel esso stickers | 306 yellow / orange / pension fund red side door badges
gti6 inlet manifold badges | 306 rear boot badges (p2/p3)
winner of Extraction of toys from prams with outstanding vigour award 2009 [source: gti6 owners club]
Posted 7th Jun 2010 at 04:18
owain

Seasoned Pro

Location: Essex

Registered: 20 May 2009

Posts: 9,185

Status: Offline

Post #87
Cheers Rikky that's worth knowing, I've actually got a battery powered one but didn't think it'd be up to it. As I don't need them off right now I'll leave it til after Oulton Park next week in case I break anything, then I'll have a bash.

Thanks muchly!

________________________________________

Membership expiring soon, get in contact on our new little forum project.
Posted 7th Jun 2010 at 13:20
dangerous dave

Seasoned Pro

Location: Bedford

Registered: 27 Apr 2004

Posts: 9,890

Status: Offline

Post #88
love the commitment.

Joney from here had the same coilovers I think, however he got them professionally set up somewhere near the Essex region. I think it cost him about £250 but the car was just insane afterwards, sub 9 minute ring lappery with only 130bhp. Definately needs a baffled sump though.

________________________________________

You didn't see anything. Right?
Posted 7th Jun 2010 at 17:00
owain

Seasoned Pro

Location: Essex

Registered: 20 May 2009

Posts: 9,185

Status: Offline

Post #89
"Professionally"?! What is this crazyness of which you speak?

It's something I've considered but probably won't do until I've got all the mods and weightsaving done, then possibly adjustable topmounts as well.

I take it I'm free to flog your stereo on eBay as you haven't been round to get it? Wink

________________________________________

Membership expiring soon, get in contact on our new little forum project.
Posted 7th Jun 2010 at 17:11
dangerous dave

Seasoned Pro

Location: Bedford

Registered: 27 Apr 2004

Posts: 9,890

Status: Offline

Post #90
lol, I will pick it up, promise sorry, it's just been a fairly crap time for me to get anything done

Best to wait till it's all done before you get it set up, though surely not too much to do now, maybe just a cage and a set of Brembos? How aboiut track wheels? oh, quaife ATB is a must as well of course (as you know from the R26r) and their's the small matter of the supercharger kit and the ...

________________________________________

You didn't see anything. Right?
Posted 7th Jun 2010 at 18:22
owain

Seasoned Pro

Location: Essex

Registered: 20 May 2009

Posts: 9,185

Status: Offline

Post #91
We're nearly there, probably getting a lightened bonnet and need to sort the rear suspension. Cage will be done, maybe a lsd if I get carried away Wink

Supercharger isn't happening though. Stop it. That's naughty.

________________________________________

Membership expiring soon, get in contact on our new little forum project.
Posted 7th Jun 2010 at 18:43
dangerous dave

Seasoned Pro

Location: Bedford

Registered: 27 Apr 2004

Posts: 9,890

Status: Offline

Post #92
I can always pass you Steven's details on for fitting the cage, unless you're having a crack at welding that yourself?

________________________________________

You didn't see anything. Right?
Posted 7th Jun 2010 at 20:42
owain

Seasoned Pro

Location: Essex

Registered: 20 May 2009

Posts: 9,185

Status: Offline

Post #93
It's sure as hell not a job I'll be doing myself so PM them over to me. Sadly I've well and truly run out of money so won't be for some time yet...

________________________________________

Membership expiring soon, get in contact on our new little forum project.
Posted 7th Jun 2010 at 20:44
cwspellowe

Seasoned Pro

Location: Calderbank

Registered: 19 Jul 2009

Posts: 6,496

Status: Offline

Post #94
Just don't do the cage yourself, I have visions of you superglue-ing it in place. Or f*cking bits off because they don't seem to do anything LOL

You're making great progress though mate, not long til you're tearing it a new one Thumbs up

________________________________________

Bye bye Sundance Kid Sad
Posted 7th Jun 2010 at 21:42
owain

Seasoned Pro

Location: Essex

Registered: 20 May 2009

Posts: 9,185

Status: Offline

Post #95
What you trying to say about my slapdash car-building approach? That in some way it's not entirely how a professional might do it?

Na. A badly welded cage can be worse than no cage at all, so I'll be leaving that for someone else.

________________________________________

Membership expiring soon, get in contact on our new little forum project.
Posted 7th Jun 2010 at 21:58
cwspellowe

Seasoned Pro

Location: Calderbank

Registered: 19 Jul 2009

Posts: 6,496

Status: Offline

Post #96
Make a budget one out of plumbing materials. If you don't crash the car you'll be wasting your money Laugh

________________________________________

Bye bye Sundance Kid Sad
Posted 7th Jun 2010 at 22:01
owain

Seasoned Pro

Location: Essex

Registered: 20 May 2009

Posts: 9,185

Status: Offline

Post #97
I hear 50mm plastic wastepipe is the way to go if you need real structural rigidity in the case of a roll.

________________________________________

Membership expiring soon, get in contact on our new little forum project.
Posted 7th Jun 2010 at 22:04
prism7guy

Seasoned Pro

Location: DoncastAAAAARGH

Registered: 13 Jan 2008

Posts: 4,639

Status: Offline

Post #98
owain wrote:
I hear 50mm plastic wastepipe is the way to go if you need real structural rigidity in the case of a roll.


True, just make the cage around the car so in the case of a roll or crash none of the actual bodywork is damaged Wink

________________________________________

Goldie the track car.
Posted 7th Jun 2010 at 22:26
jcphat

Seasoned Pro

Location: In the day room, Nurse!

Registered: 22 Feb 2008

Posts: 1,061

Status: Offline

Post #99
owain wrote:
I hear 50mm plastic wastepipe is the way to go if you need real structural rigidity in the case of a roll.


Only for Rallyes where weight is the crucial factor.Ninja

________________________________________

New Forum same high quality intellectual debate!
Team Zimmer™
Posted 7th Jun 2010 at 22:41
cwspellowe

Seasoned Pro

Location: Calderbank

Registered: 19 Jul 2009

Posts: 6,496

Status: Offline

Post #100
Cheeky, I see you snapping up the Viper air filter Wink

________________________________________

Bye bye Sundance Kid Sad
Posted 8th Jun 2010 at 00:24

Pages (31): first .. 3 [4] 5 .. last

All times are GMT. The time is now 00:23

The Peugeot GTi-6 & Rallye Owners Club - ©2024 all rights reserved.

Please Note: The views and opinions found herein are those of individuals, and not of The Peugeot 306 GTi-6 & Rallye Owners Club or any individuals involved.
No responsibility is taken or assumed for any comments or statements made on, or in relation to, this website. Please see our updated privacy policy.